
Kernel filters are a common approach for modifying images for various applications of image processing. They can be used to sharpen an image, blur it, or extract attributes about a picture for further processing. Implementation of the filters is simple and straight forward. I wanted to do some experiments with Kernel filters on my phone. But to my surprise the available options were not many. I decided to make my own. Before developing something for my phone I started off from a browser since my Chromebook was handy. Here I’m sharing the results.
What is a Kernel
Kernels are known by many names. Kernel, convolution matrix, and mask all refer to the same thing. Convolution is the process of adding together the values of neighboring elements of an image and applying some weight to each of the pixels. The weights, or kernel, are often expressed using matrix notation. For each one of the pixels in an image the kernel is applied to the pixel and it’s neighboring pixels to determine the new intensity for the pixel.
Manipulating Images in HTML and JavaScript
In HTML and JavaScript the image element doesn’t give direct access to its pixels for manipulation. Instead the canvas element can be used to read and write pixels. Well, not directly. With the canvas element there’s a method named getPixelData() that will return a structure that has a number array of the intensities of the pixels. After manipulation of the elements the the result can be copied back into the canvas with putPixelData().
Visually we see the pixel data as being organized in rows and columns. In memory it is organized in a single dimensional array. To read and write the correct pixel you’ll need to know how it’s organized. A single pixel is composed of 4 numbers; 3 of the numbers are for intensities of red, green, and blue and the fourth number is for transparency. These 4 elements make up a single pixel. Pixel data is usually saved continuously starting with the upper left most pixel of an image as the first one to be encoded and moving to the right from there. Once the end of a row is reached the encoding continues starting with the left most pixel on the next row.
Pretend that you had an image that was 10 pixels wide and 10 pixels tall. If you wanted to read from the pixel on the third row and fourth column (keeping in mind that zero based addressing is being used) we would need at least 20 pixels into the array to get to the third row and then another 3 more pixels to get to the fourth column. In other words we need to read the twenty third pixel. Since pixels are composed of four elements this works out to the reading starting with index 92 of the array to get the red portion of the pixel and indices 93, 94, and 95 to read the green, blue, and transparency portions. Given an X and Y coordinate the equation for determining what address to start reading at is as follows.
PixelIndex = (y*imageWidth+x)*4;
Since the application of the kernel can overlap with pixels that are outside the range of the image I needed to decide how to deal with attempts to read pixels that are outside of range. I could have a constant value returned (like zero for all elements), have the read address wrap around to the other side of the image, or I could cap the read coordinates. I chose to cap the read coordinates. Attempts to read a coordinate that is less than zero will result in coordinate being changed to zero. An attempt to read beyond the edge of the image results in the edge of the image being read.
I’ve covered enough theory for us to build our first kernel filter in JavaScript. Now to get to building. Kernel filters are arrays of multipliers. They can be of any dimension. The basic pieces of information that we’ll need are the dimensions of the kernel and an array holding the values for each element of the kernel. We also need to mark which position in a filter represents the center pixel.
function kernel(width, height, centerX, centerY) {
	this.width = width;
	this.height = height;
	this.centerX = centerX || Math.floor(height/2);
	this.centerY = centerY || Math.floor(width/2);
	this.weightArray = [];
	for(var h=0;h<height;++h) {
		this.weightArray.push([]);
		for(var w=0;w<width;++w) {
		 	this.weightArray[h].push(0);
		}
	}
}
Given an image we need to get the image data from the image into the canvas. The canvas has a method named drawImage that will do this.
var width  = imageElement.naturalWidth;
var height = imageElement.naturalHeight;
var canvas = $('')[0];
var ctx = canvas.getContext('2d');
ctx.drawImage(img,0,0);
var image = ctx.getImageData(0,0,width,height);
var pix = image.data;
To apply the filter, we will need to have a structure that contains the source data and another for writing the results. The results cannot be written to the same structure that we are reading from as this would overwrite some of the pixels that still need to be read for other processing.
var getPix = function(x,y) {
      x = Math.max(0, Math.min(x, width -1));
      y = Math.max(0, Math.min(y, height-1));
      var address = (y*width+x)*4;
      return [pix[address+0], pix[address+1], pix[address+2], pix[address+3]];
    }

    var getFilteredPix = function(x,y, kernelFilter) {
      var retVal = [0,0,0,0];
      for(var fy=0;fy<kernelFilter.height;++fy) {
        for(var fx=0;fx<kernelFilter.width;++fx) {
          var m = kernelFilter.weights[fy][fx];
          var pix = getPix(x+fx-kernelFilter.centerX, y+fy+-kernelFilter.centerY);
          retVal[0]+=pix[0]*m;
          retVal[1]+=pix[1]*m;
          retVal[2]+=pix[2]*m;
          retVal[3]+=pix[3];
        }
      }
      return retVal;
    }

    for(var yp=0;yp<height;++yp) {
      for(var xp=0;xp<width;++xp) {
        var newVal = getFilteredPix(xp,yp);
        var address = (yp*width+xp)*4;
        resultPixelData[address+0] = newVal[0];
        resultPixelData[address+1] = newVal[1];
        resultPixelData[address+2] = newVal[2];
        resultPixelData[address+3] = newVal[3]
      }
    }
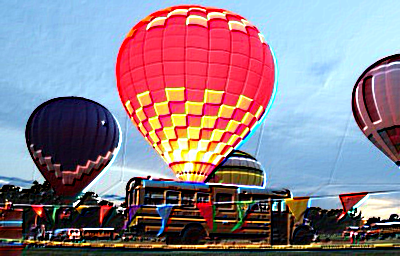
With that in place we can now view the results of various kernel filters. Using the same source image here are a few filters and the result of them being applied. This is the original image that I’ll be working with.


Identity
| 0 | 0 | 0 |
| 0 | 1 | 0 |
| 0 | 0 | 0 |
As suggested by the name the identity filter does not result in any change on
the image, much like other identity operations in math like adding 0 to a number
or multiplying and dividing by 1.
Edge Detection
| -1 | -1 | -1 |
| -1 | 8 | -1 |
| -1 | -1 | -1 |
The edge detection filter highlights high contrast areas of an image resulting in lines
showing where these areas meet. If you wanted to produce an outline of a subject this
would be one of your go-to filters.


Emboss
| -2 | -1 | 0 |
| -1 | 1 | 1 |
| 0 | 1 | 2 |
The Embose filter produces an image with a 3d effect making it look like the image has been pressed into a material. Various areas of the image will appear to be raised or depressed.

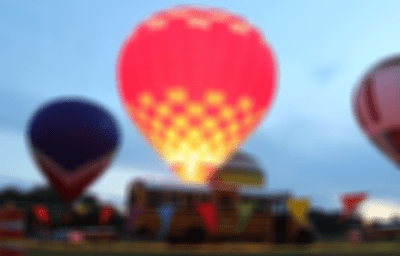
Box Blur
| 0.111 | 0.111 | 0.111 |
| 0.111 | 0.111 | 0.111 |
| 0.111 | 0.111 | 0.111 |
The Box Blur simply averages the pixels in an area together. Here I show a 3×3 filter. For the image shown here I actually used a 10×10 filter for the sake of exagerating the effect to make it more visible here.
This gives me something quick I can use for testing out image filters. It could be better though. Right now, to apply a different filter I need to modify code. Wouldn’t it be nice if the filter data were externalized allowing for filters to be saved and shared? I’ll look at that the next time I revisit this project.
