Running WordPress on a NVIDIA Jetson or Raspberry Pi

As part of an exploration on hosting sites and services with a minimal hardware setup, I wanted to install WordPress on a Raspberry Pi. WordPress is an open-source software system for hosting sites and blogs. I’m trying it out because I thought it would be easy to install and setup and allow someone to manage posts without demanding they be familiar with HTML and other web technologies (though knowing them certainly helps). With the Raspberry Pi being an ARM based Linux computer, I also thought that these instructions might work on a NVIDIA Jetson with little alteration. When I tried it out, I found that these instructions work on the Jetson with no alteration needed at all. In this post I only show how to install WordPress and its dependencies. I’ll cover making the device visible to the Internet in a different post.

To get started, make sure that your Jetson or Raspberry Pi is up to date. Run the following two commands.

sudo apt-get update
sudo apt-get upgrade

These commands could take a while to run. Once they have finished, reboot your device.

Not to install the software. I’m connected to my device over SSH. You can run these commands directly through a terminal on the devicealso. But everything that I write is from the perspective of having access only to the terminal. We are going to install the Apache web server, a MySQL database, and a PHP interpreter.

Apache Web Server

To install the Apache Web Server, type the following command.

sudo apt-get install apache2

After running for a while, Apache should successfully install. You can verify that it is installed by opening a browser to your device’s IP address. From the terminal, you can do this with the following command.

lynx http://localhost

You should see the default Apache page display. To exit this browser press the ‘Q’ key on your keyboard and answer ‘y’ to the prompt.

Installing PHP

To install PHP on your device, use the following command.

sudo apt-get install php

With the PHP interpreter in place, we can add a page with some PHP code to see it processed.

Navigate to the folder that contains the Apache HTML content and add a new page named test-page.php

cd /var/www/html
sudo nano test-page.php

The file will have a single line as its content. Type the following.

<?php echo "Hey!"; ?>

You can now navigate to the page in a browser.

lynx http://localhost/test-page.php

Installing the Database

Maria Database is a mySQL database. It will contain the content for our site. Install it with the following command.

sudo apt-get install mariadb-server

The database is installed, but it needs to be configured. To access it, we need to setup a user account and a password. Decide what your user ID and password will be now. Also choose a name for the database. You will need to substitute my instances of USER_PLACEHOLDER, PASSWORD_PLACEHOLDER, and DATABASE_PLACEHOLDER with the names and passwords that you have chosen.

sudo mysql -uroot

You will be presented with the MariaDB prompt. Type the following commands to create your user account, database, and to give permission to the database.

CREATE USER 'USER_PLACEHOLDER'@'localhost' IDENTIFIED BY 'PASSWORD_PLACEHOLDER';
CREATE DATABASE DATABASE_PLACEHOLDER;
GRANT ALL ON DATABASE_PLACEHOLDER.* to 'USER_PLACEHOLDER'@'localhost';
quit;

We need to make sure that account can access the database. Let’s connect to the database using the account that you just created.

mysql -u USER_PLACEHOLDER -p

You will be prompted to enter the password that you choose earlier. After you are logged in, type the following to list the databases.

SHOW DATABASES;

A list of the databases will show, which should include a predefined system database and the one you just created.

We also need to install a package so that PHP and MySQL can interact with each other.

sudo apt-get install php-mysql

Installing WordPress

The downloadable version of WordPress can be found at wordpress.org/download. To download it directly from the device to the web folder use the following command.

sudo wget https://wordpress.org/latest.zip -O /var/www/html/wordpress.zip

Enter the folder and unzip the archive and grant permissions to Apache for the folder.

cd /var/www/html
sudo unzip wordpress.zip
sudo chmod 755 wordpress -R
sudo chown www-data wordpress -R

We are about to access our site. It can be accessed through the devices IP address at http://IP_ADDRESS_HERE/wordpress. As a personal preference, I would prefer for the site suffix to be something other than wordpress. I’m changing it to something more generic, “site”.

mv wordpress site

Now let’s restart Apache.

sudo service apache2 restart

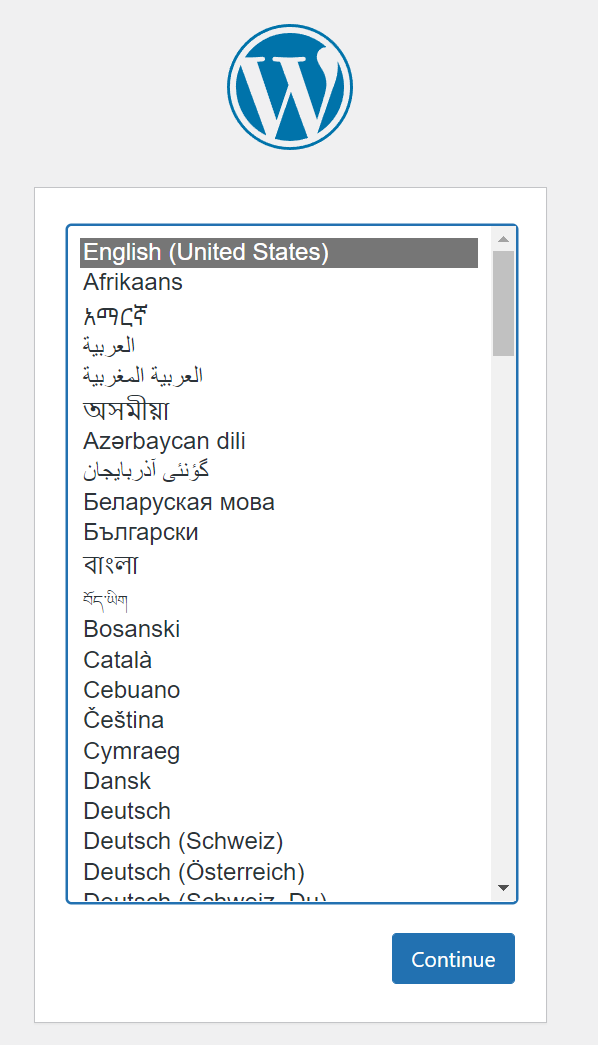
From here on I am going to interact with the device from another computer with a desktop browser. I won’t need to do anything in the device terminal. Using a browser on another computer I navigate to my device’s IP address in the /site folder. The IP address of my device is 192.168.50.216. The complete URL that I use is http://192.168.50.216/site. When I navigate there, I get prompted to select a language.

A screenshot of the language selection screen on the Raspberry Pi. This is the first screen that you will encounter when WordPress is served from the Pi for the first time.
Word Press Language Prompt

The next page lets you know the information that you will need to complete the setup. That information includes

  • The database name
  • The database user name
  • The database password
  • The database host
  • The Table name prefix

The first three items should be familiar. The fourth item, the database host, is the name of the machine that has the database. Since we are running the database and WordPress from the same device this entry will be “localhost”. If we were running more than one site from this device to keep the databases separate, the tables for each instance could have a common prefix. I’m going to use the prefix wp_ for all of the tables. All of this information will be saved to a file named wp-config.php. If you need to change anything later your settings can be modified from that file.

These are the default settings for WordPress. The first three fields must be populated with the information that you used earlier.
Default WordPress Settings

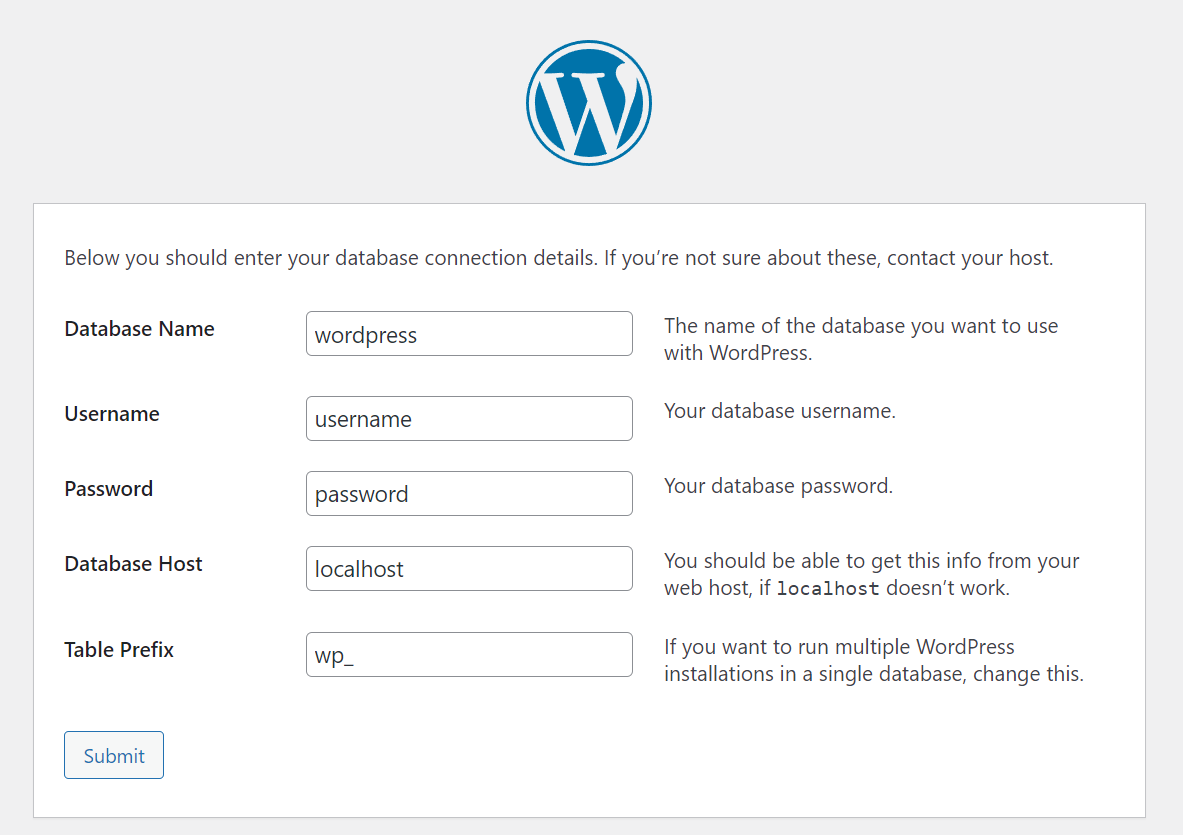
Enter your database name, user name, and password that you decided earlier. Leave the host name and the table prefix with their defaults and click on “submit.” If you entered everything correctly, on the next screen you will be prompted with a button to run the installation.

WordPress prompt to run the installation. This shows after successfully configuring it to access the database.

On the next page you must choose some final settings of your Word Press configuration.

Final Setup Screen

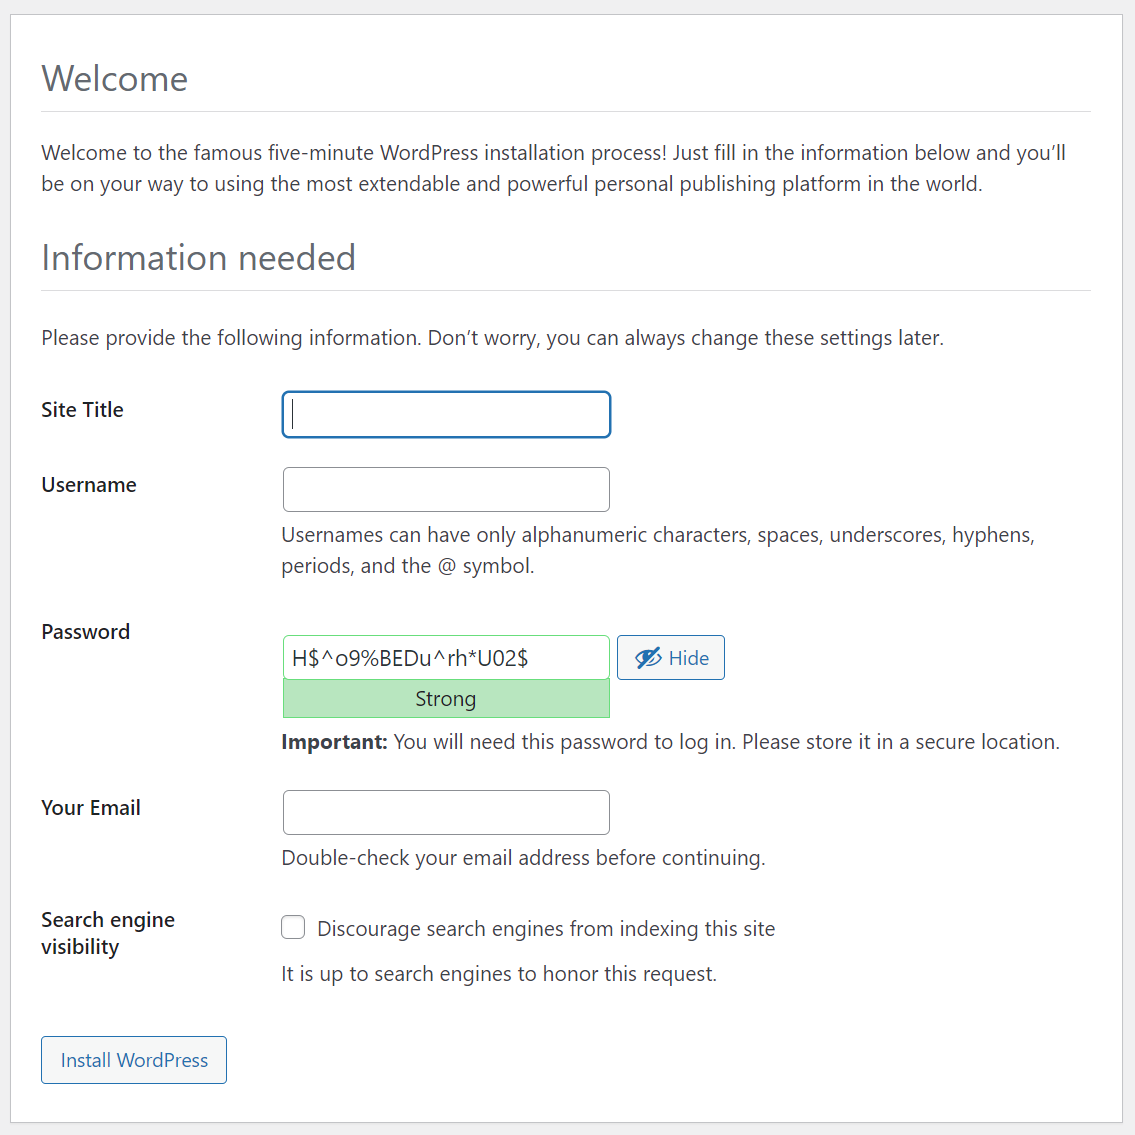
After clicking on “Install WordPress” on this screen, you’ve completed the setup. With the instructions as I’ve written them, the site will be in the path /wordpress. The administrative interface will be in the path /wordpress/wp-admin. WordPress is easy to use, but a complete explanation of how it works could be lengthy and won’t be covered here.


Creating a Service on a Raspberry Pi or Jetson Nano

Creating a service on a Raspberry Pi or a Jetson is easier than I thought. At the same time, there is still a lot of information to sort through. I’m still exploring the various settings that can be applied to a service. But I wanted to share the information that I thought would be immediately useful. While I was motivated to explore this based on something I was doing on a Jetson Nano, the code and instructions work identically without any need for modification on a Raspberry Pi.

I have a Jetson Mate. The Jetson Mate is an accessory for the Jetson Nano or Jetson Xavier NX Modules. Up to 4 modules can be placed within the Jetson mate to form a cluster. Really the Jetson Mate is just a convenient way to power multiple Jetsons and connect them to a wired network. It contains a 5-port switch so that a single Network cable can be used to connect all of the modules. Despite the Jetsons being in the same box, they don’t have an immediate way to know about each other. Reading the documentation from Seeed Studio, they suggest logging into your router and finding the IP addresses there.

That approach is fine when I’m using the Jetsons from my house; I have complete access to the Network here. But that’s not always possible. On some other networks I may not have access to the router settings. I made a program that would let the Jetson’s announce their presence over UDP Multicast. This could be useful on my Pis also; I run many of them as headless units. I needed for this program to start automatically after the device was powered on and to keep running. How do I do that? By making it a service.

There are several ways that one could schedule a task to run on Linux. I’m using systemd. Systemd was designed to unify service configurations across Linux distributions. The information shown here has applicability well beyond the Pi and Jetson.

The details of how my discovery program works is a discussion for another day. Let’s focus on what is necessary for making a service. For a sample service, let’s make a program that does nothing more than increment a variable and output the new value of the variable. The code that I show here is available on GitHub ( https://github.com/j2inet/sample-service ). But it is small enough to place here also. This is the program.

#include <iostream>
#include <thread>

using namespace std;

int main(int argc, char** argv) 
{
    int counter = 0;
    while(true)
    {
        cout << "This is cycle " << ++counter << endl;
        std::this_thread::sleep_for(std::chrono::seconds(10));
    }
}

This program counts, outputting a digit once ever ten seconds. To build the program, you will need to have cmake installed. To install it, use the following command at the terminal.

sudo apt-get install cmake -y

Once that is installed, from the project directory only a couple of commands are needed to compile the program.

cmake ./
make

The program is built, and a new executable named service-sample is now in the folder. If you run it, you will see the program counting. Press CTRL-C to terminate the program. Now we are going to make it into a service.

To make a service, you will need to copy the executable to a specific folder and also provide a file with the settings for the service. For the service settings, I’ve made a file named similarly to the executable. This isn’t a requirement. But it’s something that I’ve chosen to do for easier association. In a file named service-sample.service I’ve place the settings for the service. Many of these settings are technically optional; you only need to set many of them if your specific service is dependent on them. I’m showing more than is necessary for this service because I think some of these settings will be useful to you for other projects and wanted to provide an example.

[Unit]
Description=Counting service.
Wants=network.target
After=syslog.target network-online.target

[Service]
Type=simple
ExecStart=/usr/local/bin/service-sample
Restart=on-failure
RestartSec=10
KillMode=process

[Install]
WantedBy=multi-user.target

Here are what some of those settings mean. Note that I also describe some other settings that are not used, but available for you to consider. You can also see documentation for this file in the man pages.

[Unit] section

Documentation viewable with the following command

man systemd.unit

SettingMeaning
DescriptionA short text description of the service.
DocumentationURIs at which documentation for the service can be found
RequiresOther units that will be activated or deactivated in conjunction with this unit
WantsExpress weak dependencies. Will try to activate these dependencies first, but if those dependencies fail, this unit will be unaffected
ConflictsThis setting prevents this unit from running at the same time as a conflicting unit
After/BeforeUsed to express the order in which units are started.These settings contain a space delimited list of unit names.

[Install] Section

Documentation for the [Install] section is viewable at the following URL

SettingMeaning
RequiredBy / WantedByStarts the current service if any of the listed services are started. WantedBy is a weaker dependency than RequiredBy.
AlsoSpecifies services that are to be started or disabled along with this service

[Service] Section

Documentation for the [Service] section is viewable from the following URL.

man systemd.service

SettingMeaning
Type* simple – (default) starts the service immediately
* forking – the service is considered started once the process has forked and the parent has exited
* oneshot – similar to simple. Assumes service does its job and exits.
* notify – considers a service started when it sends a signal to systemd


ExecStartCommands with arguments to execute to start the service. Note that when Type=oneshot that multiple commands can be listed and executed sequentially.
ExecStopCommands to execute to stop the service
ExecReloadCommands to execute to trigger a configuration reload of the service
RestartWhen this option is enabled, the service will be restarted when the service process exits or is killed
RemainAfterExitWhen True, the service is considered active even after all of its processes have exited. Mostly used with Type=oneshot.

Deploying

Having the executable and this service file are not themselves enough. They must also be moved to an appropriate location and the service must be activated. I’ve placed the steps for doing this in a script. This script is intentionally a bit verbose to make it clear what the script is doing at any time. The first thing that this script does is terminate the service. While this might sound odd given that we haven’t installed the service yet, I do this to make the script rerunnable. If this is not the first time that the script has run, it is possible that the service process is running. To be safe, I terminate it.

Next, I copy files to their appropriate locations. For this simple service those files are one executable binary and the service settings. The executable is placed in /usr/local/bin. The service settings are copied to /etc/systemd/system/. On the service settings, the permissions on it are changed with chmod. This will ensure the owner has read/write permissions and the group has read permissions.

With the files for the service in place, we next ask systemd to reload the service definitions. I then probe the status for my service. While my service isn’t running, I should see it listed. I then enable the service (so that it will run on system startup) and then start the service (so that I don’t need to reboot to see it running now) and then probe the system status again.

echo "stopping service. Note that the service might not exists yet."
sudo systemctl stop service-sample

echo "--copying files to destination--"
sudo cp ./service-sample /usr/local/bin
sudo cp ./service-sample.service /etc/systemd/system/service-sample.service
echo "--setting permissiongs on file--"
sudo chmod 640 /etc/systemd/system/service-sample.service
echo "--reloading daemon and service definitions--"
sudo systemctl daemon-reload
echo "--probing service status--"
sudo systemctl status service-sample
echo "--enabling service--"
sudo systemctl enable service-sample
echo "--starting service service status--"
sudo systemctl start service-sample
echo "--probing service status--"
sudo systemctl status service-sample

After the service is installed and running, you can use the command for probing the status to see what it is up too. The last few lines that the service has outputted will display with the service information. Probe the service status at any time using this command.

sudo systemctl status service-sample

Sample output from the command follows.

pi@raspberrypi:~ $ sudo systemctl status service-sample
● service-sample.service - Counting service.
   Loaded: loaded (/etc/systemd/system/service-sample.service; enabled; vendor preset: enabled)
   Active: active (running) since Wed 2022-03-09 15:57:12 HST; 12min ago
 Main PID: 389 (service-sample)
    Tasks: 1 (limit: 4915)
   CGroup: /system.slice/service-sample.service
           └─389 /usr/local/bin/service-sample

Mar 09 16:09:29 raspberrypi service-sample[389]: This is cycle 361
Mar 09 16:09:31 raspberrypi service-sample[389]: This is cycle 362
Mar 09 16:09:33 raspberrypi service-sample[389]: This is cycle 363
Mar 09 16:09:35 raspberrypi service-sample[389]: This is cycle 364
Mar 09 16:09:37 raspberrypi service-sample[389]: This is cycle 365
Mar 09 16:09:39 raspberrypi service-sample[389]: This is cycle 366
Mar 09 16:09:41 raspberrypi service-sample[389]: This is cycle 367
Mar 09 16:09:43 raspberrypi service-sample[389]: This is cycle 368
Mar 09 16:09:45 raspberrypi service-sample[389]: This is cycle 369
Mar 09 16:09:47 raspberrypi service-sample[389]: This is cycle 370
pi@raspberrypi:~ $
Screenshot of service output. Note the green dot indicates the service is running.

The real test for the service comes after reboot. Once you have the service installed and running on your Jetson or your Pi, reboot it. After it boots up, probe the status again. If you see output, then congratulations, your service is running! Now that a service can be easily created and registered, I’m going to refine the code that I used for discovery of the Pis and Jetsons for another post.

Posts may contain products with affiliate links. When you make purchases using these links, we receive a small commission at no extra cost to you. Thank you for your support.

Twitter: @j2inet
Instagram: @j2inet
Facebook: j2inet
YouTube: j2inet
Telegram: j2inet