Creating Development Certificates for Samsung Tizen TVs

Whether you are developing for a consumer Samsung TV or for one of the commercial SSSP displays you’ll need to have a development certificate for your code to run. There is a difference in how the certificate is created for the commercial and consumer displays. But the process is similar off the same for both.

To get started you’ll need to already have Tizen Studio installed. Open the Tizen Studio package manager and make sure that you have the following components installed.

  • Samsung Certificate Extensions

If you don’t already have the component installed select it for installation. You’ll also need to have the SDK component installed for the version of Tizen that you are targeting (ex: “5.0 TV”).  Once the component is present start the Tizen Studio Device Manager.

The device manager will be used to get the device’s ID (DUID) for consumer TVs and for installing the development certificate onto the display. For these steps to work the TV must have development mode enabled and must be set to accept development requests from the same IP address as your development machine; it will refuse request from other addresses.  If you haven’t already enabled development mode I have another posts on how to do that
here
.

In the device manager there is an icon in the upper right corner of a phone connected a computer. Select this icon. It is for establishing connections to the device manager. In the window that opens you will see a list of devices that you’ve previously connect to. If the IP address of your display is there you can click on the icon of the on/off switch to reconnect to it. If the IP address of your display is not present click on the + icon to add it. When adding you can give the TV a descriptive name, enter the IP address, and the port on which to connect (usually 26101). Click on OK to return to the main Device Manager user interface and you should see your display connected. Right-click on the display and select DUID to see the ID of the display. Go ahead and copy it to the clipboard.  You will need it in later on.  If you have multiple displays for which you will develop  repeat the same steps to collect the DUID values for the other displays and save them to a text document.  Note that if you have both consumer and commercial displays that the DUIDs for them cannot be used  mixed with each other. You can perform the following steps for all of your consumer displays at once and then all of your commercial displays at once.

Open the Certificate Manager.  When it is opened for the first time you may be asked to select a location from which you want to import certificate profiles. Select Cancel here.  You will need to create both an Author certificate and a Distributor certificate. Click on the + icon in the upper right corner to start the process of creating a new certificate. What you select on the window that appears is dependent on the type of display for which you are developing.

TizenCertificateTypeSelection

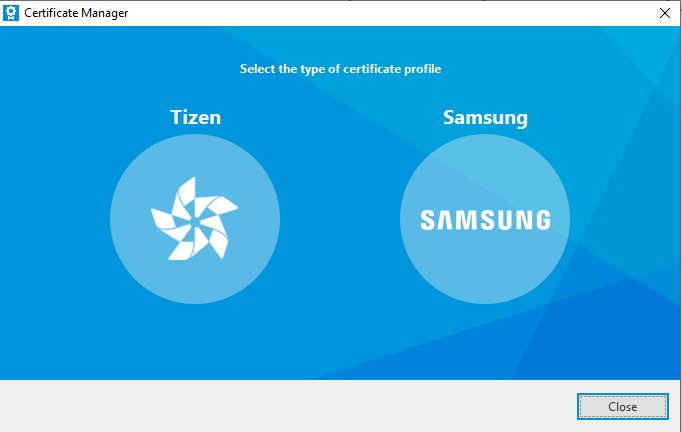
Commercial (SSSP) Display Steps

For the commercial displays select “Tizen. ” In the next step you’ll be asked to enter a name for the certificate profile. If you develop for other device types (such as the mobile device, watch, or the consumer displays) you’ll need to have more than one certificate profile. It will be good for them to have easily identifiable names.  Enter a name here that let’s you know that this is a certificate for developing for a commercial display and select Next.

TizenEnteringCertificateProfileName

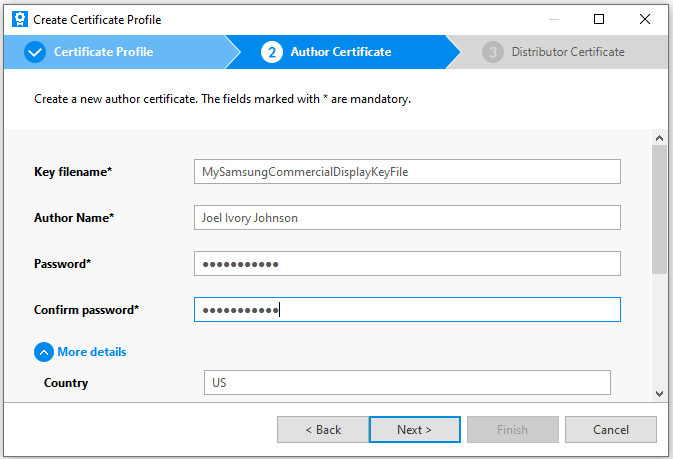
Next you must select an author certificate. If you’ve created an author certificate before you have the option to select it. If not then select the option to create a new one. I’ll assume that an author certificate has not been created yet. The minimal amount of information that you need for an author certificate is a name, a password for the certificate (don’t forget this password!). You can optionally enter your country code, State, City, Organization, department, and an e-mail address and a filename in which the key file for the certificate will be saved. Enter your options and select “Next”

TizenEnteringCertificateAuthorData

The last selection to make is whether you want to use the default Tizen distributer certificate . While this selection will allow you to submit mobile applications to the Tizen store it is fine for our purposes. Select it and click on “Finish.” With this you have a

TizenDistributerCertificateType

Consumer Display Steps

For the consumer displays when asked for the certificate type select “Samsung”.

TizenCertificateTypeSelection

On the next screen you’ll be asked for the device type. Select “TV.”

TizenDCertificateeviceType

Enter a name for the profile and select next.

TizenCertificateProfileName

Next you’ll select an author certificate. If you already have an author certificate that you’d like to use  you can select it here. If you would like to create a new certificate (which you would do if you’ve never created one before) select the first option. You would also select this option if you had a certificate but it has expired. If you had a certificate that has expired you may want to select the option to create a new certificate and check the box that says “Use an Existing Certificate.” If you have an application that has been published to the Tizen store before and are creating a new certificate then you’ll want to use this option since an application’s ID is in part based on the certificate with which it was signed.

TizenAuthorCertificateInformation

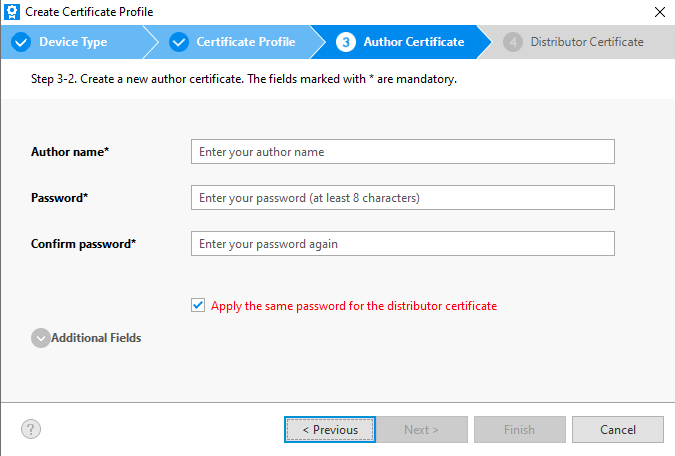
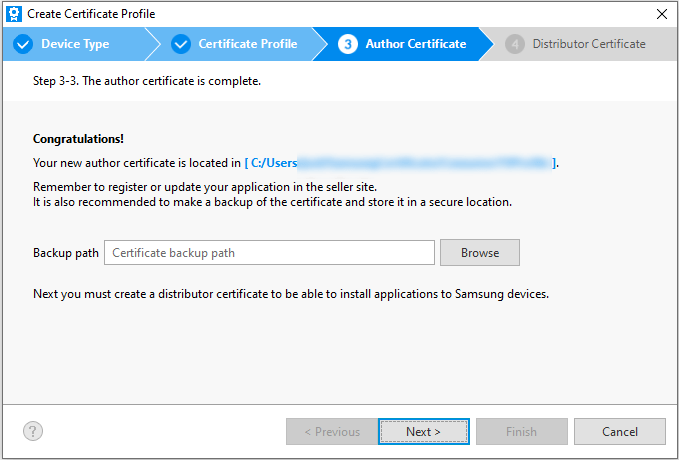
Enter the your author information. Remember what your password is, especially if you plan to publish your application under this certificate. When you click on “Next” you’ll be asked to sign into your Samsung account. After signing in your Author certificate is created.

You’ll be presented with the option of backing up your certificate. While this isn’t required it is strongly encouraged. You will want to keep this secure as it forms part of the identity for your apps. But you are almost done. You need a distributor certificate

TizenBackupCertificate

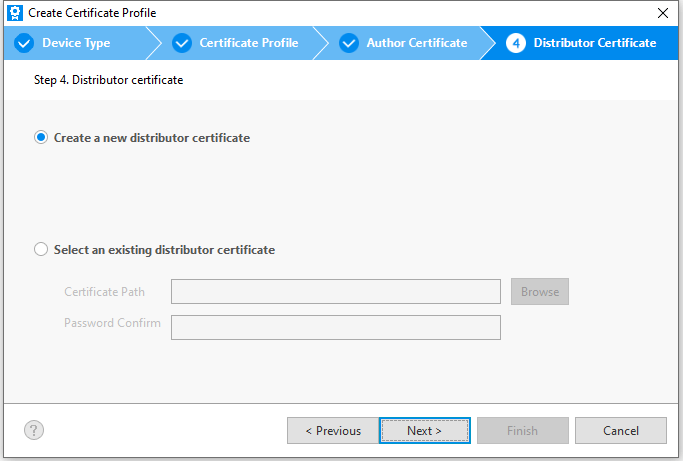
On the next screen you are prompted to either create a new distributor certificate or select an existing one. Choose the option to create a new one.

TizenNewDistributorCert

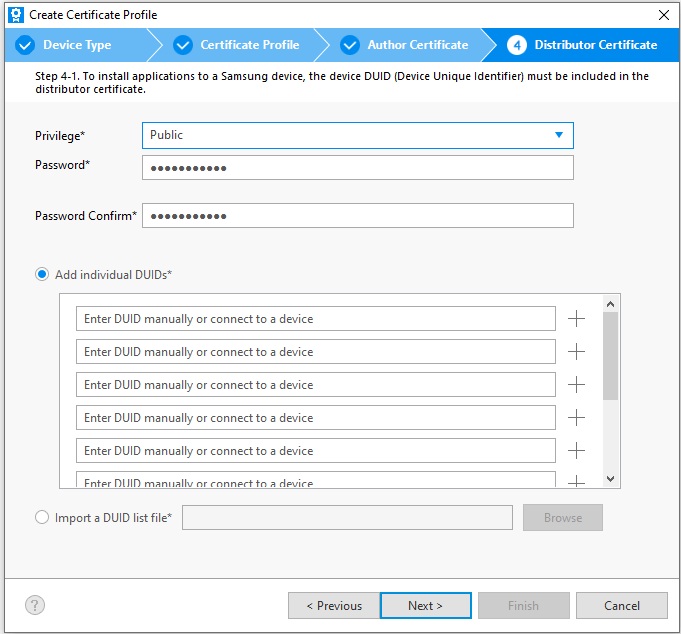
Now it is time to use the DUID that you copied earlier. If it is already on your clipboard it will automatically be pasted into one of the entries for DUID. You also have the option to change the privilege level, but not really. The two privileges available are “Public” and “Partner.” Partner gives you application to functionality that isn’t available to everyone. But to use Partner level privileges they have to be granted to you by Samsung.

TizenEnterDUID

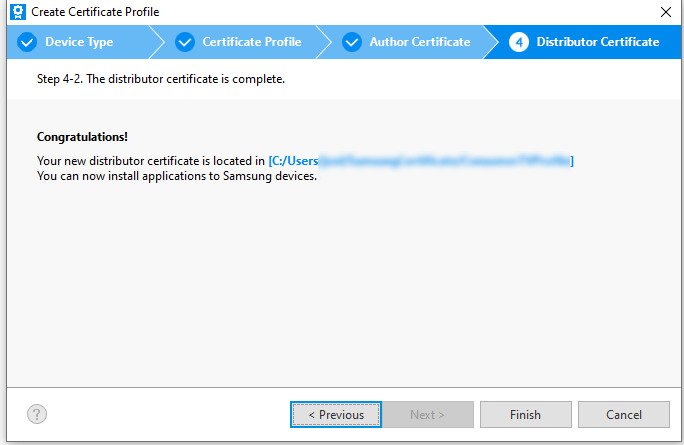
After you click on “Next” you’ll be greeted with a confirmation that the certificate has been created along with the path to the certificate being shown.

TizenCertificateCreationComplete

For Both Consumer and Commercial

Now that your certificates have been created you need to let the display know about it so that it can recognize applications that were signed with your certificate and allow them to run. To do this return to the device manager. Right-click on the your display in the device manager and select “Permit to install apps.” The display is ready to accept applications now.

Switching Certificate Profiles

If you are developing for more than one type of Tizen device you’ll probably have to change which certificate profile that you are using as you change which platform you are working on. When you need to change profile open the certificate manager. You will see a list of the profiles that you’ve set up and a check-mark next to one marking it as the active profile. If you want to change which profile is active select it from the list and click on the check mark in the upper right corner.

With the certificate created and selected you can now move forward with deploying an application to the display. Start off with a hello world program just to see that it works.

51thAkzZ9BL._SL160_

Tizen Compatible TV

Setting Up a Jetson Nano Dev Environment

If you’ve followed the directions for writing the OS for the nano you are mostly setup for development. The tools that you must have are already part of the image. But you’ll want to have a code editor.  I chose to use Visual Studio Code on the Nano. While Microosft doesn’t distribute the binary themselves it can be compiled for the ARMs processor.  But I was able to follow the three step instructions available from  code.headmelted.com. To summarize the steps here

  1. Open a termina
  2. Start a sudo session with sudo -s
  3. paste the following into the terminal
    . <( wget -O - https://code.headmelted.com/installers/chromebook.sh )

A few minutes later visual studio code will be installed and available.

I’m using MAKE file for my project. But the first thing I needed to figure out was what compiler should I use and where on the file system is it.  The CUDA compatible file system of choice is nvcc. It can be found at the following path.

/usr/local/cuda/bin/nvcc

To make sure it worked I made a simple hello world program and saved it using the totally wrong file name of helloWorld.cpp. I say “wrong” because the compiler looks at the file extension and treats the file differently based on that extension. Instead of using cpp I should have used cu. With CPP the compiler doesn’t understand the directives for the CUDA code.

__global__ void cuda_hello()
{
    printf("Hello World from GPU!\n");
}

using namespace std;

int main()
{
        cout << "Hello world!" << endl;
        cuda_hello<<<1,1>>>();
        return 0;
}


To compile the code I use the following at the command line.

/usr/local/cuda/bin/nvcc helloWorld.cs -o helloWorld

This produces a binary named  helloWorld.  Upon running it I’m greeted with the text.

Introduction to Web Assembly with C/C++: Part 1

webassembly-logo

I’ve been taking advantage of Web Assembly lately. It is supported by all the major browsers, let’s one make use of already existing useful code that has been written for other environments, and provides some performance benefits over JavaScript. Web Assembly has a lot of potential and support and I’d like to introduce other developers to it. I’m going to be using C++ in this post. But by no means is this the only language in which someone can make use of Web Assembly. In this post I talk about why someone might want to consider web assembly and how to get a development environment setup.

What is Web Assembly?

Web Assembly is a specification for a virtual machine that runs in the browser. Compared the the highly dynamic JavaScript Web Assembly can achieve much higher performance. Contrary to popular misconception though Web Assembly doesn’t completely replace JavaScript. You will probably use the two together.  Web Assembly is based on LLVM  (Low Level Virtual Machine), a stack based virtual machine that compilers can target.  If someone wanted to make a new programming language they could have the compiler for their language produce LLVM code and then use an already existing tool chain to compile it to platform specific code. A person building a compiler for a new language wouldn’t need to make completely separate systems for different CPU architectures.  Web Assembly being LLVM based could run code that was written by a variety of languages. Currently there isn’t support for garbage collection yet which restricts the languages that target it presently. C/C++, C#, and Rust are a few languages that can be used with Web Assembly presently with more expected in the future.

What Other Languages Can I Use?

  • C/C++ – I’ll be using that language in this article
  • C#/.Net – I’ve got interest in this one and will write about it in the future.
  • Elixir
  • Go
  • Java
  • Python
  • Rust – This is a newer language

Why Use Web Assembly?

I suggest Web Assembly primarily for the performance benefits in computationally expensive operations.  The binary format it uses is much more strict than JavaScript and it is more suitable for computationally intensive operations. There is also a lot of existing and tested code for work such as cryptography or video decoders that exists in C/C++ that one might want to use in a page. Despite all its flexibility interpreted JavaScript code doesn’t run as fast as a native binary. For some types of applications this difference in performance isn’t important (such as in a word processor). For other applications differences in performance translate into differences in experiences.

While the demand for performance is a motivation to make a native binary there are also security considerations. Native binaries may have access to more system resources than a web implemented solution. There may be more concern with ensuring that a program (especially if it is from a third party) doesn’t do anything malicious or access resources without permission. Web Assembly helps bridge the gap between these two needs; it provides a higher performance execution environment within a sandbox.

WebAssemblySupport

C++? Can’t I Cause a Buffer Overflow With That?

Sure. But only within the confines of the sandbox in which the code will run. It could crash your program, but it can’t cause arbitrary execution of code outside the sandbox. Also note that presently Web Assembly doesn’t have any bindings to Host APIs. When you target Web Assembly you don’t have an environment that allows you to bypass the security restrictions in which JavaScript code will run. There’s no direct access to the file system, there’s not access to memory outside of your program, you will still be restricted to communicating with WebSockets and HTTP request that don’t violate CORS restrictions.

How Do I Setup a Developer Environment

There are different versions of instructions on the Internet for installing the Web Assembly tools. If you are running Windows 10 you may come across a set of instructions that start with telling you to install the Windows Subsystem for Linux. Don’t use those instructions; I personally think they are unnecessarily complex. While I have the Windows Sub System for Linux installed and running for other purposes that’s not where I like to compile my Web Assembly code.

Using your operating system of choice (Windows 10/8/7, macOS, Linux) clone the Emscripten git repository, run a few scripts from it, and you are ready to go. Here are the commands to use.  If you are on Windows omit the ./ at the beginning of the commands.

git clone https://github.com/emscripten-core/emsdk.git
cd emsdk
git pull
./emsdk install latest
./emsdk activate latest

With the tools installed you will also want to set the some environment variables. There is a script for doing this. On Windows 10 run

emsdk_env.bat

For the other operating systems run

source emsdk_env.sh

The updates that this makes to environment variables isn’t persistent; it will need to be run again with the next reboot.  For an editor I suggest using Visual Studio Code. I’ll be compiling from the command line in this article. Feel free to use the editor of your choice.

Web Assembly Explorer

I don’t use it in this tool within this article, but Web Assembly Explorer is available as an online tool for compiling C++ into Web Assembly and is an option if you don’t have the tools installed.

https://mbebenita.github.io/WasmExplorer/

Hello World

Now that we have the tools installed we can compile and run something. We will do a hello world program. Type the following source code and save it in hello.cpp.

#include 
int main(int argc, char**argv) 
{
     printf("Hello World!\n");
    return 0;
}

To compile the code from the command line type the following.

emcc hello.cpp -o hello.html

After the compiler runs you will have three new files.

  • hello.wasm – the compiled version of your program
  • hello.html – an HTML page for hosting your web assembly
  • hello.js – JavaScript for loading your web assembly into the page

If you try to open the HTML file directly your code probably will not run. Instead the page will have to be served through an HTTP server. If you have node installed use the node http-server. You can install the http-server with

npm install  http-server -g

Then start the server from the directory with your hello.html

http-server . -p 81

Here I’ve instructed the http-server to run on port 81. You can use the port of your choice here provided nothing else is using it. Remember to substitute the port that you chose throughout the rest of these instructions.

Open a browser and navigate to http://localhost:81/hello.html. You’ll see your code run. If you view the source for the page there is a lot of “noise” in the file. Much of that noise is from the displayed images being embedded within the HTML.  That’s fine for playing around. But you will want to have something customized to your own needs.

We can provide a shell or template file for the compiler to use. Emscripten has a minimal file available at https://github.com/emscripten-core/emscripten/blob/master/src/shell_minimal.html. Download that file. It will be used as our starting point. It is convenient for the sake of distribution for everything to be in one file. But I don’t like the CSS and JavaScript being embedded within the file.  The CSS here isn’t needed and is being deleted. I’m moving the  JavaScript  to its own file and added a script references to it in my HTML.  There are several items within the HTML and the script that are not necessarily needed. Let’s look at the script first and start making this minimal file even more minimalist.

At the top of the script there are three variables to page elements to indicate download and progress. Those are not absolutely necessary. I’m deleting them.  I need to delete references to them too. Lower in the JavaScript is a method named setStatus . I’m replacing it’s body with a call to console.log() to print the text that is passed to it.  The first set of programs that I’m going to write won’t use a canvas. The element isn’t needed for now; I’m commenting it out instead of deleting it so that I can use it later.  Having deleted the first three lines of this file and and code that references them I’m returning to the HTML. Most of it is being deleted. I’ve commented out the canvas reference. There is a line in the HTML file with the text {{{ SCRIPT }}}. The compiler will take this file as a template and replace {{{ SCRIPT }}} with the reference to the script specific to our Web Assembly file.

webAssemble-templateHTML

When the Web Assembly program executes a printf() the text will be written to the textarea element. I place my hello.cpp file among these files and then compile it with the following command.

emcc hello.cpp --shell-file shell_minimal.html -o hello.html

The –shell-file argument indicates what file to use as a template. The -o parameter tells the name of the HTML file to write to. If you look at hello.html you can see it is almost identical to the input template. Run the site now and you’ll see the same result, but with a much cleaner interface. Run the program again and you will see the same result with a much cleaner interface.

Binding Functions

I earlier mentioned that Web Assembly doesn’t have any bindings to any operating system functions. It also doesn’t have bindings do the browser. Nor does it have access to the DOM. It is up to the page that loads the web assembly to expose functions to it. In emscripten.js the Modules object defines a number of functions that are going to be made available to the Web Assembly. When the C/C++ code calls printf it will be passed through the JavaScript function defined here of the same name. It isn’t a requirement that the names be the same, but it is easier to keep track of function associations if they are.

Calling C/C++ From JavaScript

But what if you have your own functions that you wish to bind so that your JavaScript code can call the C++ code? The Module object has a function named ccall that can be used to call C/C++ code from JavaScript and another function named cwrap to build a function object that we can hold onto for repeated calls to the same function. To use these functions some additional compile flags will be needed.

To demonstrate the use of both of these methods of calling C/C++ code from JavaScript I’m going to declare three new functions in the C++ code.

  • void testCall() – accepts no parameters and returns no value. This method only prints a string so that we know that our call to it was successful.
  • void printNumber(int num) – accepts an integer argument and prints it. This lets us know that our value was successfully called.
  • int square(int c) – accepts an integer and returns the square of that integer. This let’s us see that a value can be returned back from the code.

The C++ language perform what is called name mangling; the names of the functions in the compiled code is different than the uncompiled code. For the functions that we want to use from outside the C++ code we need to wrap declarations for the functions in an extern “C” block. If our code were being written in C instead of C++ this wouldn’t be necessary. I still prefer C++ because of some of the features that the language offers.  Normally I would have a declaration such as this in a header file. But for now my C++ program is in a single file. Close to the top of the program I make the following declarations.

extern "C" {
    void testCall();
    void printNumber(int f);
    int square(int c);
}
The implementation for the functions is what you would expect.
void testCall() 
{
    printf("function was called!\n");
}

void printNumber(int f) {
    printf("Printing the number %d\n", f);
}

int square(int c)
{
    return c*c;
}
There’s a change to my main method too. I’ve had to include a new header file, enscripten.h, because I am about to use one of the functions that it provides.  In main added the following line.
EM_ASM ( InitWrappers());
It will result in a JavaScript function named InitWrappers() to get called. I will talk about how EM_ASM works in a following section.   I’m adding a third