For some odd reason while Windows 10 IoT core has the capability to connect it to hidden networks it doesn’t expose this capability in its UI. Given it’s target audience I to some degree can understand it not having some of the same features to guide a user through getting connected to a hidden network while at the same time seeing this as an inconvenience.
Isn’t It Easier to Unhide the Network
No, at least not when you have no control over the network. There’s an argument to be made on why hiding a network is not an effective security action. Whether those arguments fail or make great points is irrelevant in environments where you personally have no control or influence on the network.
There Are Several Ways to Connect. Which Should I Use?
I found a few solutions to this problem. But I’m only presenting the one that I found to be satisficing. The method requires that the IoT device be first connected to a wired network first.
On a computer (as in your laptop or desktop) that already has a connection to the wireless network export the wireless profile. Copy this to the the Windows 10 IoT device and the import the profile. Let’s talk about how to do each one of those steps.
Exporting Your Wireless Profile
On your computer that has a connection to the wireless network open a powershell instance. use the following command to export your wireless profile.
netsh wlan export profile name=
Here substitute the name of your wireless profile in for the last parameter (without the brackets). This will be the same name that shows up in the Windows Network settings for the network that you are connected to. When you press enter netsh will create an XML file with the wireless profile. Take note of the location where it was saved.
Copying the Profile to the Windows 10 IoT Device
One of the convinent things about Windows 10 IoT core is it has many of the behaviours that the Windows Desktop has. This includes the ability to read and write from the file system over the network. Connect your Windows 10 IoT device to a wired network and take note of the IP address that is assigned to it. In the Windows File Explorer on your desktop enter the following
\\\c$
You will be prompted to enter the username/password of the machine. The user name is Administrator. The password in the past has defauled to p@ssw0rd. But you might have specified a different password at setup. Once authenticated you’ll see the file system for the device. Copy that XML file over.
Importing the Wireless Profile
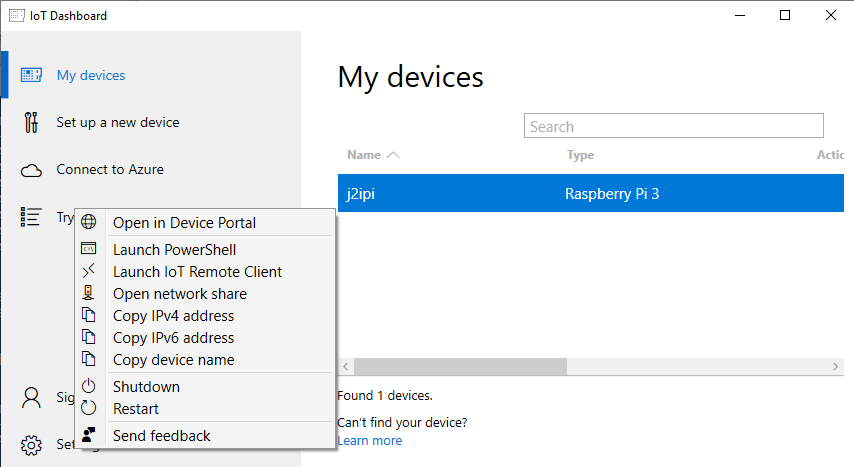
Open a Powershell instance to the Raspberry Pi. The easiest way to do this is to use the Windows 10 IoT Dashboard. Under “My devices” you should see your device listed. Right-click on it and select “Launch PowerShell”.
Once in PowerShell navigate to the directory in which you saved the XML profile. Use netsh to import it.
netsh add profile filename=
After entering this command and pressing enter the device will now be aware of the network. From the UI on the device if you go into the Network settings you can now select that hidden network. It will prompt you for the password and you’ll be connected.
Related Affiliate Links
Windows 10 for the Internet of Thing, Book


Dragonboard 410c, A tiny board compatible with Windows 10 IoT with integrated GPS


Minnowboard Turbot, another Windows 10 IoT Compatible board


Raspberry Pi Starter Kit


