Many of the people with which I work are classified as being technical or creative (though there is a spectrum between these classifications). On many projects, the creative workers design UIs while the technical people transform those designs into something that is working. I’m a proponent of empowering those that are creating a design with the ability to implement it. This is especially preferred on projects where a design will go through several iterations.
I was recently working on a project for which there would be a menu with a map of a building. Clicking on a room in the map would take the user to web page that had information on the room. I had expected the rooms on the map to generally be rectangular. When I received the map, I found that many of the rooms had irregular shapes. HTML does provide a solution for defining shapes within the image that are clickable through Image Maps. I’ve never been a fan of those, and for this specific project I would not be able to ask the creatives to update the image map. I decided on a different solution. I can’t show the picture of the map that was the image being displayed. As an example, I’ll use a picture of some lenses that are sitting in the corner of my room.

Let’s say I wanted someone to be able to click on a lens and get information about them. In this picture, these lenses overlap. Defining rectangular regions isn’t sufficient. I opened the picture in a paint program and applied color in a layer over the objects of interest. Each color is associated with a different object classification. Image editing isn’t my skill though. The result looks rough, but sufficient. This second image will be used in an HTML page to figure out which object that someone has clicked on. I’ll have a mapping of these color codes to objects.
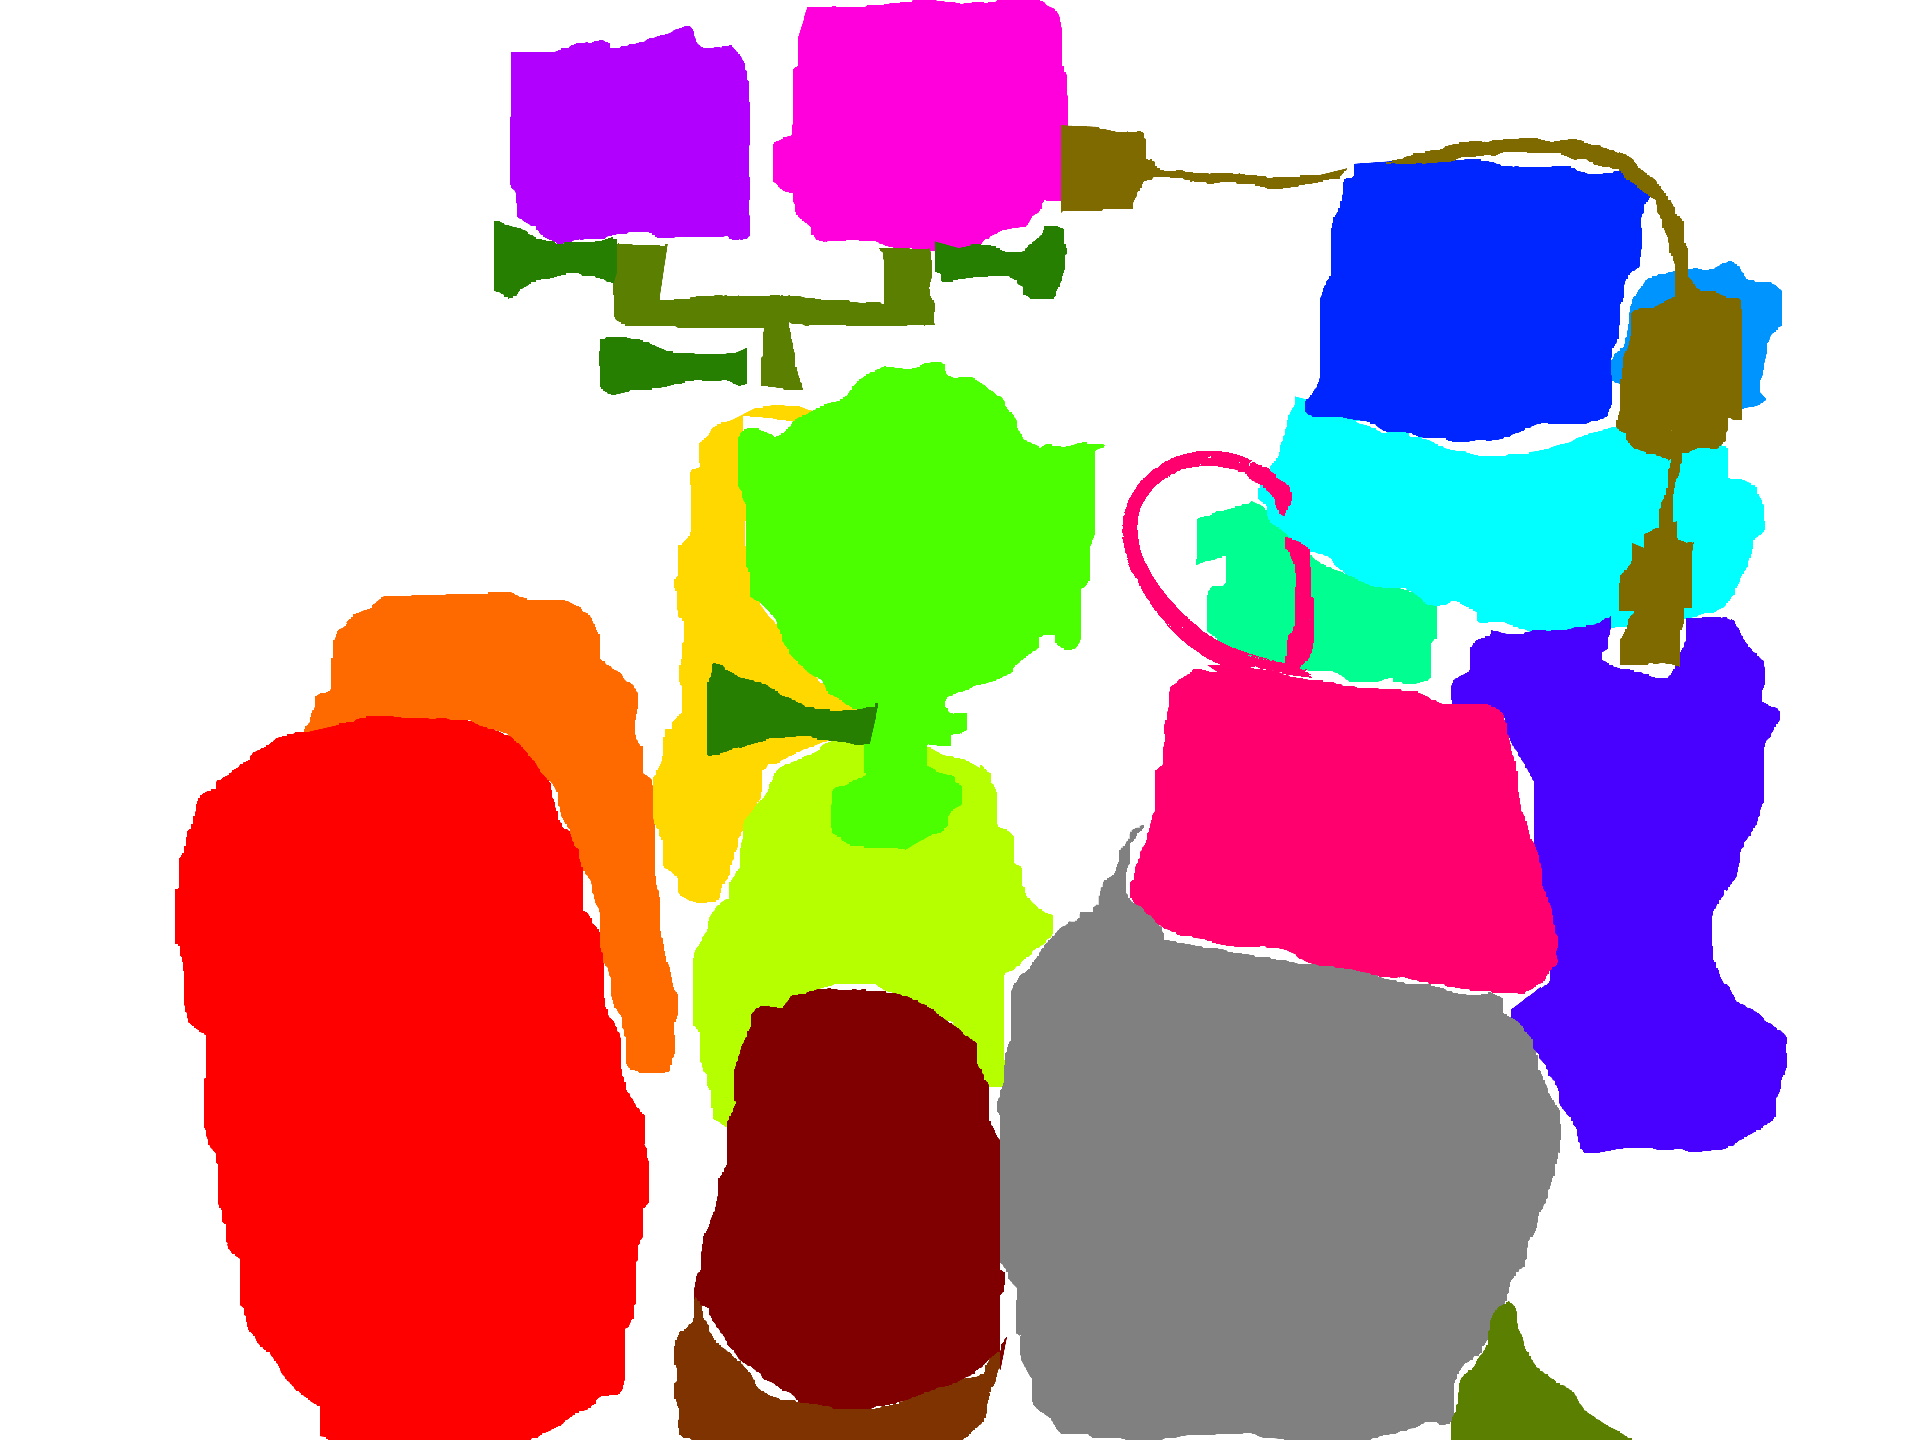
When a user clicks on the real image, the pixel color data is extracted from the associated image map and converted to a hex string. To extract the pixel data, the image map is rendered to a canvas off-screen. The canvas’s context exposes methods for accessing the pixel data. The following code renders the image map to a canvas and sets a variable containing the canvas 2D context.
function prepareMap(width, height) {
    var imageMap = document.getElementById('target-map');
    var canvas = document.createElement('canvas');
    canvas.width = width;
    canvas.height = height;
    var canvasContext = canvas.getContext('2d');
    canvasContext.drawImage(imageMap, 0, 0, imageMap.width, imageMap.height);
    areaMapContext = canvasContext;
}
I need to know the position of the image relative to the browser’s client area. To retrieve that information, I have a method that recurses through the positioning containers for the image and accumulates the positioning settings to a usable set of coordinates.
function FindPosition(oElementArg) {
    if (oElementArg == undefined)
        return [0, 0];
    var oElement = oElementArg;
    if (typeof (oElement.offsetParent) != "undefined") {
        for (var posX = 0, posY = 0; oElement; oElement = (oElement.offsetParent)) {
            posX += oElement.offsetLeft;
            posY += oElement.offsetTop;
        }
        return [posX, posY];
    }
    return [0.0];
}
The overall flow of what happens during a click is defined within mapClick in the example code. To convert the coordinates on which someone clicked (relative to the body of the document) to coordinates relative to the image, I only need to subtract the offsets that are returned by the FindPosition function. The retrieved colorcode for the area on which the user clicked can be used as an indexer on the color code to product identifier mapping. The product identifier is used as a indexer on the product identifier to product data mapping.
function mapClick(e) {
    var PosX = e.pageX;
    var PosY = e.pageY;
    var position = FindPosition(targetImage);
    var readX = PosX - position[0];
    var readY = PosY - position[1];

    if (!areaMapContext) {
        prepareMap(targetImage.width, targetImage.height);
    }
    var pixelData = areaMapContext.getImageData(readX, readY, 1, 1).data;
    var newState = getStateForColor(pixelData[0], pixelData[1], pixelData[2]);
    var selectedProduct = productData[newState];
    showProduct(selectedProduct);
}
Once could simplify the mappings by having the color data map directly to product information. I chose to keep the two separated though. If the color scheme were ever changed (which I think is very possible for a number of reasons) I thought it better that these two items of data be decoupled from each other.
You can find the full source code for this post on GitHub at this url. Because of security restrictions in the browser, you must run this code within a local HTTP server. Attempting to run it from the file system will fail due to limitations in how an application can use the data it loads when loaded from a local file. I also have brief videos on my social media account to walk through the code.
Posts may contain products with affiliate links. When you make purchases using these links, we receive a small commission at no extra cost to you. Thank you for your support.
Twitter: @j2inet
Instagram: @j2inet
Facebook: j2inet
YouTube: j2inet
Telegram: j2inet


