As a developer, there are some problems for which I get enjoyment out of solving. There are some problems for which JavaScript had not been my tool of choice because of its limits on precision of the Number type. That is no longer the case with the JavaScript type BigInt. The number of bytes used to store a BigInt scales with the magnitude of the number. On some browsers the following JavaScript code will show a difference between Number and BigInt. The value in the BigInt variable increases as one would naturally expect it to. The value in the Number variable will stay the same.
var myBigInt = BigInt(Number.MAX_SAFE_INTEGER);
var myBigResult;
console.log('BigInt value ', myBigInt);
myBigResult = myBigInt * 4n;
console.log('BigInt value * 4 = ', myBigResult);

var myNumber = Number.MAX_SAFE_INTEGER-0.9;
var myResult;
console.log('Number value ', myNumber);
myResult = myNumber *4 ;
console.log('Number value * 4 = ', myNumber);
The output for the above was as follows:
BigInt value  9007199254740991n
BigInt value * 4 =  36028797018963964n
Number value  9007199254740990
Number value * 4 =  9007199254740990
For any operation that involves values that are beyond the maximum safe integer value, the resulting value could be wrong. It is also possible to have values that appear identical when printed as a sting, but are unequal to each other when compared. BigInt literals are expressed as an integer number suffixed with a lowercase ‘n’. If you use the typeof operator on a BigInt the string 'bigint‘ is returned.
While there are no additional floating number types that offer high precision, BigInt can be used for some types of calculations. For example, if you needed a big decimal value for money calculations you could use BigInt and have your presentation of the results take into account that the number type is not storing a decimal position. For example, if the result of a calculation were 1234 when printing the number it could be converted to a string and a period could be inserted into the right position producing the string 12.34 to the user.
This is the second part of a two-part post. The first part can be found here.
At the end of the first part, I had gotten discovery of the bridge implemented and had performed the pairing of the bridge. In this part, I will show you how to create a query for the state of the light groups and control them.
Querying Group State
I’m only allowing the modification of the state of groups of lights on the Hue. First I need to query the bridge for what states exist. The list of groups and the state of the group are available at `http://${this.ipAddress}/${this.userName}/groups`. Here the data in this.userName is the user name that was returned from the Hue bridge in the pairing process. With this information I am able to create a new UI element for each group found. I only show groups of type “room” from this response. It is also possible that the user has grouped an arbitrary set of lights together in a group. I don’t show these.
var hueDB = (function () {
    var db = {};
    var datastore = null;
    var version = 1;
    db.open = function (callback) {
        var request = indexedDB.open('hueDB', version);
        request.onupgradeneeded = function (e) {
            var db = e.target.result;
            e.target.transaction.onerror = db.onerror;
            var store = db.createObjectStore('bridge', { keyPath: 'bridgeID' });
        };
        request.onsuccess = function (e) {
            datastore = e.target.result;
            callback();
        };
    };

    db.getBridgeList = function () {
        return new Promise((resolve, reject) => {
            var transaction = datastore.transaction(['bridge'], 'readonly');
            transaction.onerror = function (e) {
                reject(e.error);
            };
            transaction.oncomplete = function (e) {
                console.log('transaction complete');
            };

            var objStore = transaction.objectStore('bridge');
            objStore.getAll().onsuccess = function (e) {
                console.log('bridge retrieval complete');
                resolve(e.target.result);
            };

            var bridgeList = [];


        });
    };

    db.addBridge = function (bridge) {
        console.log('adding bridge ', bridge);
        return new Promise((resolve, reject) => {
            var transaction = datastore.transaction(['bridge'], 'readwrite');
            transaction.onerror = function (e) {
                reject(e.error);
            };
            transaction.onsuccess = function (e) {
                console.log('item added');
            };
            var objStore = transaction.objectStore('bridge');
            var objectStoreRequest = objStore.add(bridge);
            objectStoreRequest.onsuccess = function (e) {
                resolve();
            };
        });
    };

    return db;
})();
Changing the State of a Light Group Attributes
There are several elements of a light group’s state that can be modified. I’m only considering two: the brightness of the light group and whether or not the group of lights is turned on. Both can be set with a PUT request to the bridge at the the URL http://${this.ipAddress}/${this.userName}/groups/${id}/action`. This endpoint accepts a JSON payload. Turning a group of lights on or off; changing the brightness; activating a scene to change the color; and many other options can be changed through this end point. It is not necessary to specify all of the possible attributes when calling this endpoint. If an attribute is not specified it will remain at its current state. I have made a method named setGroupState that will be used by all other methods that make use of this endpoint. The methods will differ in the payloads that they build and pass to this method.
Of the many attributes that could be packaged in the payload are bri and on. The on state sets whether or not the lights are turned on. The bri attribute accepts a value in the range of 0 to 254. Note that a value of 0 doesn’t mean off. Zero is the value level assigned to the lowest level of illumination above off that the light will provide.
Activating Scenes
Scenes, or a collection of settings that applies to lights, can by associated with a predefined light group or with some arbitrary group of lights. The Hue API labels scenes as either LightScene or GroupScene accordingly. I am only working with groups scenes. A list of all of the scenes defined on the bridge is retrievable through the the endpoint http://${this.ipAddress}/api/${this.userName}/scenes.
The object returned is a dictionary of the scene IDs and the attributes. The scene ID is a string of what appears to be random characters. It’s not user friendly and should only be used internally by the code and never presented to the user. Here is a response showing only two scenes.
To activate a scene on a group I use the same endpoint that is used for turning light groups on and off or setting their brightness level. The JSON payload will have a single element named scene whose value is one of the cryptic looking scene identifiers above.
    activateScene(sceneID) {
        var scene;
        if(sceneID in this.sceneList) {
            var scene = this.sceneList[sceneID];
            var group = scene.group;
            var req = {scene:sceneID};
            return this.setGroupState(group,req );
        }
    }
Application Startup
To hide some of the events that occur at startup the application has a splash screen. The splash screen is only momentarily present. During the time that it is momentarily shown the application will attempt to reconnect to the last bridge that it had connected to and will query for the available groups and scenes. This is just enough of a distraction to hide the time taken to do this additional setup.
The Application Splash Screen
Installing and Running the Application
If you have downloaded the source code to your local drive, you can add the program to Chrome as an unpacked extension. In a browser instance open the URL chrome://extensions. In the upper-left corner of this UI is a button labeled Load Unpacked. Select this option.
UI for loading unpacked Chrome extensions
You will be prompted to select a folder. Navigate to the folder where you have unpacked the source code and select it. After selecting it you will see the application in the list of installed extensions.
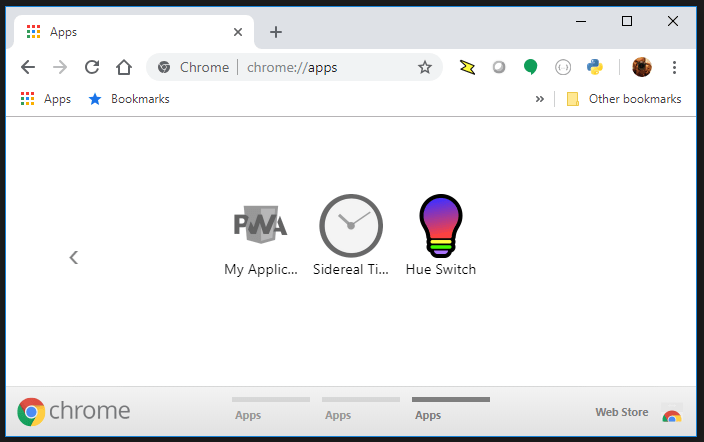
The application will now show up in the Chrome app launcher. This may be exposed through the regular app launcher that is part of your operating system (such as the Program menu on Windows) and will also appear in Chrome itself. Close to the address bar is a button labeled “Apps.”
The application in the Chrome app launcher
Completing the Application
As I mentioned in the opening, this is not meant to be a complete application. It is only an operational starting point, creating something that is functional enough to start testing different functions in the Hue API.
I will close with mentioning some other potential improvements. For a user running the application for the first time the setup process might be smoothed out by automatically trying to pair with the first bridge seen (if there is only one bridge seen) and prompting the user to press the link button. This makes the setup process a two step process: start the application and press the link button on the bridge. There could also be other people that are operating the Hue lighting at the same time that this application is running. Periodically polling the state of the lights and light groups on the network and updating the UI accordingly would improve usability. A user may also want to control individual lights within a group or have control over the light color. For this a light selection UI would also need to be developed.
It took me about an evening to get this far in the development and it was something enjoyable to do during a brief pause between projects. As such projects go, I’m not sure when I’ll get a change to return to it. But I hope that in it’s current form that it will be of utility to you.