Progressive Web Apps (PWA) are HTML based applications that run as though they are desktop applications. Google Chrome received support for PWAs on Chrome OS in May with the release of Chrome 67. Linux and Windows received support in August with the release of Chrome 70. Support for Mac OS X is yet to come.

One of the first differences that stands out for PWAs is that they can run in their own application window and are indistinguishable from other applications running on a machine. That difference is largely visual. But the differences extend well beyond what is visible. Resources that are not usually available to an HTML page are available to a PWA such as access to Bluetooth, serial ports, UDP networking, and more. Chrome PWAs can be installed and have their own icon in your programs menu and function offline.
There are requirements that must be satisfied before an HTML page can be installed as a PWA. These are the conditions that must be met.
- The page must be served over SSL/HTTPS.
- The page must have a service worker with a fetch handler.
- User engagement requirements must be met (interaction with the domain for at least 30 seconds).
- A manifest must be present.
- 192px and 512px icons must be included.
- Application must have a short name and long name.
- The display mode must be specified.
start_urlmust be specified.
If all of these requirements are met Chrome will trigger a beforeinstallprompt event for the web page. Once this event is triggered your application can present the user with an install prompt. Depending on the Chrome version your application may be able to suppress this prompt and display it to the user later (allowing you to decide where in the interaction flow that the prompt shows up) or your app might not be allowed to suppress it.
I’ll make a minimilastic application that satisfies the requirements for being a PWA. The application that I’ll make will calculate sidereal time. Sidereal time is a time tracking system used by astronomers and is always expressed in 24 hour format. The usual system of tracking time was formed around trying to map the time of the day to the position of the sun (solar time, though it is far less than perfect). Sidereal time is based on the position of the stars relative to the observer. I will not talk much about the algorithm behind this calculation much here. I talked about calculating sidereal time in an application I had made for the now defunct Windows Phone 7; while that OS is no more the description I gave on how sidereal time works is still applicable.
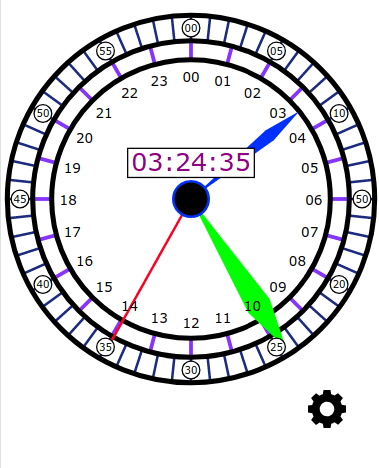
Using SVG I’ve made a simple 24 hour clock face. The clock face is really there for aesthetics. Chances are if you try to read the hands of the clock the hour hand will cause confusion since it’s position on a 24 hour clock will not meet expectations that have been formed from being able to read a 12 hour clock. The digital readout is the part that will actually give the information of interest. Every second the time is updated and the hands animate to their new position. There’s also a gear icon for opening the settings interface.
Satisfying the SSL/HTTP Requirement
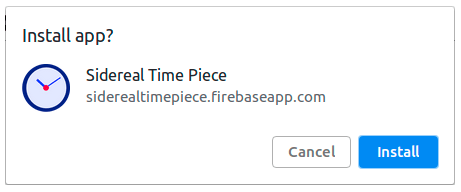
A lot of the necessary features are only available if your application is being served over SSL. If you don’t see HTTPS in the address bar then these features simply will not work. To satisfy this requirement for now I’m using Google Firebase and the temporary URL that it has assigned to me. I don’t plan on keeping this URL forever, but at the time of this post you can play with the application over at https://siderealtimepiece.firebaseapp.com.
Satisfying Manifest Resources Requirements
The manifest for my application is in the root directory of the application. It is a JSON formatted file with information on where the program icons can be found, the starting URL, and the name of the application as it should appear on the user’s machine.
{
    "short_name": "Sidereal",
    "name": "Sidereal Time Piece",
    "icons": [
      {
        "src": "./images/sidereal192.png",
        "type": "image/png",
        "sizes": "192x192"
      },
      {
        "src": "./images/sidereal512.png",
        "type": "image/png",
        "sizes": "512x512"
      }
    ],
    "start_url": "index.html?pwa=true",
    "background_color": "#000080",
    "display": "standalone",
    "scope": "./",
    "theme_color": "#FFFFFF"
  }
The Service Worker
To satisfy the service worker requirement there’s a JavaScript file in the root of this application’s files named sw.js. The service worker works in the background behind the page. For this application we only want the service worker to do two things; respond to an install event by caching the required files locally and serve up those files when needed. The list of the files that are to be cached are in an array named urlsToCache. When the service worker response to the install event it will pass this list of URLs to a call of the addAll method on the cache object. The cache object will then download the resources at these URLs and save them locally where we can use them offline.
var CACHE_NAME = 'siderealclock-cache';
var urlsToCache = [
  './',
  './styles/main.css',
  './scripts/app.js',
  './scripts/jquery-3.3.1.min.js',
  './images/sidereal192.png',
  './images/sidereal512.png',
  './images/siderealLarge.png',
  './404.html'
];

self.addEventListener('install', function(event) {
  // Perform install steps
  event.waitUntil(
    caches.open(CACHE_NAME)
      .then(function(cache) {
        console.log('Opened cache');
        return cache.addAll(urlsToCache);
      })
  );
});
For the fetch event I’m using code from a Google recommendation. This handler will serve the contents from the cache when there is a cache hit and also add new files to the cache when a request is made for a file that isn’t already there.
self.addEventListener('fetch', function(event) {
    event.respondWith(
      caches.match(event.request)
        .then(function(response) {
          // Cache hit - return response
          if (response) {
            return response;
          }

          // IMPORTANT: Clone the request. A request is a stream and
          // can only be consumed once. Since we are consuming this
          // once by cache and once by the browser for fetch, we need
          // to clone the response.
          var fetchRequest = event.request.clone();

          return fetch(fetchRequest).then(
            function(response) {
              // Check if we received a valid response
              if(!response || response.status !== 200 || response.type !== 'basic') {
                return response;
              }

              // IMPORTANT: Clone the response. A response is a stream
              // and because we want the browser to consume the response
              // as well as the cache consuming the response, we need
              // to clone it so we have two streams.
              var responseToCache = response.clone();

              caches.open(CACHE_NAME)
                .then(function(cache) {
                  cache.put(event.request, responseToCache);
                });

              return response;
            }
          );
        })
      );
  });
This file must be registered as the service worker for it to be able to do anything. In one of the JavaScript files loaded by the page I check the navigator object to ensure there is a serviceWorker member (if there isn’t then the browser in which the code is running currently doesn’t support service workers). If it is there then the service worker can be registered with navigator.serviceWorker.register(path_to_service_worker).
if('serviceWorker' in navigator) {
    navigator.serviceWorker
             .register('./sw.js')
             .then(function() { console.log("Service Worker Registered"); });
  }
Handling the Install Prompt
If your code is running on a Chrome implementation that supports it you can defer the presentation of the installation prompt. In my case I’ve decided to defer it and make a button available in the settings UI. The variable installPrompt will hold the reference to the event object that when activated will present the user with the Chrome install UI. When the event is raised the variable is populated with the event object and the install button within my settings UI is made visible.
var installPrompt;


function beforeInstall(e) {
    console.log('beforeInstallPrompt()')
    e.preventDefault();
    installPrompt = e;
    $('.installUI').show();
}


window.addEventListener('beforeinstallprompt', beforeInstall);
    $('.installButton').on('click', function(){
        installPrompt.prompt();
        installPrompt.userChoice
          .then((choiceResult) => {
            $('.installUI').hide();
            installPrompt = null;
          });

    });
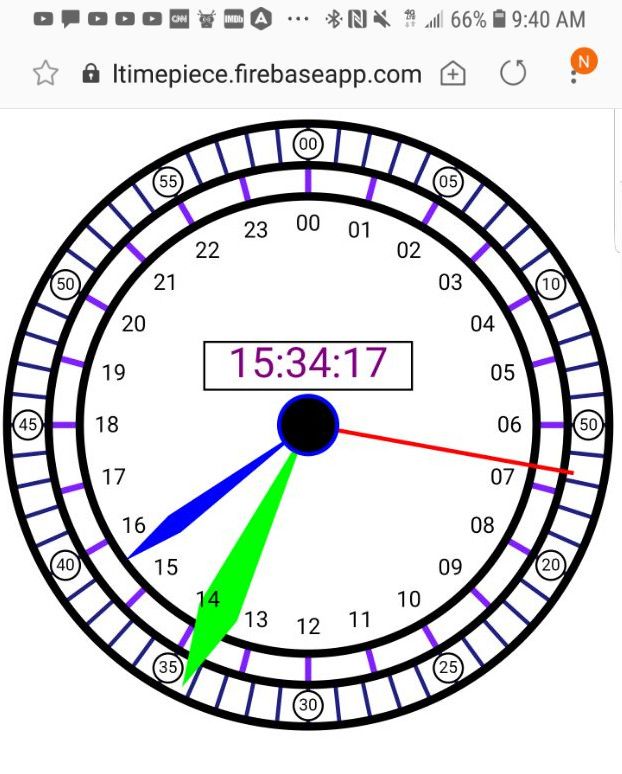
Testing the application on Chrome on Ubuntu Linux when I select my install button the Chrome install prompt shows.
Program Launchers on the Desktop
On the desktop once installed the icon for the PWA shows up in the computer’s program launcher. It also shows up in the Chrome app list. When launched since this application was made to run in standalone mode the application runs in it’s own window with the OS appropriate buttons for going full screen, minimizing, and closing the window. My test application uses location services to acquire the longitude at which the sidereal time is being calculated. When run in a regular browser window I’m prompted each time I visit the page to give permission for location information. This gets a little annoying after a while. When the application is running in stand alone mode the application’s border shows an icon indicating that the location is being detected. Clicking on the icon gives the user the ability to change the location permissions for the application.
Samsung Internet Compatibility
Samsung Internet, the default browser for a long period on many Samsung phones, also supports PWAs. (Samsung Internet can also be installed on non-Samsung phones). Samsung Internet is a Chromium based browser and Samsung is one of the contributors to the Chromium project. It may come as no surprise that no code changes are necessary for this application to work on The UI it presents for installing PWAs is different than what Chrome presents. When Samsung Internet detects that a page can be installed as a PWA an icon is shown in the address bar that resembles a house with a plus in the center. Selecting it will add the icon to the home screen. The icon shows with a smaller image of the Samsung Internet icon indicating that it is a PWA. The beforeinstallprompt event will never be triggered. Since the presentation of the custom install button was driven by this event it simply will not show.
Adding iOS Compatibility
If you saw the original iPhone announcement back in 2007 Steve Jobs had announced that making apps for the iPhone could be done with HTML; at the time there was no SDK available to developers and if they wanted to target the iPhone they were making a web app that had an icon on the home screen. From 2007 to 2018 Apple didn’t do much to advance the platform. It wasn’t until March 2018 that Apple made significant updates to their support to HTML based applications. Apple added support for web manifest, and services workers, web assembly, and other features.
There’s not 100% parity between iOS and Android for available features in PWA. On iOS storage is limited to 50MB per app. On Android the application can request more storage. Android BWAs also have access to Bluetooth features, speech recognition, background sync, and other features. For my sample application none of these mentioned differences matter. While the Android implementations have UI notifications that let the user know that the app can be installed on iOS there’s no visual notification. To install the application the user must select the share option and add the page to their home screen.
Safari ignores most of the attributes of the manifest. It also doesn’t save state if the user leaves the application. So the developers must make their own implementation to save state as the user jumps in and out of the application. If you want a custom icon to show in Safari for your application Apple has a document on specifying the icon using the link tag. An icon can be specified like the following.
<link rel="apple-touch-icon" href="./images/icons/apple-icon-57x57.png">
If you want to specify multiple icons and allow the phone to select the most appropriate one for the user’s resolution add a sizes attribute to the tag.
   <link rel="apple-touch-icon" sizes="57x57" href="./images/icons/apple-icon-57x57.png">
    <link rel="apple-touch-icon" sizes="60x60" href="./images/icons/apple-icon-60x60.png">
    <link rel="apple-touch-icon" sizes="72x72" href="./images/icons/apple-icon-72x72.png">
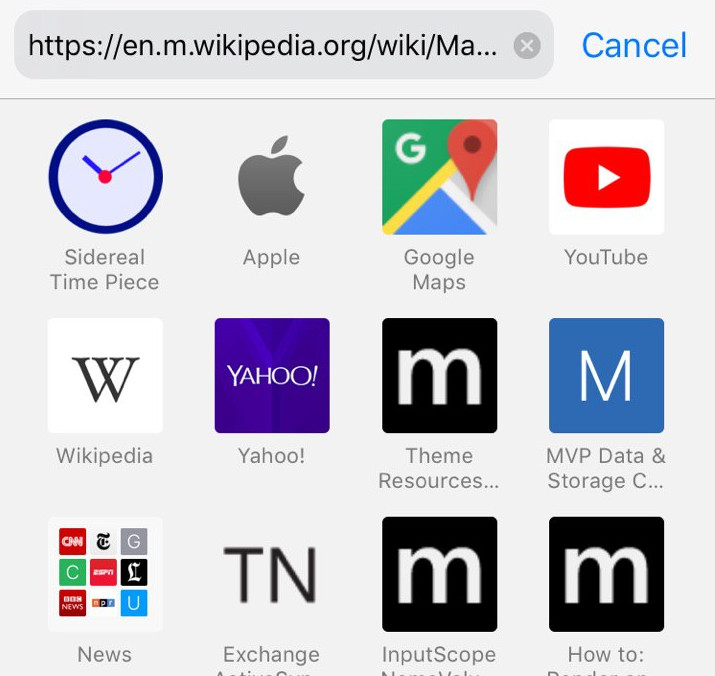
My clock icon for the program shows up in the iPhone favourites list as the following.
Offline Functionality
This application doesn’t need the internet for any functionality. It’s only inputs are the current local time and the user’s longitude. With the lack of need for any network resources and the service worker caching the required files for the application it will work just fine offline after it has been installed. If you make an application that requires network access you will want to give some thought to what to do when there is no data connection. Even if the application can’t do anything without a connection it would be better to show a friendly message than to just let the application not work.
An Alternative to the App Store
PWAs longtime might turn out to be a good alternative to app stores for some types of applications. Whether or not it is a good fit for the needs that you have will depend on the functionality that your applications require and what is available on the devices that you need to target. Apple appears to be behind on this front at the moment. But I hope that the attention that they’ve put on the platform this year to be indicative of future efforts. I’m personally am interested in what could be done when PWAs and WebAssembly are combined together. These are topics to which I hope to give a good bit of attention over the following months.