SignageLive + BrightSign

Signangelive is a platform for managing content on digital signage.  It works on a variety of devices, including BrightSign, Chrome OS, LG webOS, Samsung Tizen TVs, and Windows.  I recently used evaluated Signagelive for use with a BrightSign project.

One of the units of deployent on Signangelive is an HTML Widget.  An HTML Widget is a zip file of HTML assets with a manifest and a .wgt file extension.  Prior to now, the only place I’ve really seen Widgets used is on Samsung’s Tizen based platforms.  The Samsung smart watches, TVs, and the Tizen powered phones support HTML applications through Widgets.  The Widgets and other presentation items (such as videos, pictures, or other displayable elements) can be scheduled to run on a device and the platform will take care of the rest.

For the solution I am working on, I packaged it as a widget.  The only additional file that I had to make to do this was a config.xml along with a PNG image to use as an icon.  I updated the WGT into the signage live system, scheduled it, and sometime later the widget was running on the BrightSign.  This deployment process would work great for a production environment, but it doesn’t work as well for development where you might want to make a quick change and refresh.  I found two solutions for this.

IFRAME

One solution was to deploy an IFRAME whose address pointed back to my development machine.  With this solution, if I want to make a quick change, I can make the change on my local file system and then refresh my view on the device.  Refreshing the video on the device could be done by pressing the reset button, but that takes too long.  If you have Chrome installed, you can connect to port 2999 of the BrightSign unit; connect to the browser instance; and then press the refresh menu option on your local browser.  It results in the BrightSign refreshing too.

Remote File System Browsing

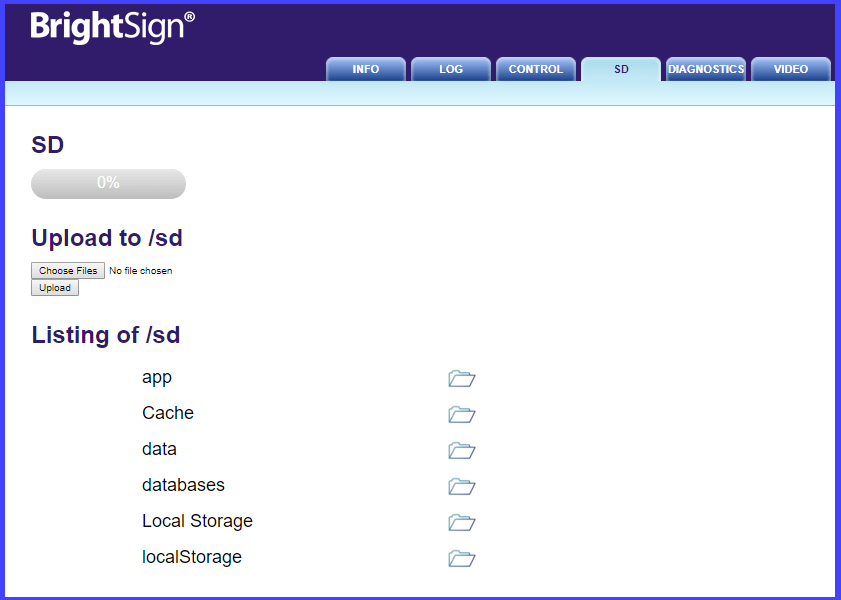
You can also upload files directly to the BrightSign. Connect to the BrightSign’s IP address (without the port specified).  There’s a tab labeled “SD” (for the SD card). From there you can upload content to any place on the file system.  After your files are copied, you can either reset the device (which in my opinion takes too long) or connect to the devices IP and refresh the view as described in the IFRAME section.

bscardlisting

Accessing Node

I initially ran into another problem with running my code in a widget.  I mentioned in another blog posts that BrightSign does not support the HTML5 APIs for persistent storage.  The solution that I suggest for this is using NodeJS within BrightSign.  Signagelive runs the code that was packaged inside of a widget in an IFRAME.  As it turns out IFRAMES on BrightSign does not support NodeJS functionality, but that is easily overcome.  The IFRAME that contains the widget has access to the parent window.  The child window cannot call NodeJS functions directly, but it can grab a reference to its parent and invoke the parent’s NodeJS functionality.  To minimize the difference between code run within and outside of the WGT and IFRAME we can coalesce the possible locations of a needed function. To get access to the required function, I used the following.

window.require = window.require || window.parent.require;

File System Access

My attempts to access the file system would initially fail while hosted in Signagelive. To fix this it was necessary to modify AutoRun.brs. When the BrightSign version of Signagelive creates its HTML window (of type roHtmlWidget in BrightScript) it does not configure the window for file system access. To fix this the WebWindowHTML function in Autorun.brs needs a couple of items added, storage_path and storage_quota.

Function WebWindowHTML(index% as integer, url$ as string, RectX as integer, RectY as integer, RecWidth as integer, RecHeight as integer) as Object
	
	webRect=CreateObject("roRectangle", RectX, RectY, RecWidth, RecHeight)
    is = {
        port: 3000
    }
    webPageConfig = {
        nodejs_enabled: true,
        storage_path: "SD:"
        storage_quota: 1073741824        
        inspector_server: is,
        brightsign_js_objects_enabled: false,
        javascript_enabled: true,
        mouse_enabled: true,
        scrollbar_enabled: false,
        storage_path: "SD:",
        storage_quota: 1073741824,   
		port: m.msgPort,
        security_params: {
            websecurity: false,
            camera_enabled: true,
            insecure_https_enabled: false
        },
		url: url$
    }
	
    webhtmlWidget = CreateObject("roHtmlWidget", webRect, webPageConfig)
    webhtmlWidget.Show()

	return webhtmlWidget
	
End Function


I talked to an engineer at Signagelive about addressing this issue.  I do not know how frequently Signagelive makes updates., but this change may appear in future versions of the software making it unnecessary.  If you happen to read this close to the time that the post was made, the change might not have rolled out yet.  You can make the change yourself but beware of a possible risk.  There is a possibility that an update will be made and pushed out to your device that does not yet contain this change. If that happens you would want your code to fail gracefully instead of simply crashing.

-30-

NodeJS on BrightSign

When I left off I was trying to achieve data persistence on a BrightSign  (model XT1144) using the typical APIs that one would expect to be available in an HTML application. To summarize the results, I found that using typical methods of checking localStorage and indexedDB show as being available; but indexedDB isn’t actually available; and localStorage appears to work, but doesn’t survive a device reset.

The next method to try is NodeJS.  The BrightSign devices support NodeJS, but the entry point is different than a standard entry point of a NodeJS project. A typical NodeJS project will have its entry point defined in a JavaScript file. For BrightSign, the entry point is an HTML file. NodeJS is disabled on the BrightSign by default. There is nothing in BrightAuthor that will enable it. There is a file written to the memory card (that one might otherwise ignore when using BrightAuthor) that must be manually modified. For your future deployments using BrightAuthor, take note that you will want to have the file modification described in this article saved to a back-up device so that it can be restored if a mistake is made.

The file, AUTORUN.BRS, is the first point of execution on the memory card. You can look at the usual function of this file as being like a boot loader; it will get your BrightSign project loaded and transfer execution to it. For BrightSign projects that use an HTML window the HTML window is actually created by the execution of this file. I am not going to cover the BrightScript language. For those that were ever familiar with the language, it looks very much like a variant of the B.A.S.I.C. language. When an HTML window is being created it is done with a call to the CreateObject method with “roHtmlWidget” as the first parameter to the function. The second parameter to this call is a “rectangle” object that indicates the coordinates at which the HTML window will be created. The third (optional) parameter is the one that is of interest. The third parameter is an object that defines options that can be applied to the HTML window.  The options that we want to specify are those that enable NodeJS, set a storage quota, and define the root of the file system that we will be accessing.

The exact layout of your Autorun.js may differ, but in the one that I am currently working with, I have modified the “config” object by adding the necessary parameters. It is possible that in your AutoRun.brs that the third parameter is not being passed at all. If this is the case, you can create your own “config” object to be passed as a third parameter. The additions I have made are in bold in the following.

is = {
    port: 3999
}    
security = {
        websecurity: false,
        camera_enabled: true
}
    
config = {
    nodejs_enabled: true,
    inspector_server: is,
    brightsign_js_objects_enabled: true,
    javascript_enabled: true,
    mouse_enabled: true,
    port: m.msgPort,
    storage_path: "SD:"
    storage_quota: 1073741824            
    security_params: {
        websecurity: false,
        camera_enabled: true
    },
    url: nodeUrl$
}
    
htmlWidget = CreateObject("roHtmlWidget", rect, config)

Once node is enabled the JavaScript for your page will run with the capabilities that you would generally expect to have in a NodeJS project. For my scenario, this means that I now have acces to the FS object for reading and writing to the file system.

fs = require('fs');
var writer = fs.createWriteStream('/storage/sd/myFile.mp4',{defaultEncoding:'utf16le'});
writer.write("Hello World!\r\n");
writer.end()

I put this code in an HTML page and ran it on a BrightSign. After inspecting the SD card after the device booted up and was on for a few moments I saw that my file was still there (Success!).  Now I have a direction in which to move for file persistence.

One of the nice things about using the ServiceWorker object for caching files is that you can treat a file as either successfully cached or failed. When using a file system writer there are other states that I will have to consider. A file could have partially downloaded, but not finished (due to a power outage; network outage; timeout; or someone pressing the reset button; etc.). I’m inclined to be pessimistic when it comes to guaging the reliability of external factors to a system. I find it necessary to plan with the anticipation of them failing.

With that pessimism in mind, there are a couple of approaches that I can immediately think to apply to downloading and caching files.  One is to download files with a temporary name and change the name of the file from its temporary to permanent name only after the download is successful. The other (which is a variation of that solution) is to download the file structure to a temporary location. Once all of the files are downloaded, I could move the folder to its final place (or simply change the path at which the HTML project looks to load its files). Both methods could work.

I am going to try some variations of the solutions I have in mind and will write back with the results of one of the solutions.

-30-

BrightSign HTML: Where is the Persistent Storage?

BrightSign Media Players work with a number of content management systems.  With a content management system, you can upload a BrightSign presentation as an asset and it will be distributed to the the units out in the field automatically.

Recently, I was investigating what the options are for other persistent storage.  The assets to be managed were not a full presentation, but were a few files that were going to be consumed by a presentation. As expected, the solution needed to be tolerant to a connection being dropped at any moment.  If an updated asset were to be partially downloaded, the expected behavior would be that the BrightSign continues with the last set of good assets that it had until a complete new set could be completely downloaded.

The first thing that I looked into was whether the BrightSign units supported service workers.  If they did, this would be a good area to place an implementation that would check for new content and initiate a download.  I also wanted to know what storage options were supported.  I considered indexedDB, localStorage, and caches.  The most direct way of checking for support was to make an HTML project that would check if the relevant objects were available on the window object.  I placed a few fields on an HTML page and wrote a few lines of JavaScript code to place the results in the HTML page.

Here’s the code and the results.

function main() {
    $('#supportsServiceWorker').text((navigator.serviceWorker)?'supported':'not supported');
    $('#supportsIndexDB').text((window.indexedDB)?'supported':'not supported');
    $('#supportsLocalStorage').text((window.localStorage)?'supported':'not supported');
    $('#supportsCache').text((window.caches)?'supported':'not supported');
    supportsCache
}
$(document).ready(main);
Feature Support
serviceWorker supported
indexedDB supported
localStorage supported
cache supported

Things looked good, at first.  Then, I checked the network request.  While inspection of the objects suggests that the service worker functionality is supported, the call to register a service worker script did not result in the script downloading and executing.  There was no attempt made to access it at all.  This means that service worker functionality is not available.  Bummer.

Usually, I’ve used the cache object from a service worker script.  The use of it there was invisible to the other code that was running in the application.  But with the unavailability of the service worker the code for the presentation will show more awareness of the object.  Not quite what I would like, but I know know that is one of the restrictions in which I must operate.

The Caches object is usually used by a service worker.  But the object can be used by the window, while it is defined as a part of the service worker spec, there’s no requirement that it be only used by it.

The next thing worth trying was to manually cache something and see if it could be retrieved.

if(!window.caches)
return;
window.caches.open(‘cache1’)
.then(function (returnedCache) {
cache = returnedCache;
});

This doesn’t actually do anything with the cache yet.  I just wanted to make sure I could retrieve a cache object.  I ran this locally and it ran just fine.  I tried again, running it on the BrightSign player, and got an unexpected result, window.caches is non-null, and I can call window.caches.open and get a callback.  The problem is that the callback always receives a null object.  It appears that the cache object isn’t actually supported.  It is possible that I made a mistake.  To check on this, I posted a message in the BrightSign forum and moved on to trying the next storage option, localStorage.

The localStorage option didn’t give me the results that I expected on the BrightSign. For the test I made a function that would keep what I hoped to be a persistent count of how many times it ran.

function localStorageTest() { 
    if(!window.localStorage) {
        console.log('local storage is not supported' );
        return;
    }
    var result = localStorage.getItem('bootCount0') || 0;
    console.log('old local storage value is ', result);
    result = Number.parseInt( result) + 1;
    localStorage.setItem('bootCount0', result);
    result = localStorage.getItem('bootCount0', null)
    console.log('new local storage value is ', result);
}

When I first ran this, things ran as expected.  My updated counts were saving to localStorage.  So I tried rebooting.  Instead of saving, the count reset to zero.  On the BrightSign, localStorage had a behavior exactly like sessionStorage.

Based on these results, it appears that persistent storage isn’t available using the HTML APIS.  That doesn’t mean that it is impossible to save content to persistent storage.  The solution to this problem involves NodeJS.  I’ll share more information about how Node works on BrightSign in my next post.  It’s different than how one would usually use it.

-30-

Basic Hue Lighting Control: Part 2

This is the second part of a two-part post.  The first part can be found here.

At the end of the first part, I had gotten discovery of the bridge implemented and had performed the pairing of the bridge.  In this part, I will show you how to create a query for the state of the light groups and control them.

Querying Group State

I’m only allowing the modification of the state of groups of lights on the Hue.  First I need to query the bridge for what states exist.  The list of groups and the state of the group are available at `http://${this.ipAddress}/${this.userName}/groups`. Here the data in this.userName is the user name that was returned from the Hue bridge in the pairing process.  With this information I am able to create a new UI element for each group found.  I only show groups of type “room” from this response.  It is also possible that the user has grouped an arbitrary set of lights together in a group.  I don’t show these.

var hueDB = (function () {
    var db = {};
    var datastore = null;
    var version = 1;
    db.open = function (callback) {
        var request = indexedDB.open('hueDB', version);
        request.onupgradeneeded = function (e) {
            var db = e.target.result;
            e.target.transaction.onerror = db.onerror;
            var store = db.createObjectStore('bridge', { keyPath: 'bridgeID' });
        };
        request.onsuccess = function (e) {
            datastore = e.target.result;
            callback();
        };
    };

    db.getBridgeList = function () {
        return new Promise((resolve, reject) => {
            var transaction = datastore.transaction(['bridge'], 'readonly');
            transaction.onerror = function (e) {
                reject(e.error);
            };
            transaction.oncomplete = function (e) {
                console.log('transaction complete');
            };

            var objStore = transaction.objectStore('bridge');
            objStore.getAll().onsuccess = function (e) {
                console.log('bridge retrieval complete');
                resolve(e.target.result);
            };

            var bridgeList = [];


        });
    };

    db.addBridge = function (bridge) {
        console.log('adding bridge ', bridge);
        return new Promise((resolve, reject) => {
            var transaction = datastore.transaction(['bridge'], 'readwrite');
            transaction.onerror = function (e) {
                reject(e.error);
            };
            transaction.onsuccess = function (e) {
                console.log('item added');
            };
            var objStore = transaction.objectStore('bridge');
            var objectStoreRequest = objStore.add(bridge);
            objectStoreRequest.onsuccess = function (e) {
                resolve();
            };
        });
    };

    return db;
})();

Changing the State of a Light Group Attributes

There are several elements of a light group’s state that can be modified.  I’m only considering two: the brightness of the light group and whether or not the group of lights is turned on.  Both can be set with a PUT request to the bridge at the the URL http://${this.ipAddress}/${this.userName}/groups/${id}/action`.  This endpoint accepts a JSON payload.  Turning a group of lights on or off; changing the brightness; activating a scene to change the color; and many other options can be changed through this end point.  It is not necessary to specify all of the possible attributes when calling this endpoint.  If an attribute is not specified it will remain at its current state.  I have made a method named setGroupState that will be used by all other methods that make use of this endpoint.  The methods will differ in the payloads that they build and pass to this method.

    setGroupState(groupName, state) {
        var id = this.groupToGroupID(groupName);
        var reqBodyString = JSON.stringify(state);
        return new Promise((resolve, reject) => {
            fetch(`http://${this.ipAddress}/api/${this.userName}/groups/${id}/action`, {
                method: "PUT",
                headers: { "Content-Type": "application/json" },
                body: reqBodyString
            })
                .then(resp => resp.json())
                .then(jsonResp => {
                    resolve(jsonResp);
                })
                .catch(err => reject(err));
        });
    }

Of the many attributes that could be packaged in the payload are bri and on.  The on state sets whether or not the lights are turned on.  The bri attribute accepts a value in the range of 0 to 254.  Note that a value of 0 doesn’t mean off.  Zero is the value level assigned to the lowest level of illumination above off that the light will provide.

Activating Scenes

Scenes, or a collection of settings that applies to lights, can by associated with a predefined light group or with some arbitrary group of lights.  The Hue API labels scenes as either LightScene or GroupScene accordingly.  I am only working with groups scenes.  A list of all of the scenes defined on the bridge is retrievable through the the endpoint http://${this.ipAddress}/api/${this.userName}/scenes.

The object returned is a dictionary of the scene IDs and the attributes.  The scene ID is a string of what appears to be random characters.  It’s not user friendly and should only be used internally by the code and never presented to the user.   Here is a response showing only two scenes.

{
    "8AuCtLbIiEJJRNB": {
        "name": "Nightlight",
        "type": "GroupScene",
        "group": "1",
        "lights": [
            "2"
        ],
        "owner": "rF0JJPywETzJue2G8hJCn2tQ1PaUVeXvgB0Gq62h",
        "recycle": false,
        "locked": true,
        "appdata": {
            "version": 1,
            "data": "5b09D_r01_d07"
        },
        "picture": "",
        "lastupdated": "2017-01-16T23:35:24",
        "version": 2
    },
    "7y-J6Qyzpez8c2R": {
        "name": "Dimmed",
        "type": "GroupScene",
        "group": "1",
        "lights": [
            "2"
        ],
        "owner": "rF0JJPywETzJue2G8hJCn2tQ1PaUVeXvgB0Gq62h",
        "recycle": false,
        "locked": false,
        "appdata": {
            "version": 1,
            "data": "Nmgno_r01_d06"
        },
        "picture": "",
        "lastupdated": "2017-01-16T23:35:24",
        "version": 2
    }
}

To activate a scene on a group I use the same endpoint that is used for turning light groups on and off or setting their brightness level.  The JSON payload will have a single element named scene whose value is one of the cryptic looking scene identifiers above.

    activateScene(sceneID) {
        var scene;
        if(sceneID in this.sceneList) {
            var scene = this.sceneList[sceneID];
            var group = scene.group;
            var req = {scene:sceneID};
            return this.setGroupState(group,req );            
        }
    }

Application Startup

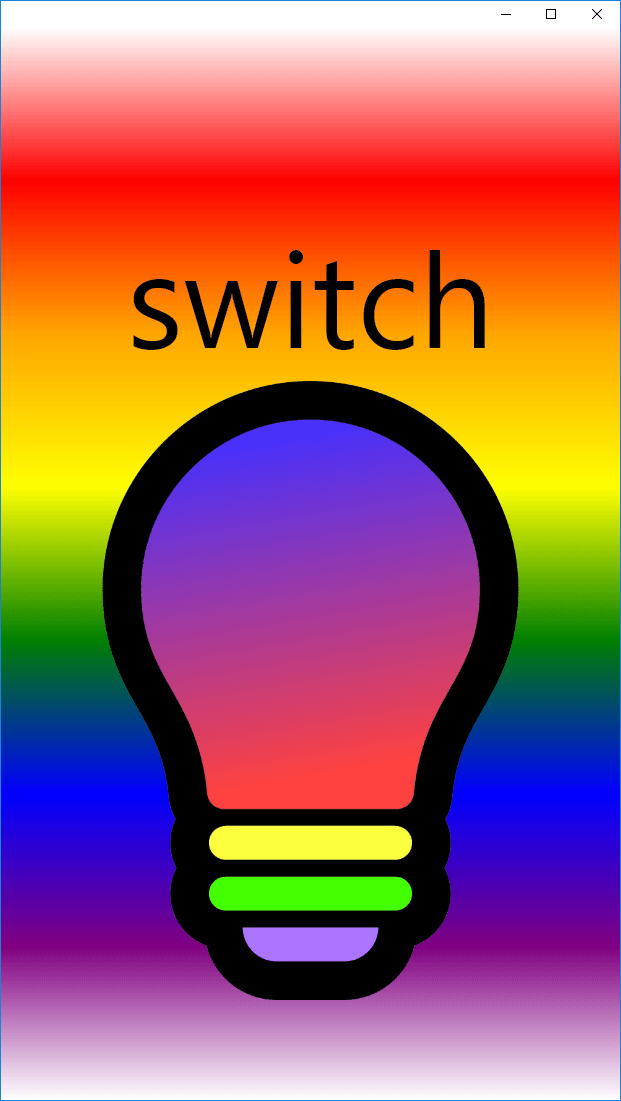
To hide some of the events that occur at startup the application has a splash screen. The splash screen is only momentarily present. During the time that it is momentarily shown the application will attempt to reconnect to the last bridge that it had connected to and will query for the available groups and scenes. This is just enough of a distraction to hide the time taken to do this additional setup.

switch
The Application Splash Screen

Installing and Running the Application

If you have downloaded the source code to your local drive, you can add the program to Chrome as an unpacked extension. In a browser instance open the URL chrome://extensions.  In the upper-left corner of this UI is a button labeled Load Unpacked.  Select this option.

unpacket
UI for loading unpacked Chrome extensions

You will be prompted to select a folder.  Navigate to the folder where you have unpacked the source code and select it.  After selecting it you will see the application in the list of installed extensions.

loadedextension

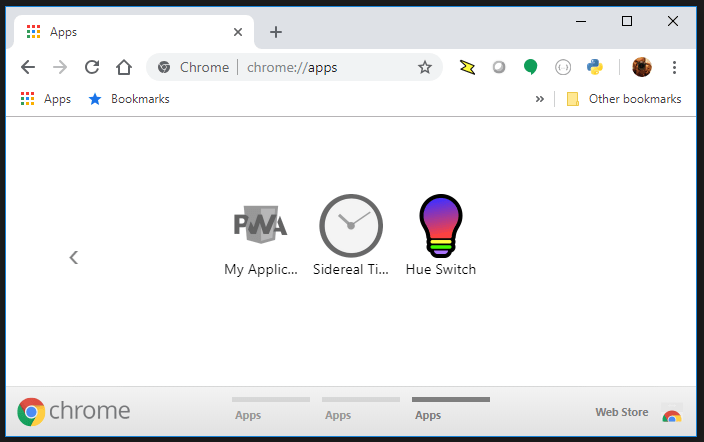
The application will now show up in the Chrome app launcher.  This may be exposed through the regular app launcher that is part of your operating system (such as the Program menu on Windows) and will also appear in Chrome itself.  Close to the address bar is a button labeled “Apps.”

applauncher
The application in the Chrome app launcher

Completing the Application

As I mentioned in the opening,  this is not meant to be a complete application.  It is only an operational starting point, creating something that is functional enough to start testing different functions in the Hue API.

I will close with mentioning some other potential improvements.  For a user running the application for the first time the setup process might be smoothed out by automatically trying to pair with the first bridge seen (if there is only one bridge seen) and prompting the user to press the link button.  This makes the setup process a two step process: start the application and press the link button on the bridge.  There could also be other people that are operating the Hue lighting at the same time that this application is running.  Periodically polling the state of the lights and light groups on the network and updating the UI accordingly would improve usability.  A user may also want to control individual lights within a group or have control over the light color.  For this a light selection UI would also need to be developed.

It took me about an evening to get this far in the development and it was something enjoyable to do during a brief pause between projects.  As such projects go, I’m not sure when I’ll get a change to return to it.  But I hope that in it’s current form that it will be of utility to you.

-30-


Basic Hue Lighting Control: Part 1

screenshot
Screenshot of Chrome application for controlling Hue lighting.

Continuing from the post I made on SSDP discovery with Chrome, I’m making an application that will do more than just discovery. For this post I’m going to show the starting point of a Chrome application for controlling your home Hue lighting. I’ve divided this into two parts. In this first part I’m showing the process of pairing with the bridge. In the second part I’ll control the lights.

The features that this application will implement will include bridge discovery and pairing; the power state of the light; and the brightness level of the light. There’s many other features that could still be implemented.  Given the full range of capabilities that the Hue kits support (changing color, timers, response to motion sensors, etc.) this will not be an application that utilizes the full capability of the Hue lighting sets.

Chrome Only

This application is designed to only run in Chrome. If you want to adapt it to run outside of Chrome, you can do so by first disabling SSDP discovery. (Other HTML application platforms might not support UDP for discovery.)

The other discovery methods (querying Hue’s discovery web service or asking the user to enter the IP address) can still work. A non-chrome target will also need to allow CORS to be ignored and allow communication without SSL.

What is Hue Lighting?

Hue Lighting is an automated lighting solution made by Philips. Generally the lighting kits are sold in a package that contains three LED based light bulbs and a bridge. The bridge is a device that connects to your home network with an Ethernet jack and communicates with the light bulbs.

Philips also makes free applications for iOS and Android for controlling the lights. For any Hue light the light’s brightness and whether or not it is turned on can be controlled through the applications. Some lights also allow the color temperature to be changed (adjusting the tint between red, yellow and blue). Some lights support RGB (Red, Green, Blue) parameters so that their colors can be changed.  These settings can be individually adjusted or settings for a collection of the lights can be defined together as a “scene.” When a scene is activated the state of all of the lights that make up the scene are updated. Scenes can be activated through special light switches, through an app, through a schedule, or in response to a Hue motion sensor detecting motion.

Discovery: Review and New Methods

The central piece of hardware for the Hue lighting is the Hue Bridge. At the time of this writing there are two versions of the bridge. For the functionality that this application will utilize, the differences between the two bridges will not matter. The messaging and interaction to both versions of the bridge will be the same. My UI will properly represent the bridge that the system discovers. The first version of the Hue Bridge is round. The second version of the Hue Bridge is square. In either case we must first find the bridge’s IP address before we can begin interaction.

phillipsbridge
Phillips Hue Bridge Version 1 (left) and Version 2 (right)

The Hue bridge can be discovered in multiple ways. It can be discovered using SSDP. The basics of SSDP discovery were previously discussed here. Please refer back to it if you need more detail than what is found in this brief overview.  Devices that support SSDP discovery join a multicast group on the network that they are connected to. These devices generally wait for a request for discovery to be received. An SSDP request is sent as an HTTP over UDP message and every SSDP device that receives it responds with some basic information about itself and a URL to where more information on the device can be found. Examples of some devices that support SSDP are network attached storage; set top boxes like Android TVs and Rokus; printers; and home automation kits.

Two other methods of discovering a bridge include asking the user to enter an IP address and asking for a list of IP addresses of bridges on your network through the Hue discovery service.  If you have a Hue bridge connected to your network right now you can see it’s IP address by visiting https://discovery.meethue.com/ . If you are on a shared network then you may also see IP addresses of other bridges on your network. It is also possible that not all bridges on your network are reachable.  This method is much easier to implement than SSDP based discovery. But on a network for which there is no Internet connection (whether by design or from an outage) this method will not work. The SSDP method is only dependent on the local network.

function discoverBridge() { 
    discovredHueBridgeList = [];
    fetch(' https://discovery.meethue.com')
        .then(response => response.json())
    .then(function (hueBridgeList) {
        console.info(hueBridgeList);
        hueBridgeList.forEach((item)=> {
         // each item processed here has a bridge IP address
         // and serial number exposed through item.id and 
         // item.internalipaddress
       }
     );
}

Once I have a bridge IP address I attempt to query it for more information. If communication succeeds, then I show a representation of the bridge with an icon that matches the version of the bridge that the user has. The UI layout has two images ( one named hueBridgev1 and the other hueBridgev2) I show the appropriate image and hide the other.

Pairing

Now that the bridges have been discovered, it is up to the user to select one with which to pair. After the user selects a bridge, she is instructed to press the pairing button on the bridge. While this instruction is displayed the application is repeatedly attempting to request a new user ID name from the bridge. This should be viewed more as an access token. The Hue documentation uses the term “user name” but the actual value is what appears to be a random sequence of characters. To request a user name a JSON payload with one member named devicetype is posted to the bridge. The value assigned to devicetype matters little. It is recommended that it be a string that is unique to your application. The payload is posted to http://%5Byour bridge IP address]/api. A failure response will result. This is expected. The application must repeatedly make this request and prompt the user to press the link button on the bridge.  The request will fail until the pairing button on the bridge is passed.

function pairBridge(ipAddress) {
   console.info('attempting pairing with address ', ipAddress);
   var req = { devicetype: "hue.j2i.net#browser" };
   var reqStr = JSON.stringify(req);
   var tryCount = 0;
   return new Promise(function(resolve, reject)  {
      var tryInterval = setInterval(function () {
      console.log('attempt ', tryCount);
      ++tryCount;
      if (tryCount > 60) {
        clearInterval(tryInterval);
         reject();
         return;
      }
      fetch(`http://${ipAddress}/api`, {
         method: "POST",
         headers: {
            "Content-Type": "application/json"
         },
         body: reqStr
      })
      .then(function(response)  {
         console.log('text:',response);
         return response.json();
      })
      .then(function(data)  {
          console.log(data);
          if (data.length > 0) {
             var success = data[0].success;
             var error = data[0].error;
             if (success) {
                console.log('username:', success.username);
                var bridge = {
                   ipAddress: ipAddress,
                   username: success.username
                };
                clearInterval(tryInterval);
                 resolve(bridge);
                  return;
               }
               else if (error) {
                  if (error.type === 101) {
                     console.log('the user has not pressed the link button');
                  }
               }
            }
         });
      }, 2000);
   });
}

Once the button is pressed the bridge will respond to the first pairing request it receives with a user name that the application can use. This user name must be saved and used for calls to most of the functionality that is present in the bridge. I save the bridge’s serial number, IP address, and the name that must be used for the various API calls to an indexedDB object store. The access information for multiple paired bridges could be stored in the object store at once. But the application will only be able to communicate with one bridge at a time.

Continued in Part II

Graphing with the HTML Canvas

Among other places I went to Peru and saw Machu Picchu! The trip back home though was long and boring.  There’s lots of ways that one can keep their mind when busy when in a non-stimulating situation though. Reading, Sudoku , cross word puzzles, so on. Sometimes I like playing with code during these times. I had started off reading a math heave book though. I generally have a notebook with me, and my notebooks are generally graph ruled. But graphing polynomials can be tedious. But hey, I had a Chromebook  with me, plenty of battery life, and no Internet access. So I decided to see what I could do with the HTML canvas. I cam up with something that worked and was useful. It’s not something that I would package and call a library by any means. After all, this is something that was put together during a layover in an airport. But nonetheless I thought it to be something that is worthy of sharing.

Drawing with the Canvas

Let’s review how to draw with the HTML5 canvas. First a <canvas> element would need to be declared within a page. Within the page’s script we grab a reference to the canvas and get the 2d context and hold onto it; the context object will be the object used for most of our interaction with the canvas. Here I take a canvas
and draw a red rectangle in it.
<canvas id="myCanvas" width="320" height="200"></canvas>

    var canvas = document.getElementById('myCanvas');
    var ctx = canvas.getContext('2d');
    ctx.fillStyle="#FF0000";
	ctx.fillRect(10,10,100,100);

Cool, we can draw on the surface. But before graphing anything we need to be able to map the data that we are graphing to the coordinate space for the graph. That’s going to be a linear transformation. Linear transformations are easy but something that I’m sure I’ll want to do several times. So I’ve made a class to figure out the the transformation for me.

Linear Transformation

Given a pair of starting and ending values this class is able to convert from on value range to another. The class has two methods. the map() method will do the conversion and rmap will perform a reverse conversion. Given the the freezing and boiling points of water in Farenheit and Celcius it could perform conversions back and forth between the two.

function linearMapping(iMin, iMax, oMin, oMax) {
	this.slope =  (oMax - oMin) / (iMax - iMin);
	this.base = oMin - this.slope*iMin;
	this.map = function(x) {
		if(typeof x != 'number')
			return null;	
		return x*this.slope+this.base;
	}
	this.rmap = function(x) {
		if(typeof x != 'number')
			return null;
		return (x - this.base)/this.slope;
	}
}

I sat for a while and I thought about the parameters that I would want to pass when creating a graph. I first envisioned passing this information as individual parameters to a function. But I didn’t have to think for long before I realized this would be a lot of parameters most of which I probably would not feel like specifying. I took a slightly different approach and decided to instead pass a parameter object. The object would be initialized with a set of workable default values that could be changed as the graph needed to be customized.

Graphing Options

Some of the basic information needed is the the size of the graph within the HTML page and the ranges of the X and Y values being displayed. I allow these values to be optionally passed in when constructing the object. I’ve also defined a color palette to be used for the graph.

function graphOptions(width, height, minX, maxX, minY, maxY) {
	this.width = width || 300;
	this.height = height || 300;
	this.minX = minX || -10;
	this.maxX = maxX ||  10;
	this.minY = minY || -10;
	this.maxY = maxY ||  10;
	this.stepX = 2;
	this.stepY = 2;
	this.backgroundColor = '#F0F0F0';
	this.lineColor = '#C0C0FF'
	this.minorLineWidth = 1;
	this.majorLineWidth = 4;
	this.dataColors = [
		"#000000",
		"#ff0000",
		"#00ff00",
		"#0000FF",
		"#FF8000",
		"#ff0080",
		"#80FF00",
		"#8000FF"
	]
}

With that we are ready to start creating our graph. We need a way of specifying where in the page the graph should be generated. I’ve made a method named makeGraph() that will accept two arguments; the parent element for the graph and the parameter object for the graph options. If for some reason the parent element isn’t specified the function will just append the graph to the page’s DOM.

Creating the Graph

This class will take care of creating the canvas object. The canvas’s context will be retained along with the options and packaged in an object as both will be needed later for plotting graphs. When the graph is created I render the graph lines on it. The canvas object is added to the page

function makeGraph(parentElement, options) {
	options = options || new graphOptions();
	var graphElement = document.createElement('canvas');

	graphElement.width = options.width;
	graphElement.height = options.height;

	var ctx = graphElement.getContext('2d');
	var newGraph = new graph(ctx, options);
	ctx.fillStyle=options.backgroundColor;
	ctx.fillRect(0,0,options.width, options.height);

	ctx.strokeStyle = options.lineColor;
	ctx.beginPath();
	ctx.lineWidth = options.majorLineWidth;
	var xOrigin = newGraph.xMapping.map(0);
	var yOrigin = newGraph.yMapping.map(0);
	ctx.moveTo(xOrigin,0);
	ctx.lineTo(xOrigin, options.height);
	ctx.moveTo(0, yOrigin);
	ctx.lineTo(options.width, yOrigin)
	ctx.stroke();
	ctx.strokeStyle = options.lineColor;
	ctx.beginPath();
	for(var i = options.minX; i<options.maxX;i+=options.stepX) {
		var xPos = newGraph.xMapping.map(i);
		ctx.moveTo(xPos,0);
		ctx.lineTo(xPos,options.height);
		ctx.lineWidth = options.minorLineWidth;
	}
	for(var i = options.minY; i<options.maxY;i+=options.stepY) {
		var yPos = newGraph.yMapping.map(i);
		ctx.moveTo(0, yPos);
		ctx.lineTo(options.width, yPos);
		ctx.lineWidth = options.minorLineWidth;
	}
	ctx.stroke();

	if(parentElement != null)
		parentElement.appendChild(graphElement)
	else
		document.body.appendChild(graphElement)
	return newGraph;
}

The result of the above is the return of a graph object that hasn’t been defined here yet. The graph object packages together the context for rendering, the graph objects, and the objects for mapping the values being represented to canvas coordinates. Something that may look odd at first is that for the Y-mapping I placed a maximum value in a minimum parameter and vice versa. This is because the coordinate system that many of us use when thinking about graphs is reversed along the Y-axis than the canvas coordinates. The general way that people think about graphs is that numbers of greater value will appear higher up on the graph. But in the canvas coordinate space the highest position has a Y-coordinate of zero and as the number increases the position maps to a position further down on a page. There’s more than one way to address this, but since the linear transfor object can already handle this if I
specify the values in a certain order that’s the solution that I used.

The function made for public use on this class ia named plot. It accepts a list of functions to be graphed. While I expect an array of functions to be passed to it if a singular function were passed that’s converted to an array of one function so that it can be treated the same way. The plot function interates through the functions passed through it passing each one to another function that does the actual work. A different color index is passed for each function.

The real work is done in plotFunction. First the X-values that fall within the range of the limits of the graph are passed to the function being mapped and the canvas-mapped result is saved to an array. The result for each X-value could either be a number or a non-number. Non-numbers will not be represented in the graph. This allows for the generation of graphs for which there may be X-values that are not part of the functions domain. If an exception occurs when calling the function being graphed the X-value association with that exception is treated as a value for which the function returns nothing. After this first pass we have an array of the canvas-mapped output values from the function.

Rendering the Graph

Next we perform the acual rendering of the output onto the graph. The function will scan ahead in the array of results to the first numerical value. This first numerical value may or may not be in the first position of the array. Once a value is found it is used as the first coordinate for a line segment. Each numerical value in the array that follows this is added to the line segment. This continues until either the end of the array is reached or a non-numerical value is encountered. In either case the accumulated points for the line segment are stroked ending. If there are more values within the array the process is repeated until the end of the array is encountered.

function graph(context, options) {
	this.ctx = context;
	this.options = options;
	this.xMapping = new linearMapping(options.minX, options.maxX, 0, options.width);
	this.yMapping = new linearMapping(options.minY, options.maxY, options.height, 0);

	this.plot = function(sourceFunctions) {
		if(!Array.isArray(sourceFunctions))
			sourceFunctions = [sourceFunctions];
		var colorNumber = 0;
		sourceFunctions.forEach((x)=> {
			this.plotFunction(x,colorNumber);
			++colorNumber;
		})
	}

	this.plotFunction = function (plotFunction, colorNumber) {
		colorNumber = colorNumber || 0;
		colorNumber = colorNumber % this.options.dataColors.length;
		var values = new Array(this.options.width);
		for(var xPos=0;xPos<this.options.width;++xPos) {
			var y = null;
			var x= this.xMapping.rmap(xPos);
			try {
				values[xPos] = this.yMapping.map(plotFunction(x))
			} catch(exc) {
				values[xPos] = null;
			}
		}
		//Find the first value that we can map
		var xPos = 0;
		while((typeof values[xPos] != 'number')&&(!Array.isArray(values[xPos]))&&(xPos < values.length))
			++xPos;
		if(xPos == values.length)
			return;
		
		while(xPos<values.length) {
			this.ctx.beginPath();
			this.ctx.strokeStyle = this.options.dataColors[colorNumber];
			this.ctx.moveTo(xPos, values[xPos]);
			while(xPos+1<values.length && typeof values[xPos+1] == 'number') {
				++xPos;
				this.ctx.lineTo(xPos, values[xPos]);
			}
			++xPos;
			this.ctx.stroke();
			while((typeof values[xPos] != 'number')&&(xPos < values.length))
				++xPos;
		}
	}
}

How Does it Look?

The graphing class is complete. Showing a graph is now only a matter of including the JavaScript in a page and using it. The simplest example of using it would be the following.

var g = makeGraph(randomPlotsArea, options);
g.plot((x)=>{return Math.sin(x); });

Here’s the result!

I’ve made a page with a few place holders for graphs. Among other things it contains the following.

<p id="randomPlots">
	
Random plots
</p> <p id="trajectoryPlotArea" >
Plot of a trajectory height for an object thrown up at 10 m/s near the earth's surface.
</p>

To render the graphs within their appropriate places I acquire a reference to the parent element in which the graph will be contained and I pass that to the makeGraph() function. Here I render the SIN function, the COSINE function (with no values returned from 2.0 to 3.0), and a x-squared

var randomPlotsArea = document.getElementById('randomPlots');				
var options = new graphOptions();
var g = makeGraph(randomPlotsArea, options);
g.plot([
	function(x){return 5*Math.sin(x);},
	(x)=>{
			if(Math.floor(x)!=2)
				return 6 * Math.cos(x);
			return null;
		},
	(x)=>{return x * x; }
	]);

Here is the result. The range for which no value is returned is apparent from the area in which the red line on the graph is not rendered.


Where to From Here?

Awesome! The code works! But now what?  Well, nothing for now. This was something I wrote with temporary intentions and to keep myself from being bored. That’s not to say that I’m giving up on developing a graphing library. Once back home I checked online to see what types of other graphing libraries are available. There’s a number of them, each having their own strengths. I have a direction in which I’d like to take this that is different from the others that are out there. I may revisit this, but only after a lot more thought of what I want to do, how I want this to work,  and how the variations on graphs can be specified.