Creating a Service on a Raspberry Pi or Jetson Nano

Creating a service on a Raspberry Pi or a Jetson is easier than I thought. At the same time, there is still a lot of information to sort through. I’m still exploring the various settings that can be applied to a service. But I wanted to share the information that I thought would be immediately useful. While I was motivated to explore this based on something I was doing on a Jetson Nano, the code and instructions work identically without any need for modification on a Raspberry Pi.

I have a Jetson Mate. The Jetson Mate is an accessory for the Jetson Nano or Jetson Xavier NX Modules. Up to 4 modules can be placed within the Jetson mate to form a cluster. Really the Jetson Mate is just a convenient way to power multiple Jetsons and connect them to a wired network. It contains a 5-port switch so that a single Network cable can be used to connect all of the modules. Despite the Jetsons being in the same box, they don’t have an immediate way to know about each other. Reading the documentation from Seeed Studio, they suggest logging into your router and finding the IP addresses there.

That approach is fine when I’m using the Jetsons from my house; I have complete access to the Network here. But that’s not always possible. On some other networks I may not have access to the router settings. I made a program that would let the Jetson’s announce their presence over UDP Multicast. This could be useful on my Pis also; I run many of them as headless units. I needed for this program to start automatically after the device was powered on and to keep running. How do I do that? By making it a service.

There are several ways that one could schedule a task to run on Linux. I’m using systemd. Systemd was designed to unify service configurations across Linux distributions. The information shown here has applicability well beyond the Pi and Jetson.

The details of how my discovery program works is a discussion for another day. Let’s focus on what is necessary for making a service. For a sample service, let’s make a program that does nothing more than increment a variable and output the new value of the variable. The code that I show here is available on GitHub ( https://github.com/j2inet/sample-service ). But it is small enough to place here also. This is the program.

#include <iostream>
#include <thread>

using namespace std;

int main(int argc, char** argv) 
{
    int counter = 0;
    while(true)
    {
        cout << "This is cycle " << ++counter << endl;
        std::this_thread::sleep_for(std::chrono::seconds(10));
    }
}

This program counts, outputting a digit once ever ten seconds. To build the program, you will need to have cmake installed. To install it, use the following command at the terminal.

sudo apt-get install cmake -y

Once that is installed, from the project directory only a couple of commands are needed to compile the program.

cmake ./
make

The program is built, and a new executable named service-sample is now in the folder. If you run it, you will see the program counting. Press CTRL-C to terminate the program. Now we are going to make it into a service.

To make a service, you will need to copy the executable to a specific folder and also provide a file with the settings for the service. For the service settings, I’ve made a file named similarly to the executable. This isn’t a requirement. But it’s something that I’ve chosen to do for easier association. In a file named service-sample.service I’ve place the settings for the service. Many of these settings are technically optional; you only need to set many of them if your specific service is dependent on them. I’m showing more than is necessary for this service because I think some of these settings will be useful to you for other projects and wanted to provide an example.

[Unit]
Description=Counting service.
Wants=network.target
After=syslog.target network-online.target

[Service]
Type=simple
ExecStart=/usr/local/bin/service-sample
Restart=on-failure
RestartSec=10
KillMode=process

[Install]
WantedBy=multi-user.target

Here are what some of those settings mean. Note that I also describe some other settings that are not used, but available for you to consider. You can also see documentation for this file in the man pages.

[Unit] section

Documentation viewable with the following command

man systemd.unit

SettingMeaning
DescriptionA short text description of the service.
DocumentationURIs at which documentation for the service can be found
RequiresOther units that will be activated or deactivated in conjunction with this unit
WantsExpress weak dependencies. Will try to activate these dependencies first, but if those dependencies fail, this unit will be unaffected
ConflictsThis setting prevents this unit from running at the same time as a conflicting unit
After/BeforeUsed to express the order in which units are started.These settings contain a space delimited list of unit names.

[Install] Section

Documentation for the [Install] section is viewable at the following URL

SettingMeaning
RequiredBy / WantedByStarts the current service if any of the listed services are started. WantedBy is a weaker dependency than RequiredBy.
AlsoSpecifies services that are to be started or disabled along with this service

[Service] Section

Documentation for the [Service] section is viewable from the following URL.

man systemd.service

SettingMeaning
Type* simple – (default) starts the service immediately
* forking – the service is considered started once the process has forked and the parent has exited
* oneshot – similar to simple. Assumes service does its job and exits.
* notify – considers a service started when it sends a signal to systemd


ExecStartCommands with arguments to execute to start the service. Note that when Type=oneshot that multiple commands can be listed and executed sequentially.
ExecStopCommands to execute to stop the service
ExecReloadCommands to execute to trigger a configuration reload of the service
RestartWhen this option is enabled, the service will be restarted when the service process exits or is killed
RemainAfterExitWhen True, the service is considered active even after all of its processes have exited. Mostly used with Type=oneshot.

Deploying

Having the executable and this service file are not themselves enough. They must also be moved to an appropriate location and the service must be activated. I’ve placed the steps for doing this in a script. This script is intentionally a bit verbose to make it clear what the script is doing at any time. The first thing that this script does is terminate the service. While this might sound odd given that we haven’t installed the service yet, I do this to make the script rerunnable. If this is not the first time that the script has run, it is possible that the service process is running. To be safe, I terminate it.

Next, I copy files to their appropriate locations. For this simple service those files are one executable binary and the service settings. The executable is placed in /usr/local/bin. The service settings are copied to /etc/systemd/system/. On the service settings, the permissions on it are changed with chmod. This will ensure the owner has read/write permissions and the group has read permissions.

With the files for the service in place, we next ask systemd to reload the service definitions. I then probe the status for my service. While my service isn’t running, I should see it listed. I then enable the service (so that it will run on system startup) and then start the service (so that I don’t need to reboot to see it running now) and then probe the system status again.

echo "stopping service. Note that the service might not exists yet."
sudo systemctl stop service-sample

echo "--copying files to destination--"
sudo cp ./service-sample /usr/local/bin
sudo cp ./service-sample.service /etc/systemd/system/service-sample.service
echo "--setting permissiongs on file--"
sudo chmod 640 /etc/systemd/system/service-sample.service
echo "--reloading daemon and service definitions--"
sudo systemctl daemon-reload
echo "--probing service status--"
sudo systemctl status service-sample
echo "--enabling service--"
sudo systemctl enable service-sample
echo "--starting service service status--"
sudo systemctl start service-sample
echo "--probing service status--"
sudo systemctl status service-sample

After the service is installed and running, you can use the command for probing the status to see what it is up too. The last few lines that the service has outputted will display with the service information. Probe the service status at any time using this command.

sudo systemctl status service-sample

Sample output from the command follows.

pi@raspberrypi:~ $ sudo systemctl status service-sample
● service-sample.service - Counting service.
   Loaded: loaded (/etc/systemd/system/service-sample.service; enabled; vendor preset: enabled)
   Active: active (running) since Wed 2022-03-09 15:57:12 HST; 12min ago
 Main PID: 389 (service-sample)
    Tasks: 1 (limit: 4915)
   CGroup: /system.slice/service-sample.service
           └─389 /usr/local/bin/service-sample

Mar 09 16:09:29 raspberrypi service-sample[389]: This is cycle 361
Mar 09 16:09:31 raspberrypi service-sample[389]: This is cycle 362
Mar 09 16:09:33 raspberrypi service-sample[389]: This is cycle 363
Mar 09 16:09:35 raspberrypi service-sample[389]: This is cycle 364
Mar 09 16:09:37 raspberrypi service-sample[389]: This is cycle 365
Mar 09 16:09:39 raspberrypi service-sample[389]: This is cycle 366
Mar 09 16:09:41 raspberrypi service-sample[389]: This is cycle 367
Mar 09 16:09:43 raspberrypi service-sample[389]: This is cycle 368
Mar 09 16:09:45 raspberrypi service-sample[389]: This is cycle 369
Mar 09 16:09:47 raspberrypi service-sample[389]: This is cycle 370
pi@raspberrypi:~ $
Screenshot of service output. Note the green dot indicates the service is running.

The real test for the service comes after reboot. Once you have the service installed and running on your Jetson or your Pi, reboot it. After it boots up, probe the status again. If you see output, then congratulations, your service is running! Now that a service can be easily created and registered, I’m going to refine the code that I used for discovery of the Pis and Jetsons for another post.

Posts may contain products with affiliate links. When you make purchases using these links, we receive a small commission at no extra cost to you. Thank you for your support.

Twitter: @j2inet
Instagram: @j2inet
Facebook: j2inet
YouTube: j2inet
Telegram: j2inet

Installing Visual Studio Code on Raspberry Pi and NVIDIA Jetson

While it is possible to run Visual Studio Code on a Raspberry Pi or a NVIDIA Jetson, the process previously had a few challenges. With one method, a user could grab the code from Microsoft and compile it for their device. This was time consuming and required that a person perform some steps to be set up for development. An easier method involved acquiring a build from a third party source. The issue there is the user must trust the third party source. Now these are no longer issues because Microsoft provides ARM binaries for Visual Studio Code. The installation can be done on both devices with the same steps.

To install VS code, navigate to VisualStudio.com and click on the Learn More link on the Visual Studio Code box. From there, if you click on Other Platforms you will see all of the downloads that are available for Visual Studio Code. For the Jetson series of hardware you will want to download the ARM64 deb installer. For Raspberry Pi, if you are using the a 64-bit OS installation grab an ARM64 build. Otherwise grab the ARM build.

After the build has downloaded, open a terminal and navigate to the folder where you saved the ARM file. From the terminal type the following command.

sudo dpkg -i name_of_file.deb

An actual file name should replace name_of_file.deb. After a minute or two the installation completes. You can start VS Code from the command line by typing the command code and pressing Enter. You can also find it within your program files. Videos of the installation are available below.

Video of Installation for Raspberry Pi
Video of Installation for NVIDIA Jetson

Instagram LogoLinked In

USB Networking with the Pi


I stumbled upon a thread in the Raspberry Pi forums about enabling networking on the USB-C port on the Raspberry Pi 4. At first glance I thought this would be about networking with a USB-C to Ethernet dongle. It’s not. It is about configuring the Raspberry Pi to present as a network adapter when connected to another device with a USB-C cable. While this might sounds like a rather pedestrian capability at first it is something that has a lot of potential. I see using this when I want to do development on the Pi and I’m in an environment in which a network isn’t available (such as when I’m on a long plane trip) or when there’s a network but I just can’t connect the Pi to it (such as on a corporate network).  Additionally since I expect my Android tablet to loose it’s ability to run Linux this provides a portable dev environment in which I can put the capabilities that I need.

The basic steps in what to do can be found on this thread posted by the user thagrol.  The steps are simple. I am re-posting the steps here.

  1. Open /boot/config.txt and add the line
    dtoverlay=dwc2
  2. Open /boot/cmdline.txt and append the following
    modules-load=dwc2,g_ether
  3. Reboot the Pi

After doing these steps when the Pi is connected to a computer the computer will see it as a networking device. If you list the network adapters on the Pi you will see a new network adapter with the name usb0.

thagrol notes that the mac address generated for both sides of this virtual network adapter will be different every time that the service is started. This can cause issues when using DHCP.   He provides a solution in the form of a script that will generate a set of MAC addresses based on a unique identifier in the Raspberry Pi.  After cloning the GIT repository for the script run it as root.

sudo ./set_id.py --test

PiMakeMAC

Once the addresses are generated they can be added to /boot/cmdline.txt. The addition will follow this format.

g_ether.host_addr=HOST_MAC_ADDRESS g_ether.dev_addr=DEVICE_MAC_ADDRESS

In my case  the additional entry will be

g_ether.host_addr=02:00:27:75:0a:a5 g_ether.dev_addr=06:00:27:75:0a:a5

I’m going to set a static IP on my pi. To do this the file /etc/dhcpcd.conf must be edited. Scrolling to the bottom of the file commented out is a demonstration of how to set a static address.

piDHCPSettings

For the USB interface I’e added two lines to the bottom of this file

interface usb0
static ip_address=10.11.12.13/24

After rebooting the Pi now shows this address for the USB network interface. I’m connecting to my pi with a Windows machine. After physically connecting the device a static IP address was set on the Windows side.

WindowsIPSettings

To ensure that things are working I started off trying to ping the device and received positive responses.

C:\Users\joel>ping 10.11.12.14

Pinging 10.11.12.14 with 32 bytes of data:
Reply from 10.11.12.14: bytes=32 time<1ms TTL=128

To try something a bit more functional I tried opening a folder on the Pi using Visual Studio Code running from my computer. Success!

vsRemote

In theory this could work with a phone or other mobile device. The restricting factor is whether someone’s mobile device allows changing settings on external network adapters. Many will allow communication over such adapters, but a much smaller set will allow you to change the settings.

20200507_163400.jpg
Editing a C# file on the Pi over SSH from a Chromebook

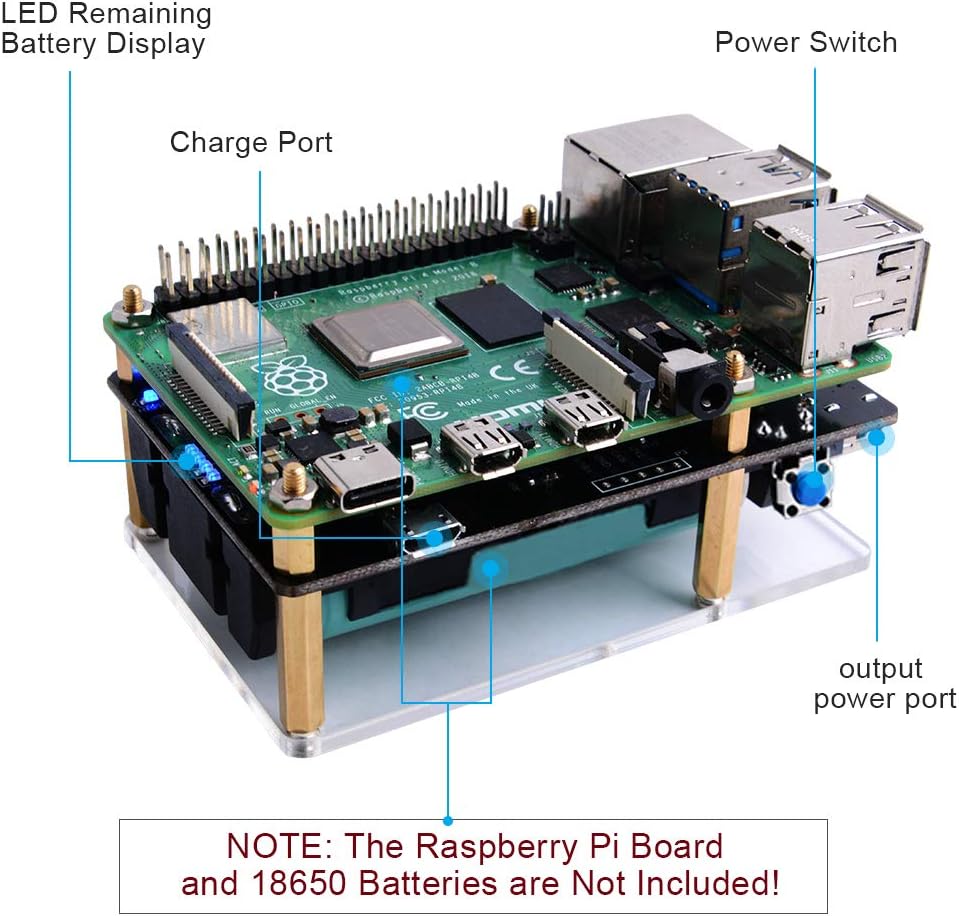
Something to note though, when using this solution on a mobile device there is a significant power drain, which makes sense; the mobile device’s battery is now working for two. There are a few ways to mitigate this but they break down to either batteries or external power. For batteries someone could add a battery to the Pi itself. There are a number of solutions that work well. I prefer PiJuice since it comes with some other options on invoking behaviours based power levels or time. Unfortunately at the time that I am writing this (during the 2020 shelter-at-home directive) this specific unit looks to be unavailable.

There are many other Pi batteries available. If you shop for one make sure that you purchase one that provides power through the headers or through pogo pens. Some provide power through the USB-C connector, which you need to keep available to act as a network connection.  Also give consideration to the connector used to charge the unit you select. You might prefer micro-USB or USB-C.  I would suggest not overclocking your Pi if it is running off of a battery. Some batteries might not be compatible with some types of cases. Ex: there is a Pi case that is essentially a heatsink that wraps the entire device. That would not work with with a power solution that uses pogo pens.

twitterLogofacebookLogo  youtubeLogo


Raspberry Pi 4


GeeekPi Raspbery Pi 4 UPS Power Supply


4PK 18650 Battery

NVIDIA Jetson Development Environment Setup

In previous posts on the NVIDIA Jetson posts I’ve talked about getting the device setup and some additional accessories that you may want to have. The OS image for the NVIDIA Jetson already contains a compiler and other development software. Technically someone can start developing with the OS image as it is when it ships.  But it is not desirable to develop this way.

There may be some things that you prefer to do on your primary computer and you’d like to be able to control the Jetson from your primary machine. The OS image for the Jetson already has SSH enabled. If you are using a Windows machine and net an SSH client I suggest using PuTTY for Windows. It’s a great SSH client and also works as a telnet or serial console when needed. It’s available from https://www.putty.org/.

When Putty is opened by default it is ready to connect to a device over SSH. You only need to enter the IP address to start the connection. Once connected enter your account name and password and you’ll have an active terminal available. For copying files over SSHFTP I use WinSCP (available from https://winscp.net/).

For development on the device I’ve chose Visual Studio Code as my IDE. Yes, it runs on ARMs too.  There are a number of guides available on how to get Visual Studio Code recompiled and installed for an ARMS system. The one that I used is available from code.headmelted.com. In a nutshell I followed two steps; I entered a super user session with the command

su -s

Then I ran the following (which downloads a script from the head melted site and runs it).

sudo apt-key adv --keyserver keyserver.ubuntu.com --recv-keys 0CC3FD642696BFC8^C
. <( wget -O - https://code.headmelted.com/installers/apt.sh )

The script only takes a few moments to run. After it’s done you are ready to start development either directly on the board or from another machine.

To make sure that everything works let’s make our first program with the Jetson Nano. This is a “Hello World” program; it is not going to do anything substantial. Let’s also use make to compile the program. make will take care of seeing what needs to be built and issuing the necessary commands. Here it’s use is going to be trivial. But I think starting with simple use of it will give an opportunity for those that are new to it to get oriented with it. Type the following code and save it as helloworld.cu

#include 

__global__ void cuda_hello()
{
    printf("Hello World from GPU!\n");
}

using namespace std;

int main()
{
	cout << "Hello world!" << endl;
	cuda_hello<<>>();
	return 0;
}

We also need to make a new file named makefile. The following couple of lines will say that if there is no file named helloworld (or if the file is out of date based on the date stamp on helloworld.cu) the to compile it using the command /usr/local/cuda/bin/nvcc helloworld.cu -o helloworld

helloworld: helloworld.cu
   usr/local/cuda/bin/nvcc helloworld.cu -o helloworld

Note that there should be a tab on the second line, not a space.
Save this in the same folder as helloworld.cs.

Type make and press enter to build the program. If you type it again nothing will happen. That’s because make sees that the source file hasn’t changed since the executable was build.

Now type ./helloworld and see the program run.

Congratulations, you have a working build environment. Now that we can compile code it’s time to move to something less trivial. In an upcoming post I’ll talk about what CUDA is and how you can use it for calculations with high parallelism.

NVIDIA Jetson Nano Shopping List

Jetson Nano Packaging

I had made a video posted to YouTube about the Jetson Nano and the additional items that I purchased for it. This is a complete list of those items and some extras (such as memory cards of some other sizes).


General Items

Memory Cards


Items I Found Helpful

Unboxing and Setting Up the NVIDIA Jetson Nano

I pre-ordered the NVIDIA Jetson Nano and had the opportunity to have my first experiences with it this week. For those that are considering the Nano I give you the gift of my hindsight so that you can have a smoother experience when you get started. My experience wasn’t bad by any measure. But there were some accessories that I would have ordered at the same time as the Jetson so that I would have everything that I needed at the start. I’ve also made a YouTube video covering this same information. You can view it here.

How does the Nano Compare to Other Jetson Devices?

The Jetson line of devices from NVIDIA can be compared across several dimensions. But where the Jetson Nano stands out is the price. It is priced at about 100 USD making it affordable to hobbiest. Compare this to the Jetson TK1 which is available for about 500 USD or the Jetson Xaviar available for about 1,200 USD. Another dimension of interest is the number of CUDA cores that the units have. CUDA cores are hardware units used for parallel execution.

  • TK1 – 192 CUDA Cores
  • TK2 – 256 CUDA cores
  • Nano – 128 CUDA Cores
  • Xavier – 512 CUDA Cores

In addition to the cores the other Jetson kits have support for other interfaces, such as SATA for adding hard drives or a CAN bus for interfacing with automotive systems. For someone getting started with experimentation the Jetson Nano is a good start.

What is In the Box?

Not much. You’ll find the unit, a small paper with the URL of the getting started page, and a cardboard cutout used for supporting the card on the case.

What Else Do I Need

  • SD Card
  • Power Supply
  • Keyboard
  • Mouse
  • Monitor (HDMI or Display Port)
  • 40mmx40mm Cooling Fan (optional)
  • WebCam (optional)
  • WiFi adapter or Ethernet cable to router

Most of the things on that list you might already have. For an SD card get one at least 8 gigs or larger.

Power Supply

A power supply! It uses a 5 volt power supply like what is used in a phone. Well, kind of. Don’t expect for any of your 5V power supplies to work. I found the hard way that many power supplies don’t deliver the amount of current that is needed. Even if the power supply is capable a USB cable might not allow the needed amount of current to pass. If this happens the device will just cut off. There’s no warning, no error message, nothing. It just cuts off. I only came to realize what was going on after I used a USB power meter on the device. I used a power meter for USB-A, but the board already has contacts for using a USB-C port. Depending on when you get your board it may have a USB-C port on it (possibly, speculatively).

Web Cam

A Raspberry Pi camera will work. But I used a Microsoft LifeCam. There are a number of off-the-shelf webcams that work. You’ll only need a camera if you plan on performing visual processing. If your going to be processing something non-visual or if your visual data is coming from a stream (file, network location) then of course this won’t be necessary.

WiFi

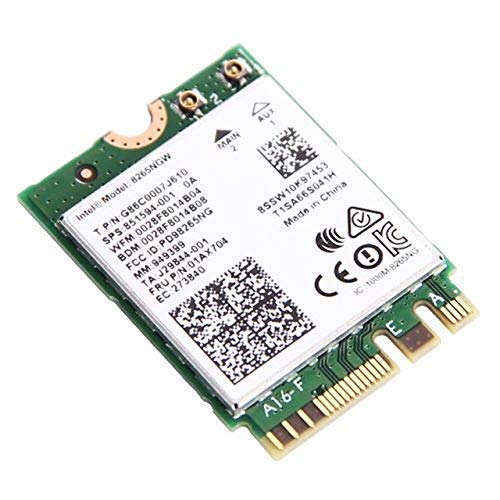
You have two options for WiFi. One option is a USB WiFi dongle. There are a number of them that are compatible with Linux that will also work here. I am using  the Edimax EW-7811UN. After being connected to one of the USB ports it just works. Another solution is to install a WiFi card into the M.2 adapter. It might not be apparent at first, but there is a M.2 slot on the case. I chose to use this solution. Like the USB solution there’s not much to be done here; inserting the WiFi adapter into the slot, securing it is most of the work. Note that you’ll also need to connect antennas to the wireless card.

Operating System Image

The instructions for writing a new operating system image are almost identical to that of a Raspberry Pi. The difference is the URL from which the OS image is downloaded. Otherwise you download an image, write it to an SD card, and insert it into the Nano. Everything else will be done on first boot. You’ll want to have a keyboard connected to the device so that you can respond to prompts. When everything is done you’ll have an ARMs build of Ubuntu installed.

For writing the OS image I used balenaEtcher. It is available for OS X and Linux. The usage is simple; select an OS image, select a target drive/memory device, and then let it start writing to the card.  The process takes a few minutes. But once it is done put the SD card in the Jetson Nano’s memory card slot.

Case Options

A case may be one of the last things that you need. But if you seriously have interest in having the Jetson Nano I suggest ordering the case at the start. There are no off-the-shelf cases available for purchase for the Nano. But there are a few 3D printable plans for the Jetson Nano. I’ve come across three and have settled on one.

First Place: Nano Mesh

NanoMesh case Image
NanoMesh 3D Printable Case

The case is a bit thick, but it isn’t lacking for ventilation. The case height accommodates a fan. While the design doesn’t include any holes for mounting antennas for WiFi drilling them is easy enough.

Second Place: Nano Box

NanoBox
Nanobox Case for nVidia Jetson Nano

The NanoBox will envelope the Jetson leaving the heat sink almost flush with the case. I’d suggest this one if you plan don’t plan to use a fan on the Jetson.  If you ever change your mind and decide that you want to have a fan it can be added. But it will be on the outside of the case.

Third Place: Nano-Pac

Nano-Pac 3D printable case
Nano-Pac case

There’s not much to say about this case. It fully envelopes the Jetson Nano. But I’ve got questions about the cooling effectiveness of this case.

It’s Assembled and Boots Up. Now What?

Once the Jetson is up and running the next thing to do is to setup a development environment. There is a lot of overlap between targeting the Jetson series and targeting a PC that has an NVIDIA GPU. What I write on this will be applicable to either except for when I state otherwise.