I pre-ordered the NVIDIA Jetson Nano and had the opportunity to have my first experiences with it this week. For those that are considering the Nano I give you the gift of my hindsight so that you can have a smoother experience when you get started. My experience wasn’t bad by any measure. But there were some accessories that I would have ordered at the same time as the Jetson so that I would have everything that I needed at the start. I’ve also made a YouTube video covering this same information. You can view it here.
How does the Nano Compare to Other Jetson Devices?
The Jetson line of devices from NVIDIA can be compared across several dimensions. But where the Jetson Nano stands out is the price. It is priced at about 100 USD making it affordable to hobbiest. Compare this to the Jetson TK1 which is available for about 500 USD or the Jetson Xaviar available for about 1,200 USD. Another dimension of interest is the number of CUDA cores that the units have. CUDA cores are hardware units used for parallel execution.
- TK1 – 192 CUDA Cores
- TK2 – 256 CUDA cores
- Nano – 128 CUDA Cores
- Xavier – 512 CUDA Cores
In addition to the cores the other Jetson kits have support for other interfaces, such as SATA for adding hard drives or a CAN bus for interfacing with automotive systems. For someone getting started with experimentation the Jetson Nano is a good start.
What is In the Box?
Not much. You’ll find the unit, a small paper with the URL of the getting started page, and a cardboard cutout used for supporting the card on the case.
What Else Do I Need
- SD Card
- Power Supply
- Keyboard
- Mouse
- Monitor (HDMI or Display Port)
- 40mmx40mm Cooling Fan (optional)
- WebCam (optional)
- WiFi adapter or Ethernet cable to router
Most of the things on that list you might already have. For an SD card get one at least 8 gigs or larger.
Power Supply
A power supply! It uses a 5 volt power supply like what is used in a phone. Well, kind of. Don’t expect for any of your 5V power supplies to work. I found the hard way that many power supplies don’t deliver the amount of current that is needed. Even if the power supply is capable a USB cable might not allow the needed amount of current to pass. If this happens the device will just cut off. There’s no warning, no error message, nothing. It just cuts off. I only came to realize what was going on after I used a USB power meter on the device. I used a power meter for USB-A, but the board already has contacts for using a USB-C port. Depending on when you get your board it may have a USB-C port on it (possibly, speculatively).
Web Cam
A Raspberry Pi camera will work. But I used a Microsoft LifeCam. There are a number of off-the-shelf webcams that work. You’ll only need a camera if you plan on performing visual processing. If your going to be processing something non-visual or if your visual data is coming from a stream (file, network location) then of course this won’t be necessary.
WiFi
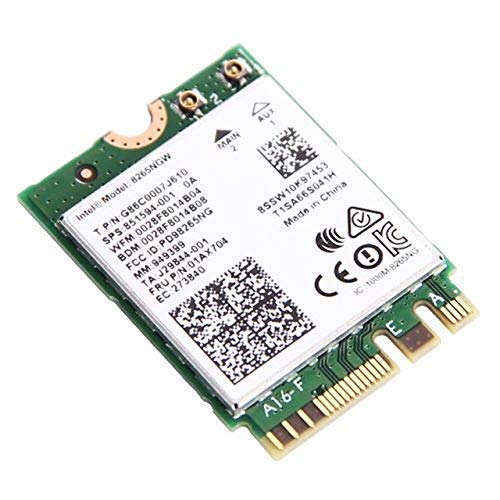
You have two options for WiFi. One option is a USB WiFi dongle. There are a number of them that are compatible with Linux that will also work here. I am using the Edimax EW-7811UN. After being connected to one of the USB ports it just works. Another solution is to install a WiFi card into the M.2 adapter. It might not be apparent at first, but there is a M.2 slot on the case. I chose to use this solution. Like the USB solution there’s not much to be done here; inserting the WiFi adapter into the slot, securing it is most of the work. Note that you’ll also need to connect antennas to the wireless card.
Operating System Image
The instructions for writing a new operating system image are almost identical to that of a Raspberry Pi. The difference is the URL from which the OS image is downloaded. Otherwise you download an image, write it to an SD card, and insert it into the Nano. Everything else will be done on first boot. You’ll want to have a keyboard connected to the device so that you can respond to prompts. When everything is done you’ll have an ARMs build of Ubuntu installed.
For writing the OS image I used balenaEtcher. It is available for OS X and Linux. The usage is simple; select an OS image, select a target drive/memory device, and then let it start writing to the card. The process takes a few minutes. But once it is done put the SD card in the Jetson Nano’s memory card slot.
Case Options
A case may be one of the last things that you need. But if you seriously have interest in having the Jetson Nano I suggest ordering the case at the start. There are no off-the-shelf cases available for purchase for the Nano. But there are a few 3D printable plans for the Jetson Nano. I’ve come across three and have settled on one.
First Place: Nano Mesh

The case is a bit thick, but it isn’t lacking for ventilation. The case height accommodates a fan. While the design doesn’t include any holes for mounting antennas for WiFi drilling them is easy enough.
Second Place: Nano Box

The NanoBox will envelope the Jetson leaving the heat sink almost flush with the case. I’d suggest this one if you plan don’t plan to use a fan on the Jetson. If you ever change your mind and decide that you want to have a fan it can be added. But it will be on the outside of the case.
Third Place: Nano-Pac

There’s not much to say about this case. It fully envelopes the Jetson Nano. But I’ve got questions about the cooling effectiveness of this case.
It’s Assembled and Boots Up. Now What?
Once the Jetson is up and running the next thing to do is to setup a development environment. There is a lot of overlap between targeting the Jetson series and targeting a PC that has an NVIDIA GPU. What I write on this will be applicable to either except for when I state otherwise.

you have a ctrl-c in you gpg key