Under many cases, one can easily host a website from home. There are a few technical requirements that must be satisfied. But provided that they can be satisfied, making a site available on the Internet from one’s home connection isn’t hard. That said, there are some reasons one might not want to do this, such as exposing their home IP Address, or any security flaws in their at-home web server making other devices on their network vulnerable if the web server has a security flaw. There are a few ways that this can be mitigated, including ensuring that the latest security updates are installed and not exposing unnecessary services to the Internet.
Before getting started, you will want to know whether your IP address is public or behind a network address translator. This is like the difference in having your own phone number or being in a phone pool in which all of the phones are identified by the same phone number. The easiest way to figure this out is to perform a Google Search on “What is my IP address” and compare that address to the one that is reported by your router. If those addresses are the same, congrats! You’ve got a public address. If they are not the same, then your network is behind a shared IP address. Solutions for hosting in this scenario involve having traffic routed from another computer that has a public address to one’s home address. That’s out of scope of what I am trying to do here.
If you have a public IP address, you will need access to your router settings. By default, routers will not direct incoming requests to devices on your network unless they are configured to do so. The exact interface used for applying these settings are manufacturer dependent. I’ll be showing the process on an ASUS router. If you are using a different router (or even another ASUS router) the interface will look different, but the concept is the same.
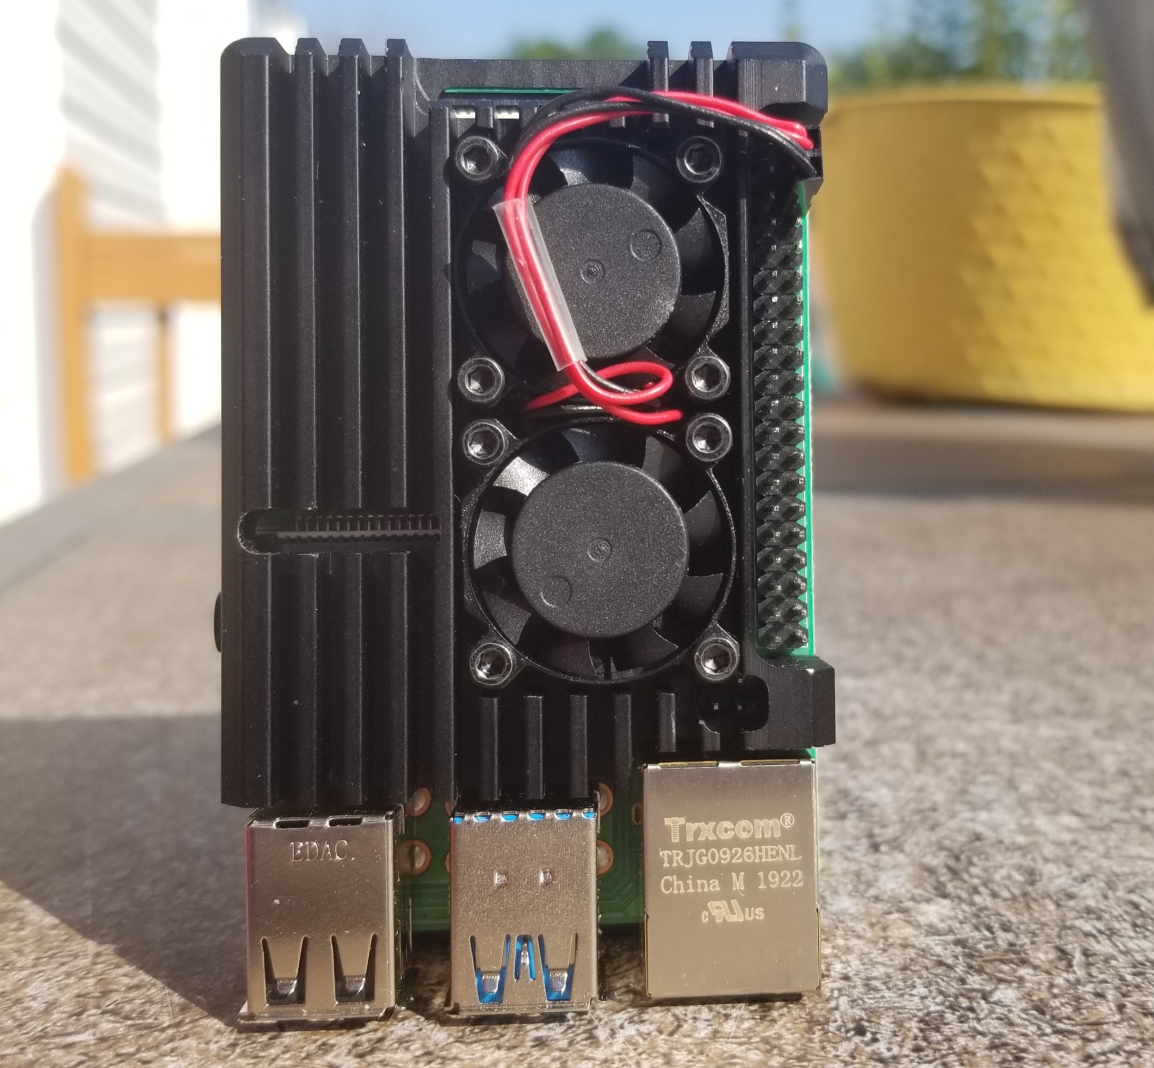
For a web server, I’m going to use a Raspberry Pi. The Pi doesn’t use a lot of energy or space. I can leave it on 24-7 in a place that is out of the way. Many of the same solutions for making web applications on the desktop also run on the Raspberry Pi. I’ll be using .Net Core. But someone could also use Node or a number of other solutions. I already have the .Net Core framework and SDK installed on my Raspberry Pi. I’ll just create a default website, as I’m not concerned with the content in it for not. To do this, I made a new folder that will contain the web site and used the following command.
dotnet new webA few moments later, the Raspberry Pi has a “Hello World!” website build. To run it, use the following command.
dotnet runThe console will output the URL to the site. It will look something like http://localhost:5000. If you open a browser on the Pi to this URL you should see the text “Hello World” render. If you use the Pi’s IP address and try this from another computer on the network, it is going to fail. But why?
By default, the website is only binding to the loopback IP address (127.0.0.1 or ::1). The site is only visible from within the computer. To change this, we could either have the site bind to a specific IP address (the Pi could have several IP addresses) or we could tell the site to bind to all network adapters on the computer. For .Net Core, we can change the address and port that the site binds to by editing Properties/launchSettings.json. Close to the bottom of the file is a setting named applicationUrl. It has a list of IP address/port combinations separated by semicolons (;). Add to this list the value http://*:5000 (feel free to use a different port number).
    "staticwebsite": {
      "commandName": "Project",
      "dotnetRunMessages": "true",
      "launchBrowser": true,
      "applicationUrl": "https://localhost:5001;http://localhost:5000;http://*:5000",
      "environmentVariables": {
        "ASPNETCORE_ENVIRONMENT": "Development"
      }
     }
Now if you return to the other computer and navigate, in your browser, to http://<ip address>:5000 you will see the text “Hello World. The site is not visible to other computers on your network. But what about other computers on the Internet? This is where you will need to look at your router settings.
Your home router’s ip address will usually be the same as what the computer reports as its gateway address. Depending on your operating system, you can see your computer’s network settings by opening a terminal and using the command ipconfig (Windows) or by using the command ip r (linux). Example output of both commands follow.
PS C:\Users\SomeUser> ipconfig

Windows IP Configuration


Ethernet adapter Ethernet:

   Media State . . . . . . . . . . . : Media disconnected
   Connection-specific DNS Suffix  . :

Ethernet adapter Ethernet 2:

   Connection-specific DNS Suffix  . :
   Link-local IPv6 Address . . . . . : fe80::e055:c0d4:65ac:49d1%3
   IPv4 Address. . . . . . . . . . . : 192.168.50.79
   Subnet Mask . . . . . . . . . . . : 255.255.255.0
   Default Gateway . . . . . . . . . : 192.168.50.1
pi@raspberrypi:~ $ ip r
default via 192.168.50.1 dev wlan0 proto dhcp src 192.168.50.50 metric 304
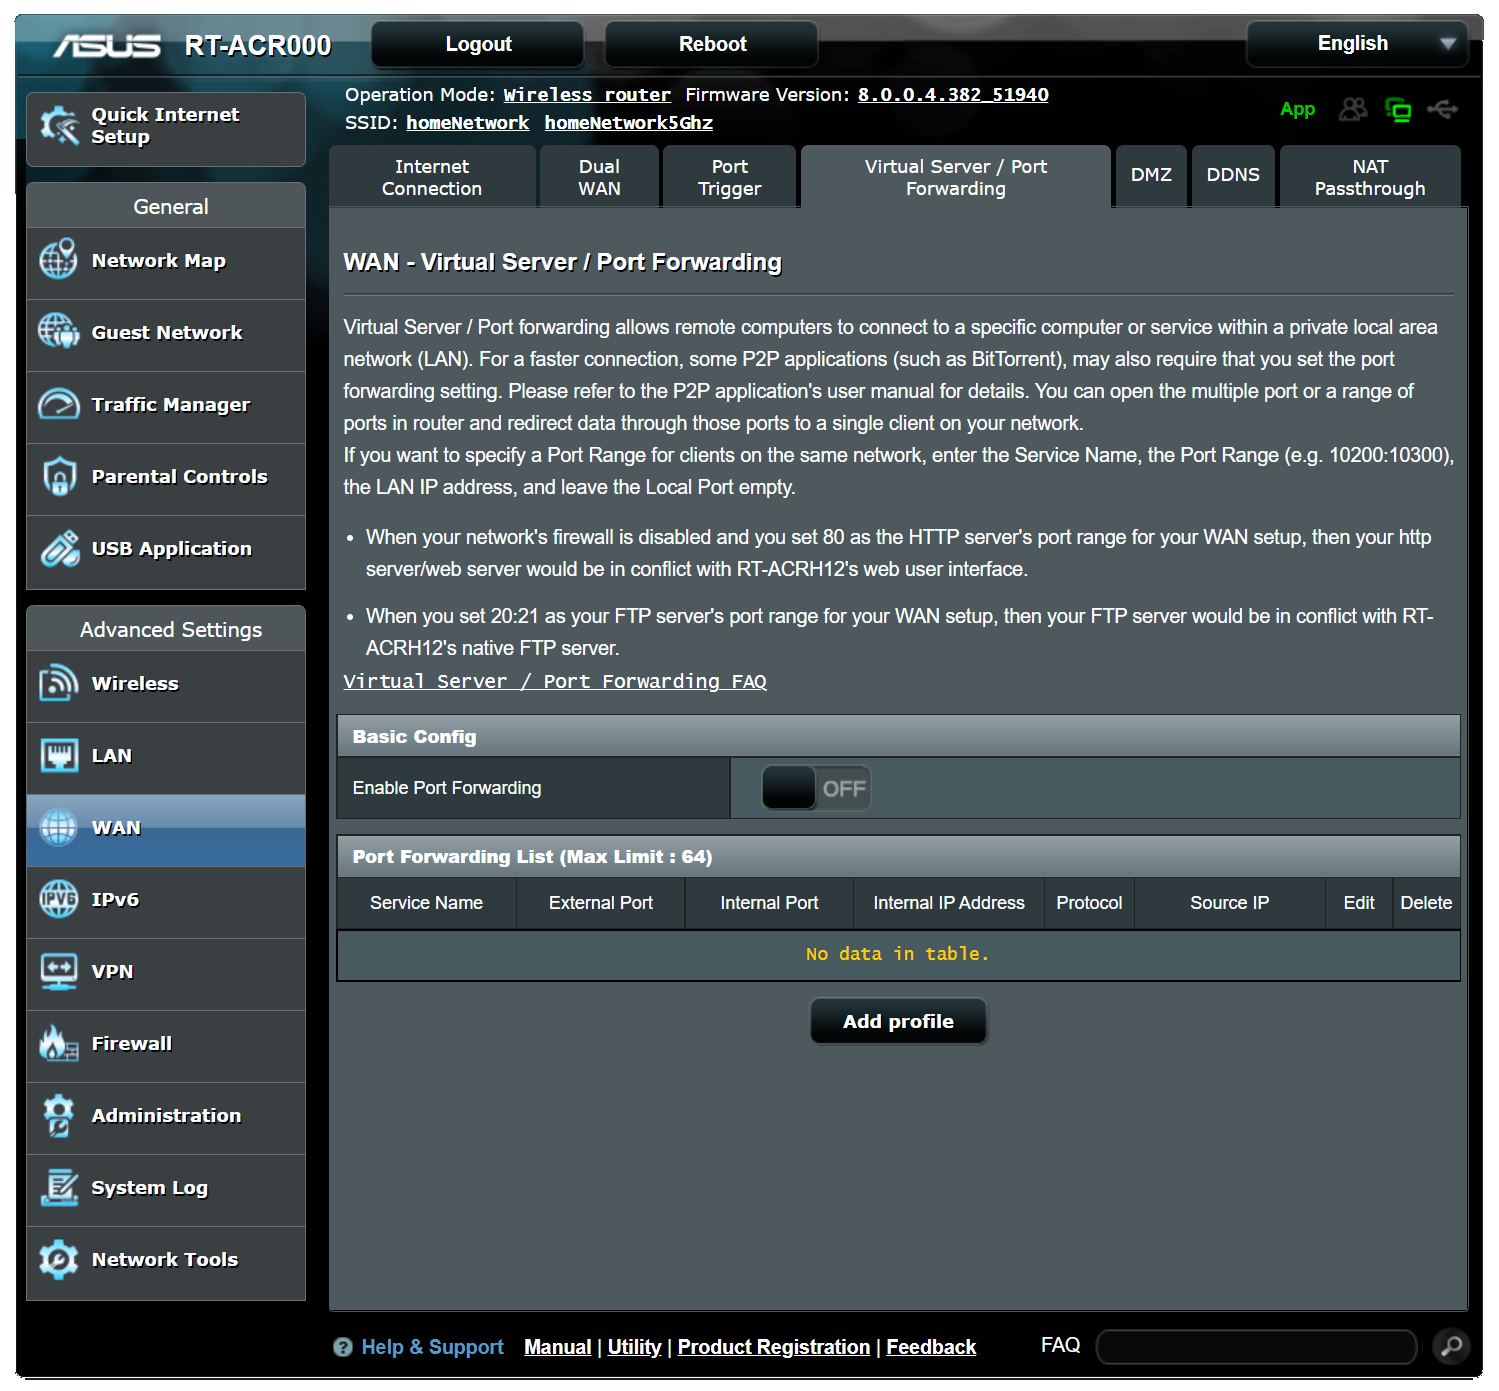
192.168.50.0/24 dev wlan0 proto dhcp scope link src 192.168.50.50 metric 304Type this IP address into your browser. You will need to know the user ID and password to your router, as it will likely ask you for them. Within your router, you will want to find the port forwarding settings. On my Asus Router, I can get to this page by selecting “Wan” and then selecting the “Virtual Server/Port Forwarding” tab. My router gives me a warning that ports 80 (usually used for HTTP) and ports 20 and 21 (used for FTP) are already used by the router for some services that it provides. I don’t actually have these services turned on, thus I wouldn’t run into conflicts. Nevertheless, I will use a different port.
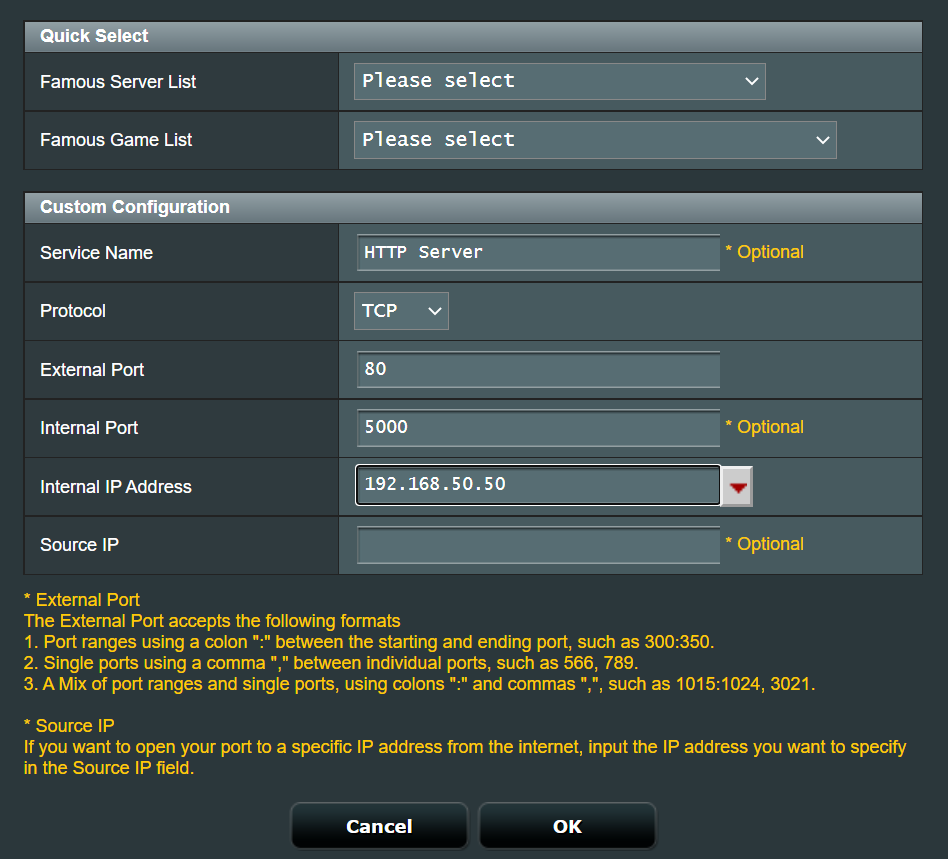
Let’s say that I want the world to access my site through port 8081. You may recall that my Pi was hosting its site on port 5000. It is not necessary for the ports to be the same. In my interface there is a switch to enable port forwarding.Clicking on “Add Profile” will create a new entry. For this entry, I need to specify this forwarding is for TCP traffic coming in on external port 80. That traffic should be forwarded to port 5000 on the address of my Raspberry Pi, which is 192.168.50.50.
After saving these settings, I turned off WiFi on my phone (to ensure it was not on the same network) and typed my home network’s IP address into my browser. I see the “Hello World” page. Great! But there is an issue here. I’m going to find it hard to remember my IP address. Also, my IP address changes every so often. Even if I keep track of it, it could change without notice. The solution to this is to use a Dynamic DNS. The router I’m using comes with this service built in. There are also options for networks where the router does not have this option.
On this Asus router, the option is under the Wan settings under a tab named DDNS. To enable the feature, I can set the option Enable the DDNS Client to Yes and select which DDNS service I want to use. If I use the default, the only setting I need to enter is the name that will be used as a portion of the domain.
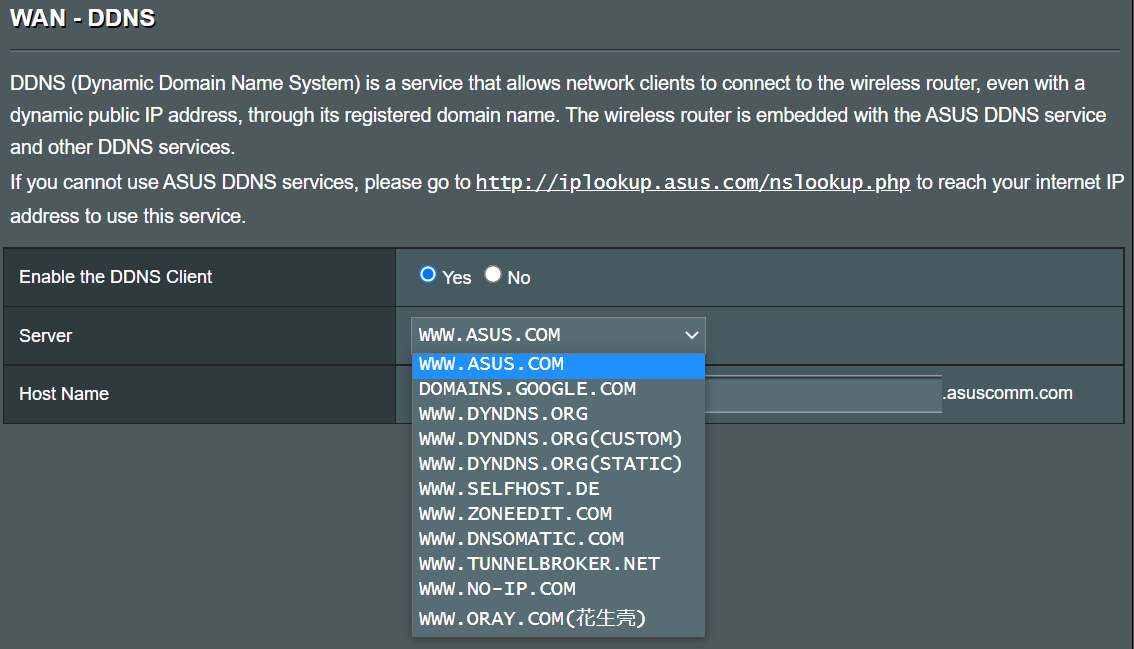
For the other services, you will require additional information. I’ve used NO-IP before. I’ll use that one. Before using this service, you will want to visit no-ip.com and create a free account. After signing in, you can set your DDNS host names. You can have up to three domains setup on the free account. When setting this up, note that the IPv4 address defaults to that of the device from which this hostname is created.

The actual domain used will be the concatenation of what is entered in the Hostname setting, followed by a period, followed by the domain selected from the drop down. Once you’ve saved this information, return to your router DDNS settings. Enter the complete host name, your NO-IP username, and password. After selecting “Apply” you should see a notification that the settings were successfully applied. Now, when you, or anyone else enter that domain name, your site will come up.
If your router doesn’t support a DDNS client, then you can build a DDNS updater on your Raspberry Pi. On your Pi, make a folder for the Dynamic Update Clienc (DUC). Enter that folder from a terminal and download and unpackage and build the DUC with the following commands.
wget https://www.noip.com/client/linux/noip-duc-linux.tar.gz
tar vzxf noip-duc-linux.tar.gz
cd noip-2.1.9-1/
sudo make
sudo make install
The last command, sudo make install, will ask for your NO-IP account information. You will also be asked for an update interval (in minutes). Accept the default of 30 minutes. From hereon, the Raspberry Pi will update the DDNS.
Twitter: @j2inet
Instagram: @j2inet
Facebook: j2inet
YouTube: j2inet
Posts may contain products with affiliate links. When you make purchases using these links, we receive a small commission at no extra cost to you. Thank you for your support.


2 thoughts on “Hosting a Website from Home on the Pi”