TypeScript in Tizen

I was writing a program to run on my television and encountered a scenario that I’ve encountered many times before; an HTML enabled device supports a JavaScript standard that is older than the one that I would like to use. The easiest workaround for this is to use a tool that will compile from a more recent version of JavaScript (or something similar) back to the version that is supported by the hardware. This is something I’ve done when developing for BrightSign and other devices.

For targeting the Tizen based Television I decided that I would use TypeScript to accomplish this; in addition to getting access to some more recent features that can be found in JavaScript there’s we also get type checking.

A bit of work was required to get this working though. On my first attempt I tried includint the TypeScript files in the same folder as the project. This doesn’t work;when the project is being compiled the compiler will try to take these files and package them in the solution. This isn’t something that we want to happen. It’s necessary to have these files in a folder that is outside of the project folder to prevent this from happening. I moved the files and made a TypeScript configuration file that specified the destination to which I wanted the resulting JavaScript files moved.

{
  "compilerOptions": {
    /* Basic Options */
    "target": "es2015",
    "module": "commonjs",  
    "sourceMap": false,   
    "outDir": "../tizenWorkspace/projectName/js"
    "strict": true,                           
    "noImplicitAny": true,                 
  }
}

This almost works. The next problem encountered is that when there is a reference to anything on the tizen object the compiler will complain about it net having been declared. The tizen object, not being a web standard object, is not something that is recognized by the compiler. There are two ways to handle this project. A work around would be to declare the tizen object as being of type any. With this declaration the compiler will just ignore what ever we do with the object and not complain.

I made a TypeScript definition file named tizen.d.ts in which to place my definitions. TypeScript already has an understanding of the interface provided by the Window object. To augment this I declare another interface that will be merged with the understanding that TypeScript has and added a definition for the tizen member there.

declare	interface Window {  tizen:any }

That works, but that’s also eliminating some of the type safety features that that TypeScript has to offer. Instead of working around the problem I wanted to address it. I wanted to provide the type definitions for the Tizen object.

There’s a project called Definitely Typed in which contributors make TypeScript definitions that can be downloaded and shared to other developers that are targeting the same environment. At first glance there appears to be existing entries for targeting Tizen within the collection. But upon further inspection it turns out that the definitions that are there (at the time of the writing of this post) are for targeting a cross development tool that also supports Tizen. that’s not what I needed. Instead of relying on community provided definitions I’ll have to make my own. When I’m done though I may have a definition file that could be shared through Definitely Typed. Since that repository is constantly being updated I would encourage seeing what it has to offer before using the code that I provide here.

declare	interface Window {  tizen:ApplicationManager}

This is when I start my descent down the rabbit hole. To define the ApplicationManager interface that is implemented by the tizen object there are a number of other interfaces that must be defined. Those interfaces have dependencies on other interfaces.

The interfaces for the various objects are documented and can be found on a Tizen.org page. Browsing through it there are some types mentioned that ultimately are strings of some type of another. Within TypeScript we can make a declaration that is similar to a typedef for equating some custom type to another.

type ApplicationId = string;
type ApplicationContextId = string;
type PackageId = string;

There is also a frequently used callback type for successes and errors of callbacks. The links to the documentation for the functions’ call signatures are broken taking me to a 404 page. I was more generic with defining these in my type definitions until I can get the specifics of the actual accepted call signatures.

type SuccessCallback = (...args: any[]) => void;
type ErrorCallback = (...args: any[]) => void;

The rest of the definitions are interfaces and follow the same patterns. I’m showing a few of the interfaces closer to the root of the definitions.

declare	interface Window {  tizen:ApplicationManager}
declare var tizen:tizenInterface;

interface tizenInterface {
    application:ApplicationManager;
}

interface ApplicationManager { 
    getCurrentApplication():Application;

    kill(contextId:string,
              successCallback:SuccessCallback,
              errorCallback:ErrorCallback):void ;

    launch( id:string, //ApplicationId
                successCallback:SuccessCallback,
                errorCallback:ErrorCallback):void;
    launchAppControl(appControl:ApplicationControl,
                        id?:ApplicationId, //ApplicationId
                          successCallback?:SuccessCallback,
                          errorCallback?:ErrorCallback,
                          replyCallback?:ApplicationControlDataArrayReplyCallback):void ;
     findAppControl(appControl:ApplicationControl,
                        successCallback:FindAppControlSuccessCallback,
                        errorCallback:ErrorCallback):void;

    getAppsContext(successCallback:ApplicationContextArraySuccessCallback,
                        errorCallback:ErrorCallback):void ;
    getAppContext(contextId:string):ApplicationContext;
    getAppsInfo(successCallback:ApplicationInformationArraySuccessCallback,
                     errorCallback?:ErrorCallback):void;
    getAppInfo(id?:ApplicationId ):ApplicationInformation;
    getAppCerts(id?:ApplicationId ):Array;
    getAppSharedURI(id?:ApplicationId ):string;
    getAppMetaData(id?:ApplicationId ):Array;
    addAppInfoEventListener(eventCallback:ApplicationInformationEventCallback):number;
    removeAppInfoEventListener( watchId:number):void ;    
}

There are a lot more objects that could be defined for Tizen. If you’ve come along this article checkout the DefinitelyType archives first. If you don’t find Tizen devinitions there you can download the version of the video that I have from here.

PWAs Available in the Galaxy Store

The Galaxy Store for Samsung Devices now supports Progressive Web Apps; your progressive applications can be listed there.  In the Galaxy Store App if you navigate to My Apps->Web Apps you can see the PWAs that are presently available.  But why target PWAs?

SamsungPWA

Progress web applications have a advantages over native apps. They can run on a variety of operating systems. PWAs tend to be smaller and the installation process is simple. Updates to a PWA can be deployed much faster than a conventional application since updates don’t need to go through an application store. Because of the sandbox in which most browsers run PWA applications have much lower potential for exploiting someone’s computing device.

A license agreement is a basic requirement. You need to own the app and give Samsung permission to have the app listed in their store. While this is a work in progress it is something that is available today; though presently the process is of enrolling an application is manual. You would need to e-mail pwasupport{-at-}samsung.com (replace the {-at-} with an @. I don’t list e-mail address plainly as not to feed to spam bots). Someone will review your web application and assist with getting the application listed.

What is .Net

.NetFramework

I have some .Net related content that I plan to post and thought that I would revisit this question.

It’s a question I find interesting in that the answer has changed slightly over the year. In the earliest years it was a branding for technologies that were not necessarily related to each other; Windows .NET Server and Windows .NET Messenger are two products that had the branding at one point. But let’s not walk down memory lane and jump straight into the answer.

.NET is still a branding but the technologies with the branding are related to each other. Microsoft uses the branding on their Common Language Runtime (CLR) products. That answer only has kicked the can down the road. What is the CLR?

The CLR is a virtual machine component. Executables targeting the CLR don’t necessarily contain any code that is native to the processor on which they are running (though it may contain native code, but let’s ignore that for a moment). CLR binaries can be distributed with no processor dependent executable code within them. At runtime when the code is being executed it is converted to machine code as needed. Because of this the same program can be run on machines that have different processor architectures. The computer on which a program is running needs to have the runtime that is specific to it’s architecture and operating system.

This system might sound familiar as modern Java does something similar. There was a time when Microsoft was invested in Java virtual machines and made the first Java runtime that compiled the Java binary to machine language. The entity that owned Java at the time (Sun) wasn’t happy about this and they took Microsoft to court for deviating from the standard of how Java virtual machines worked and for using the Internet as a method of distribution among other reasons. This disagreement might sound petty, and in part it was. But there were good reasons for their position that I’ll present in another post. But this interaction added weight to the argument that Microsoft should have their own virtual machine. They also made their own programming languages (C# and Visual Basic .NET) and a few CLRs for x86, x64, and for their mobile devices.

The CLR, also known as the .Net Framework has seen several updates over the years. Microsoft eventually decided to make the CLR open source. This contributed to another CLR implementation being created named Mono which allowed .Net Framework applications to run on Linux and Mac.

If you look up .Net now you’ll find a few .NET systems listed.

  • .Net Standard
  • .Net Core (2016)
  • .Net Framework (2002)
  • ASP.Net / ASP.Net Core

What are these?

.Net Standard is a specification of the set of APIs that are expected to be in all implementations of the .Net Framework. Think of this as analogous to an interface; .NET standard itself isn’t an implementation. If you make an application that sticks with these APIs then it will have a wide range of compatible targets.

For the .Net Framework only one version of the framework can be installed at a time. Microsoft generally kept backwards compatibility, but it wasn’t perfect. Since a system could only have one version of the Framework installed in corporations updating the Framework had to be a company level decision.

.Net Core was made to contain the most common features of the .Net Framework, but has a few new features installed. It was made with multiple operating systems in mind and multiple versions in mind.  A system can have multiple versions of .Net core installed and they can run side-by-side.  From hereon Microsoft will be putting efforts on improving .Net Core. The .Net Framework will continue to support the .Net Framework but don’t expect to see new features in it; the new features will be coming to .Net core. There are a lot of legacy functionality from the .Net Framework that did not get ported over to .Net core in the interest of performance and compatibility.

ASP (Active Server Pages) is the name for Microsoft’s Web development system. Some of the earlier versions used a language that was similar to Visual Basic (yuck). The first version of ASP that supported .NET was called ASP.NET. ASP.NET used the .Net runtime and the more recent version supports the .NET Core runtime.  Traditionally ASP pages were hosted within IIS (Internet Information Services), a Windows component for hosting web pages. Wit the modern versions while this is still an option ASP.NET pages can be hosted outside of IIS too.

If you are starting a new desktop .Net project and don’t know what version to use the safe choice will generally be .Net Core. In my opinion the best feature is its ability to run on multiple systems (Mac, Linux, Windows, and varios IoT devices including the Raspberry Pi).


Trying to learn C# and .Net Core? This is a book I would recomend.


Credit Cards and Magnetic Strips in the USA

Yes, in the USA we still use magnetic strip on credit cards.

I’ve had some interactions with some people online more than once when I found myself explaining this. One of the more recent incidents was about a phone that used magnets to keep something in place. I had commented that with such a phone I want to make sure that it didn’t get near my bank cards because of the magnets. I received responses of confusion from this. I’ll address some of the frequent responses.

  • Why does it matter if it gets near a magnet?
    – If a credit card is in contact with a magnet that is strong enough or for long enough then the data on the strip can be damaged making it unusable in magnetic strip readers.
  • Why not use contactless payment?
    Banks in the USA for the most part don’t issue contacless cards. I’ve checked for them and have found they do exists if you get a very “product” from that bank. For example if you have a card from Main Street Bank Visa (a bank name I’ve just made up) then it might not be contactless, but if you got the Main Street Bank Visa Barbie Edition (also a made up card) then it may have the contactless feature.
  • Why not use the Chip and Pin
    The chip isn’t accepted at some POS terminals. For credit cards in the USA we almost never use pins. For bank cards associated with a checking account though a PIN must be entered if the card is processed as a bank card instead of a credit card. High volume stores including fast food also prefer not to use the pin. The amount of money they can make is heavily dependent on how quickly they can complete the purchase process and they risk loosing money on missed sales than fraud at heavy times.

Typically, people in the USA that do have experience with contactless payment have it through Apple Pay or Samsung Pay. While Android Pay had been present years before it was hamstrung by three of the four nationwide phone carriers here. They decided to block Android pay and created their own payment system. Their system was called ISIS and based on the American Express SERVE cards. But things happened in the news and the ISIS name was no longer a name that was marketing friendly.  They changed the name to Softcard but the effort ultimately failed.

I myself was able to use Android Pay for some time since I had a Google phone that wasn’t distributed through the carriers. It worked fine until Apple Pay was released. When Apple Pay was released many major retailers decided to deactivate their contactless receivers. They wanted to have in on mobile app payments and they blocked such payments all together. Now, if I entered a store even if I could visually identify that a contactless payment terminal was present I didn’t know that it worked. At one point it failed more times than not and it was easier to just not bother with it.

Why not use the app that the retailer made instead of the phone payment app? There are two reasons. The first, is the retailers didn’t have such an app. They were starting development of their systems and blocked other contactless payments while they prepared their own. When such apps were available my personal motivation was that data breaches happen regularly and it is safer to minimize the number of accounts in which personal information appears. Even when an account is closed in the USA retailers may often retain records of the information; it is still vulnerable to a breach after an account with the retailer has been closed.

With that said, I’m hoping to see a shift in how credit cards are handled in the USA. There’s a high rate of credit card fraud in the USA and several times within a year my associates and I find that we must get a card replaced because of data breaches.


Enabling Development Mode on Samsung Tizen TVs

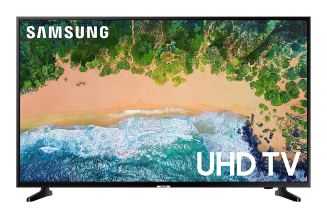
The modern Samsung TVs run the Tizen operating system. You can develop for these just as you might develop for the Tizen based watches. The Tizen TVs are locked down more than the watch is.  To deploy to a Tizen TV you’ll need to both enable developer mode and will have to let the TV know from what address it will be receiving code. If it receives request from other addresses it won’t respond to them.

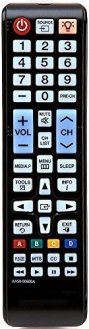
On the consumer displays there is no obvious way to enable developer mode. The option is hidden. If you open the apps browser (for seeing what other apps there are to install) you can open the developer mode menu by entering “12345” on the remote. A popup window will show from which you can select to turn developer mode “On.” If you are using one of the commercial displays (SSSP, or Samsung Smart Signage Platform) the method to enable developer mode is more obvious. If you open the TV’s menu there is an option called URL Launcher Settings. The developer mode option is within these settings.

On the consumer devices you’ll also be asked to enter the IP address of the machine from which the development will occur. This prevents other rouge devices on your network from doing anything to the TV.  Here you should enter the IP address of your development machine.

After these options are set the TV needs to be rebooted before the changes are fully applied. you can do this by holding the power button on the consumer TVs for two seconds, holding the power off button on a SSSP display for 2 seconds, or removing the power source from the TV and reapplying it.

After the TV boots developer mode is now enabled. However the mode being enabled doesn’t mean that all of the conditions for deploying code have been met. You will need to generate a distributor certificate also. Samsung has this page with instructions for generating a certificate. In following these directions you will need the the Device Unique ID (DUID). To get this you first need to connect to the TV. I prefer to use the sdb utility that comes with the Tizen SDK. It is located in tizen-studio/tools (adjust this path according to the location at which you installed Tizen Studio). The syntax for connecting is:

sdb connect

Sometimes I have to type the command twice before it takes effect. After the connection is successful open the Tizen Device Manager. You should see the TV connection within the UI. If you right-click on the connection you will have the option of selecting the TV’s DUID. Select this option and copy the DUID to the system clipboard. Keep the DUID on the system clipboard and when it is needed during the certificate generation it will automatically be pasted where it is needed.

If you at some point find that you need the TV extensions, don’t have them installed, and don’t see them in the the package manager you can install them using these instructions. https://developer.samsung.com/tv/develop/tools/tv-extension/download/

Creating a certificate based on the Device Uniuque ID (DUID) is slightly different for the two classes of displays. For the consumer displays a Samsung certificate should be created. For the commercial displays a Tizen certificate should be created. It can be a little confusing with Tizen being a Samsung creation. But you may be able to make better sense of it from another perspective. The Samsung certificate is associated with the Samsung App store. The consumer displays access the app store and the certificate rules for that are different than for apps that have no access to the App Store.

samsungremote

samsungtv

Bixby Studio Available for all Bixby Compatible Devices @SDC19

bixby

Samsung announced today at the annual Developer Conference that Bixby Studio, their developer tool for building natural language interactions, is available on all devices that support Bixby. Previously this functionality was only available on the mobile devices. With today’s announcement it is available on other devices such as the TV, Tizen powered refrigerators, and the watch.

To encourage developers to get started with Bixby development they’ve also opened a contest offering thousands of dollars in prizes. For more information on the contest visit BixbyDevJam.com.

Consumer v Commercial Displays

There are two mistakes that one might make about the difference in consumer and commercial displays.

Mistake 1: Commercial Display are just Consumer Displays that cost More

This is an easy mistake to make because at first glance the displays may look alike. But commercial displays are made to withstand a wider range of conditions than their consumer counterparts. An illustration of this that comes to my mine is a display I worked on that was installed in an airport. When the display opened to the public we saw some abuses that we didn’t quite imagine. The installation included touch screens. We expected people to touch the screens. We didn’t expect people to set their children on top of the displays. Yes, this really happened. The displays survived the years that they were at the installation without problems, but I still consider some of what they endured to be borderline abusive. If a small child were set on a consumer display (do not do this) I’m pretty sure that it wouldn’t last long.

That is just one of the tolerances that a commercial display may have that it’s consumer counter part does not. The commercial displays may also have higher tolerance for moisture (perhaps even outdoor use), temperature, potentially higher potentially a brighter screen (as might be needed for outdoor use).

Commercial displays may have a number of features that the consumer counter parts do not.  These may be additional connections (such as RS232), the ability to control several displays at once (as one might want to do in a video array configuration) and even internal media players or security features.

Mistake 2: A Commercial Display would make a good Home Display

This misconception comes from the idea that a commercial display is a consumer display with features added. The reality is that while the commercial displays may have additional features they might also be missing features that the consumer displays have. If you buy a typical consumer display above a certain size it will have the ability to run several consumer oriented applications such as a Netflix and Hulu player and a few others. The commercial displays don’t have this; and that is understandable since they are not for engaging in these consumer activities. A person that pays the extra money to get a commercial display may leave one feeling quite disappointed after realizing the features that are not available.

Samsung Consumer Displays v Samsung Commercial Displays

I’m looking at to displays that were made at about the same time. Both are made by Samsung; one is a consumer display and the other is a commercial display. Getting the differences between them has required my own exploration and experimentation. Samsung has a site at https://samsungDforum.com that contains information about the consumer displays. Unfortunately this information is only available to those that sign up for the Samsung Partner program. From what I’ve read about this program an NDA is required to enroll within it. I have not signed up for this program; if I did then I wouldn’t be able to talk about the information gained within it. As part of my interest in the displays is to talk about them (on this blog) I’m instead am gathering information both from experimenting with the display and through scraps of information available on the Internet.

The process of experimentation has had it’s moments of frustration, and I’ve already written some material on my experiences that are to be posted in the future.  In my next post on this topic I’ll talk about the differences in the Samsung Consumer and Commercial displays.


End of Linux on DeX Beta

Unfortunately, Samsung has recently announced the end of Linux on Dex support. The last time I mentioned LoD was when Samsung mentioned it was coming to more devices. A close associate recently acquired one of those devices to which support was coming. When I tried to get her sign up for the Beta I had found that there was no way to get her signed up. That was about two weeks before the Samsung announcement.

To summarize, Samsung stated what as one upgrades to Android 10 they would loose the Linux on DeX functionality; if someone wants to run a full Linux setup on their computer they will have to avoid upgrading. There was no statement on whether or not there will be anything to replace this functionality.

Personally I will miss this functionality. When I was finally able to access it I was able to leave my computer behind when I went on trips. While it wasn’t as fully ccapable as my laptop it supported enough functionality to be a secondary developerment solution; I could do enough things to respond to some unanticipated requests. I had access to GIT, Node, and various other development and command line tools include Visual Studio Code. Unless Google or Samsung plan to release a replacement this will be functionality lost with the next OS update.

In the mean time I’ll be looking back to the Chromebook. The Chromebook has some limited linux support that may be helpful. Though the last time I used it there was no where near as much functionality as LoD.

It will be missed. 😦

Creating a new Tizen Project for Samsung TVs

The objective of this entry while basic covers an easy mistake to make. It is a mistake that I have made. I’ve got a new Samsung Series 6 TV and I tried to deploy a new project to it. Errors were encountered, frustration levels were raised, but eventually I encountered success.

The Samsung TVs are more locked down than some of the other Tizen devices that I’ve worked with. The more recent ones are more locked down than some of the previous ones. When things go wrong this is what you might see.


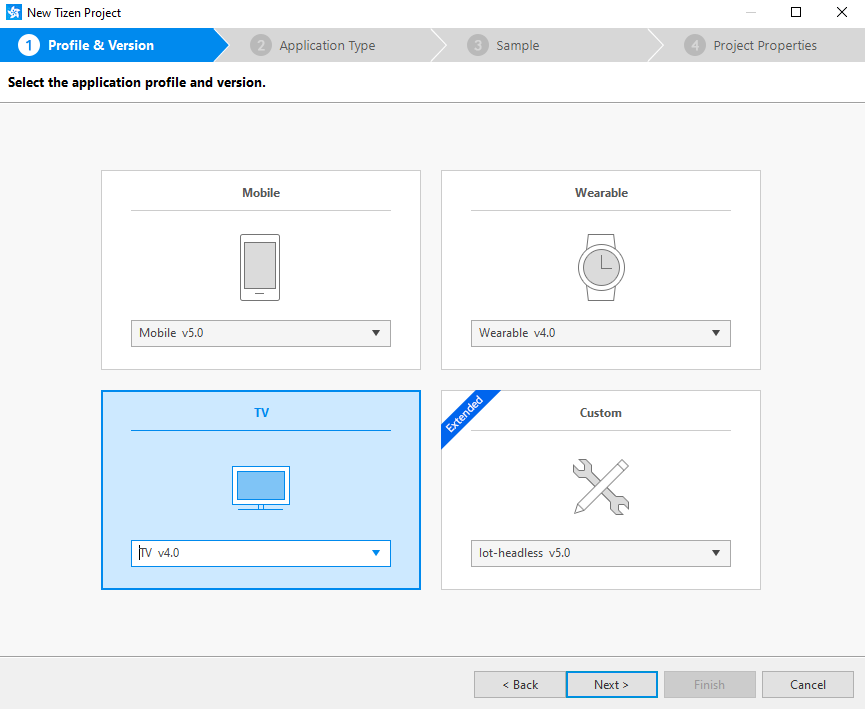
The TV I am using runs version 4 of the Tizen operating system. I make a new Tizen project and select to create the new project from the TV templates choosing Tizen 4 as the platform.

TizenNewProject

Attempts to debug the project created from this template fail. I get an error message stating:

Launching [your app name here] has encountered a problem
closed
   closed
     closed

The terminal output isn’t of much help.

Launching the Tizen application...
# If you want to see the detailed information,
# please set the logging level to DEBUG in Preferences and check the log file in 'C:\tizen-studio-data\ide\logs/ide-20191006_014055.log'.

[Initializing the launch environment...]
RDS: Off
Target information: UN43NU6900
Application information: Id(07DOxO8iKR.SystemInfo3), Package Name(07DOxO8iKR), Project Name([your app name here])
Unexpected stop progress...
(0.337 sec)

So what gives?  There are two ways to address this that are essentially two paths to the same destination. The manual solution involves editing a couple of configuration options in the files config.xml and .tproject.

The file .tproject is not visible in the Tizen IDE. But you can still open it through file -> open. This file is an XML file. There is an element named that has a sub-element . I changed the value here to tv-samsung-540. The other change in config.xml is on an element of the form . This needs to be changed to .

Why are these changes necessary? I don’t have full confirmation on this, but I believe it has to do with differences between a generic Tizen device and Samsung Tizen devices. At the time of this writing I know of no physical implementations of any non-Samsung TV Tizen devices. But it does exist as a specification.

The other solution would be performed at the creation of the project. When creating a new project do not select from the TV project templates. Instead select the Custom project templates. Within these templates there is a TV template subtype. If you choose this project type then you will start off with the configuration files mentioned above having the values that are needed.

As the Tizen operating system and the development environment are updated year to year more readers will read this entry after a new Tizen version has been released than before. It is likely that the exact values that you include here will be different than what I have used. You may need to update the values accordingly. But hopefully this will point you in the right direction.

Windows 10 IoT Core Installer Blocked?

If you try to install Windows 10 IoT core from the installer chances are you wil get blocked with the following error.

Your administrator has blocked this application because it potentially poses 
a security risk to your computer."  and "Your security settings do not allow 
this application to be installed on your computer.

I ran into this recently when preparing a Raspberry Pi to run Windows 10 IoT Core. What gives? Well, that is due to a Windows Security Setting. The setting can be changed by editing the registry.  The registry key can be found at the following location

Computer\HKEY_LOCAL_MACHINE\SOFTWARE\Microsoft\.NETFramework\Security\TrustManager\PromptingLevel

The keys inside of this path contain one key named Internet that is set to Disabled. Change it to Enabled. Then you should be able to perform the installation and then change the key back.

Raspberry Pi Starter Kit

Available on Amazon for free at the time of this writing

Getting Ready for the Holiday Season with Phillips Hue and a Raspberry Pi

The holiday season is upon us; by the end of this month I expect to start seeing my neighbors put out their fall decorations. By mid-October decorations for Halloween will show up. After Halloween the decorations roll back to fall themed only and then are changed to Christmas decorations right after new years. Two of these holidays tend to come with flashy displays and lights: Halloween and Christmas.

porch

I primarily use Phillips Hue lighting throughout my house and it is a perfect companion for festive displays. The color bulbs are adaptable to any color scheme and the newly released Edison-style bulbs add a warm glow to fall scenes.  The Phillips Hue lighting sets are programmable if you are using a hub. While the new light bulbs have Bluetooth support to directly be controlled by a phone there’s not public API for them (yet). For programming a hub is needed.

pumpkin

I’ve written on controlling the Phillips Hue lights before. Expanding on that I wanted to make a project that would let an IoT device trigger a scene according to some external event. I’ll use a motion sensor to trigger the relevant events.


But you could also use sound, change in temperature, lighting, or time as sources. I’ll be using a Raspberry Pi; it has network connectivity and can be easily interfaced to a number of devices.  I’m using the Raspberry Pi zero but about any Pi will do. Hue does have available a motion sensor ; if one only wishes to control lights based on motion a solution is available. But if one wishes to have other triggers or trigger other actions along with the lights a custom solution is needed.

20191005_160504.jpg

The Raspberry Pi 4 with a heat sink attached.

20191005_161532.jpg

Raspberry Pi Zero with a 4-port USB hub

All that I want to happen is for the the lighting pattern to change when a person is detected. I’ll use a passive infrared sensor for presence detection.  For Halloween I want a Hue light that is illuminating a jack-o-lantern to pulsate an orange color. When someone comes up knock on the door I want the light for the front door to go bright white. A few moments after a person is no longer there I want the system to go back to it’s previous pattern. But past a certain hour I don’t want this to continue; after 10:00pm the lights should extinguish. Simple enough, right?


20191005_155936.jpg

This is the passive infrared sensor that I used.

The physical build for this circuit is easy. The Passive Infrared Sensor (PIR) will get power from the VCC and ground pins of the Raspberry Pi. The signal line from the PIR can be connected to any of the GPIO pins. I’m going to use pin 3. The circuit will need to be put in an enclosure to protect it from rain or humidity in general. If your enclosure doesn’t already have a weather protected way to get power in your options are to either run the Pi off of a battery that is within the enclosure  (that means periodic recharging) or drill a hole for the wires yourself and apply a sealant.

There are a lot of languages that I could use for writing my program on the Pi. Python, Java, and C/C++ make the top of the list (in no specific order). For this project I’ve decided to go with Java. To interact with the pins in Java we will need to import classes from com.pi4j.io and com.pi4j.wiringpi. These are not standard libraries; they exists to provide an interface to the pins. To demonstrate reading a pin in Java here is a simple program that will print text in a look that reflects the pin state.

import com.pi4j.io.*;
import com.pi4j.wiringpi.Gpio;
import com.pi4j.wiringpi.GpioUtil;

public class PinTest {
   public static void main(String args[]) throws InterruptedException {   
      final GpioController gpio = GpioFactory.getInstance();
      Gpio.pinMode (3, Gpio.INPUT) ;          
      while(true) {
         if (Gpio.digitalRead(3) == 0){
               System.out.println(The Pin is ON");
         }else{
            System.out.println("The Pin is OFF");
         }
      }
   }
}

Phillips has an SDK for Java. You might see it present as an SDK for Android, but it works fine in other Java environments. A convenience from this is that a significant portion of the development can be done on your computer of choice. I did most of the development on a Mac and used git to transfer it to the Raspberry Pi when done.

20191005_162433.jpg

The color Hue lighting can take on a variety of colors.

The overall execution loop of the program will check whether or not the trigger condition has occurred. If the trigger condition has occurred then the program will activate a scene. If not then it deactivates the scene. The program loop also contains some debouncing logic. Depending on the type of sensor used and the sensors characteristics a sensor could change states with ever cycle. I’ve chosen to only deactivate if a certain amount of time has passed since the last activation. For initial development instead of interfacing to an actual sensor I have a method that is returning a random Boolean value. When the code is moved to the Raspberry Pi this method will be updated to read the state of the actual sensor. The following will only deactivate after there have been 2 seconds with no activation event.

    boolean getActivationState() { 
        return random.nextBoolean();
    }

    void runLoop() throws InterruptedException{ 
        System.out.println("running");
        long lastActivation = System.currentTimeMillis();
        while(true) { 
            Thread.sleep(100);
            boolean isActivated = getActivationState();
            if(isActivated) {
                lastActivation = System.currentTimeMillis();
                activateScene();
            }
            else {
                long now = System.currentTimeMillis();
                if ((now - lastActivation)> 2000)
                    deactivateScene();
            }
        }
    }

Controlling the lights happens through the Hue SDK. Before activating the lights the Hue bridge must be discovered. While Hue makes a series of lights that have Bluetooth controllers built in and can be controlled without the Hue Bridge currently they only support APIs through the bridge. It is a required hardware component.

The SDK already contains functions for discovering the bridge. All that a developer needs to do is initiate a search and implement a callback object that will receive information on the bridges discovered. In the following I instantiate the Phillips Hue SDK object and register a listener.  If the program had been connected with a bridge before the IP address if that bridge is loaded and it reconnects to it. Otherwise the search is initiated. As the search occurs the earlier registered listener receives callbacks.

private void init() {
    this.loadSettings();
    System.out.println("Getting SDK instance");
    phHueSDK = PHHueSDK.create();
    System.out.println("Setting App Name");
    phHueSDK.setAppName("HolidayLights");
    phHueSDK.setDeviceName("RaspPi");
    System.out.println("SDK initialized");
    phHueSDK.getNotificationManager().registerSDKListener(listener);

    if(this.getLastIpAddress()  != null) {
        System.out.println("Connect to last access point");
        PHAccessPoint lastAccessPoint = new PHAccessPoint();
        lastAccessPoint.setIpAddress(getLastIpAddress());
        lastAccessPoint.setUsername(getUserName());
        if (!phHueSDK.isAccessPointConnected(lastAccessPoint)) {
            phHueSDK.connect(lastAccessPoint);
        }
    } else {
        System.out.println("Searching for access point");
        PHBridgeSearchManager sm = (PHBridgeSearchManager) phHueSDK.getSDKService(PHHueSDK.SEARCH_BRIDGE);
        // Start the UPNP Searching of local bridges.
        sm.search(true, true);
    }
}

The listener is of type PHSDKListener. I won’t show the full implementation here but will show some of the more relevant parts.

When the bridges are found they are returned as a list. I’ve only got one on my home network and so I connect to the first one seen. If you have more than one bridge you’ll need to implement your own logic for making a selection.

@Override
public void onAccessPointsFound(List accessPoint) {
    System.out.println("Access point found");
    if (accessPoint != null && accessPoint.size() > 0) {
        System.out.println("Number of access points: "+new Integer(accessPoint.size()).toString());
        phHueSDK.getAccessPointsFound().clear();
        phHueSDK.getAccessPointsFound().addAll(accessPoint);      
        phHueSDK.connect(accessPoint.get(0));       
    }
}

When the connect attempt is made it is necessary to press the pairing button on the bridge. The console will print a message from the SDK saying this.  Once the bridge is connected I save an instance of the bridge and the a


        @Override
        public void onBridgeConnected(PHBridge b, String username) {
            HolidayController.this.bridge = b;
            isBridgeConnected = true;
            System.out.println("on bridge connected...");
            phHueSDK.setSelectedBridge(b);
            phHueSDK.enableHeartbeat(b, PHHueSDK.HB_INTERVAL);
            phHueSDK.getLastHeartbeat().put(b.getResourceCache().getBridgeConfiguration() .getIpAddress(), System.currentTimeMillis());
            setLastIpAddress(b.getResourceCache().getBridgeConfiguration().getIpAddress());
            setUserName(username);
        }

After the bridge connects the SDK will query the state of the lights on the system and update some objects representing the last known state of each light. The first time the cache is updated the program prints the name of each light and the light’s identity. This information is useful for selecting which lights will be controlled.  The light list is saved for the program to use.

        @Override
        public void onCacheUpdated(List<Integer> arg0, PHBridge bridge) {
            if(!isDeviceListPrinted) {
                PHBridgeResourcesCache rc = bridge.getResourceCache();
                List<PHLight> lightList = rc.getAllLights();
                HolidayController.this.lightList = lightList;
                ListIterator<PHLight> it = lightList.listIterator();
                while(it.hasNext()) {
                    PHLight l = it.next();
                    System.out.println(l.getIdentifier() + "    " + l.getName());
                }
                isDeviceListPrinted = true;
            }
        }
With that in place we now have enough information to change the state of the lights. To test things out I started with implementations of activateScene and deactivateScene that will just turn all the Hue lights on and off (don’t do this if you have other people in your dwelling that this would affect).
void activateScene() {
    ListIterator<PHLight> it = lightList.listIterator();
    while(it.hasNext()) {
        PHLight l = it.next();
        System.out.println(l.getIdentifier() + "    " + l.getName());
        PHLightState state = l.getLastKnownLightState();
        state.setOn(true);
        state.setBrightness(254);
        float[] xy = PHUtilities.calculateXYFromRGB(
            0xFF & ((int)color>> 0x10), 
            0xFF & ((int)color >> (long)0x08), 
            0xFF & (int)color, l.getModelNumber());
        l.setLastKnownLightState(state);
    
        bridge.updateLightState(l.getIdentifier(), state,  NOPListener);
    }
    isDeviceListPrinted = true;
}

void deactivateScene() {
    ListIterator<PHLight> it = lightList.listIterator();
    while(it.hasNext()) {
        PHLight l = it.next();
        System.out.println(l.getIdentifier() + "    " + l.getName());
        PHLightState state = l.getLastKnownLightState();
        state.setOn(false);
        //state.setBrightness(254);
        l.setLastKnownLightState(state);
    
        this.bridge.updateLightState(l.getIdentifier(), state,  NOPListener);
    }
    isDeviceListPrinted = true;
}
If the program is run at this point the lights will turn on and off somewhat randomly. Ultimately we don’t want it to control all the lights. Instead I want to be able to specify the lights that it is going to control. I’ve made a JSON file file that contains a couple of elements. One is the RGB color that I want to use in the form of an integer, the other is an array of numbers where each number is an ID for the light to be controlled. The RGB color is specified here as a base 10 number instead of the normal base 16 that you may see used for RGB codes. Unfortunately JSON doesn’t support hexadecimal numbers 🙁.
{
    "lights":[5, 7, 9],
    "color": 16711935
}
These values are read by the code. Before the code acts on any light it checks to see if its identifier is in this array before continuing. During activation if the identifier is in the array the light’s state is set to on, brightness is set to full, and the color is applied. The color must be converted to the right color space before being applied to the light; something that is done with a utility function that the SDK provides.
void activateScene() {
    System.out.println("activating scene");
    ListIterator<PHLight> it = lightList.listIterator();
    while(it.hasNext()) {
        PHLight l = it.next();
        if(isTargetLight(l.getIdentifier())) {
            System.out.println(l.getIdentifier() + "    " + l.getName());
            PHLightState state = l.getLastKnownLightState();
            state.setOn(true);
            state.setBrightness(254);
            float[] xy = PHUtilities.calculateXYFromRGB(
                0xFF & ((int)color>> 0x10), 
                0xFF & ((int)color >> (long)0x08), 
                0xFF & (int)color, l.getModelNumber()
            );
            state.setX(xy[0]);
            state.setY(xy[1]);
            l.setLastKnownLightState(state);        
            bridge.updateLightState(l.getIdentifier(), state,  NOPListener);
        }
    }
}

void deactivateScene() {
    System.out.println("deactivating");
    ListIterator<PHLight> it = lightList.listIterator();
    while(it.hasNext()) {
        PHLight l = it.next();
        if(isTargetLight(l.getIdentifier())) {
        System.out.println(l.getIdentifier() + "    " + l.getName());
        PHLightState state = l.getLastKnownLightState();
        state.setOn(false);
        l.setLastKnownLightState(state);
    
        this.bridge.updateLightState(l.getIdentifier(), state,  NOPListener);
        }
    }
}
The last steps needed to make the device work as intended are to update the getActivationState() function to read the actual state of the motion sensor instead of a random value and wiring the motion sensor to a Raspberry Pi. From hereon the code is only going to work on a Raspberry Pi since the libraries for reading the pins are only applicable to this device. It is possible to dynamically load class libraries and use them as needed for the specific platform on which code is running. But information on doing that is beyond the scope of what I wish to discuss here.
I’m declaring a GpioController variable at the class level and am instantiating it in the constructor. I also set the mode of the IO pin that I’ll be using to  input.
    GpioController gpio;
    
    HolidayController() {
        gpio = GpioFactory.getInstance();
        Gpio.pinMode (3, Gpio.INPUT) ; 
        //....
     }
The getActivationState() implementation only needs to contain a single line.
boolean getActivationState() { 
   return Gpio.digitalRead(3);
}
With that change it will now work. If the Raspberry Pi is placed in a position where the motion sensor has a view of the space of interest then it will control the lights. If you are using one of the earlier Raspberry Pis (anything before the Raspberry Pi 4) you should be able to also power the Pi off of a portable phone charger; there are many that will make sufficient batteries for the Pi. The Raspberry Pi 4 has higher energy requirements and you may run into more challenges finding a portable power supply that works.
Why use the Pi at all for this? Because there is a lot of room to expand. Such as using the video capabilities of the pi to power a display or controlling other devices. Controlling the lights is a start. I’ll be revisiting this project for add-ons in the future.
If you want to start on something similar yourself the following (affiliate) links will take you to the products on Amazon.
Parts Lists

Developing for older Samsung TVs

If you already have a Samsung TV and want to start developing for it chances are you don’t have the latest and greatest model. But when you install the Tizen development tools they only target 2 operating system versions; the latest version that is out now and the version that is yet to be released in a year or so. Your TV is too old! So what can you do?

If you check the Tizen development forums the suggestion is to install an older version of the development tools. But that’s no fun! And it is possible to develop for the older TVs with the newer tools. Go ahead and install the latest versions of the Tizen development Studio first. While that is installing you will need to download an older version of the Extensions for TV. You can find them at this site. As you scroll through the available versions you will see that if you attempt to get a version older than the 3.0 version you can’t download it. Download the 3.1 or 4.0 extensions. Don’t worry, the  extensions also contain the components needed for TV’s running the 2.3 and 2.4 Tizen version.

tizen extension for tizen sdk

After Tizen Development Studio is installed open the package manager. In the upper right corner of the package manager is a gear icon. Select it.


packagemaker

Expand the “Extensions SDK” area of the window to see the extensions installed and click on the + button to add an extension. A window opens asking for a URL. Leave the URL blank and click on the three dots next to it. You’ll now be asked to navigate to a local archive of the extension you with to add. Navigate to the file that you downloaded earlier and select it.  The package manager will take a few moments to install the extension.

When you attempt to create a new project and look at the TV templates available there’s only the 4.0 and 5.0 projects. What gives? The missing project templates can be found under the Custom projects. Select “TV-Samsung v3.0.” Even if you have a TV running Tizen 2.3 this opeion will work. When you click the next button you’ll see the familiar project templates.

Listing Applications on a Tizen Device

In a Tizen project I was working on I found that Tizen Web alone wasn’t enough to help me accomplish my goal. For some of the functionality that I needed a native application would be needed (more on that in another blog post). Rather than completely write the application in native code I was going to use HTML for the UI and a native service for other functionality. This is a Tizen Hybrid application.

The Tizen documentation wasn’t quite clear to me on what identifier to use when trying to launch a service packaged with an HTML application. It mentions using the App ID. This didn’t work for me. I only figured out the right name to use when I tried listing all of the applications and services on the device.

Getting a list of the applications and services is done through tizen.application.getAppsInfo. This function takes as a parameter a callback. The call back is given a list of the applications installed on the device. For my purposes I was only interested in the id member of the objects that were passed back.


tizen.application.getAppsInfo(
    function onListInstalledApps(applications) {
        console.log("List of Applications:");
        applications.forEach(
          function(app) {
    		console.log(`  app.id: ${app.id}`);
        });
    });

Once I saw the output of this it was easy to identify the problem I encountered with launching the service.

Screen Shot 2019-05-24 at 10.38.17 AM
Output of app listing code

According to the Tizen documentation when launching a service the ID string used is composed of the package ID and the app ID of the service. The package ID can be found in the confix.xml for the web application.  In the following you can see the package ID is “IVFd9Or08P”.

Screen Shot 2019-05-24 at 4.34.54 PM

The app ID can be found in then tizen-manifest.xml for the service project.

Screen Shot 2019-05-24 at 4.37.53 PM

The app ID here is “org.sample.service.” If you look in the output from the code sample for listing installed applications you will see that the service shows up as IVFd9Or08P.testservice. It is using the entry from the “exec” field instead of the appid field. I’m not sure why the documentation points to the appid only. But I’m happy to have figured out this problem.


Using a Game Pad in the Browser

GameController

I was thinking about a video game from my childhood and how easy it would be to rebuild the game now.  Having decided to do this I had to decide what platform to target. I chose to make it a browser application. While the game could be played with a keyboard or mouse I wanted to use a game pad to play it the way it was meant to be played.

Game pads can be used in HTML. I’ve not seen many applications that actually take advantage of this, but as game streaming becomes more popular this is likely to change.  Let’s start with one of the simplest things we can do: detect what game pads are present. I’m going to share all of my code in TypeScript. TypeScript is basically JavaScript with type information added. It compiles down to JavaScript. The advantage of using it here is that you will know the data types of a variable or parameter instead of needing to analyze the code and make inferences.

Detecting a Game Pad

To start we want to ensure that our browser supports the game pad API. To do this just check whether or not the getGamepads function exist on the navigator object.

var isGamepadSupported:boolean = (navigator.getGamepads != null);

There are two ways that we can detect the presence of game pads. We can listen for the events that are fired when a controller is connected or disconnected, or we can just poll for their presence. Here’s a code sample that does just that. The TypeScript elements are highlighted in blue.

function handleGamePadConnected(e:GamepadEvent) {
     console.log('A game pad was connected', e);
}
function handleGamePadDisconnected(e:GamepadEvent) {
     console.log('A game pad was disconnected', e);
}
window.addEventListener("gamepadconnected", handleGamePadConnected);
window.addEventListener("gamepaddisconnected", handleGamePadDisconnected);

If we run this code within a page we can see the code get triggered by ensuring the browser has focus (a browser without focus will not receive game pad events). Connecting and disconnecting a controller (if USB) or turning a controller on and off (for Bluetooth) will cause the event to trigger. On some controllers you may have to press a button for it to fully connect.  The event passed to the handlers has a field named game pad that contains all of the data for the game pad being used. The other way to get this information is to try to read the game pad state Calling navigator.getGamepads() will return information on all the game pads connected to the system. A word of warning though, the value returned is an array that has some null elements in it. If you iterate through the array don’t assume that because you are reading a valid index that there is actually an object there.

This might sound weird at first, but imagine you are playing a four player game and player 2 decides to turn off his controller and leave. Rather than assign a new index to players 3 and 4 their controller indices will stay the same and the second element in the array will be null. To get the state of all of the game pads attached to the system use the following.

var controllerStates:Array<Gamepad> = navigator.getGamepads();

When I call this method I always receive an array with up to 4 elements in it, most of which are null.  If this function is being called in the game loop from one call to another one can see what controllers are present . Keep in mind that the object returned here is the state of the game pad, but it is not a reference to the game pad itself. If you hold onto the object it will not update as the state of the controller changes.

There are two properties on the GamePad object of most interest to us; the buttons property has the state of the buttons and the axes property contains the state of each axis for each directional control on the game pad.

Axes

A D-pad input on a controller has two axes that can range from -1 to 1. There will be a vertical axis with three possible values and a horizontal axis with three possible values. While one might expect the neutral position of the controller to be zero I’ve found that even with my digital controllers the neutral value is near-zero but not quite zero.  There is a range for which we could receive a non-zero value that we would need to treat as zero.

For the analog sticks the general range of values returned will also be between -1 and 1 for each axis, but there are values between this range that could also be returned depending on how far the directional stick has been used. When the stick isn’t being touched the axis will return a value that is near zero. Like the digital input there is a near zero range that should be treated as zero. Note that the controller interface may return more axes than actually exists on the controller.

Buttons

The buttons element of a GamePad object has a list of buttons. The collection may return more objects than there are physical buttons on the controller; these non-existing buttons will not change state. The GameButton Interface has three attributes.

  • pressed – will be true if the button is pressed, false otherwise.
  • touched – for controllers that can detect touch this attribute will be true if the button is touched, false otherwise
  • value – a value between 0 and 1 that tells how far the button is pressed or how hard it is pressed.

Even if you have a controller that doesn’t support touch or analog input the touched and values buttons will still update. If a button is pressed it can be inferred that it is being touched and the touched attribute updates accordingly. For a digital button the value attribute will only be 0 or 1 and no value between.

interface GamepadButton {
     readonly pressed:boolean;
     readonly touched:button;
     readonly value:number;
}

Other Attributes

There are some other attributes that can be found on the game pad that I haven’t discussed here. There GamePad object has an index attribute that will identify its own index in the array.  There is a string id field that gives a name identifying the controller. There is also a timestamp attribute that indicates the time at which a Gamepad object was grabbed.

interface GamePad {
     readonly id:String;
     readonly index:number;
     readonly connected:boolean;
     readonly timestamp:long;
     readonly mapping:GamepadMappingType;
     readonly axes:Array<number>;
     readonly buttons:Array<GamepadButton>;
}

Code Sample

This code sample here will read the states of up to 4 controllers and show their states on the screen. I’m using images to present the code here as I have found that WordPress will sometimes unescape HTML code and render it as HTML instead of text. But you download the code sample directly to view it.

gamePadHTMLCode

The file main.js here was compiled from a typescript file, main.ts. Execution in mail.ts starts after the document is loaded. The first method executed is named start. It adds some handlers for the game pad being connected or disconnected.  These handlers only print the event out to the console. We are more interested in what is running within the interval. In the interval the states of all of the game pads is retrieved and then we call a function (updateController) to display them on the screen.

startFunction

Update Controller will find the HTML block to which a specific controller index is assigned and get the represented button state and axes states updated. The functions updateAxes and updateButtons take care of the details of these. There are several other HTML elements needed for this that were not declared in the page. Instead they are being created as they are needed.

In updateAxes if the needed element doesn’t exists I create it and then I show the value of the axis.

gamepadUpdateAxes

The function updateButtons does pretty much the same thing. Only instead of a single element it is updating three.

gamePadUpdateButtons.png

Do you have a game controller and want to try things out? I’ve got it loaded on a web page that you can try. Get your computer and controller paired. Then see the demo run at https://j2i.net/apps/gamePadStatus/

Keeping an Application Alive

I recently was working on a project in which, among other things, there needed to be a process that would restart the application should it ever be terminated for no reason. This isn’t unusual for kiosk applications where the only UI that the user will be able to get to is a single application running on the system. This isn’t an unusual need and something for which we had a utility that could do this; we generally refer to these as “Kiosk Application Monitors.”  But I decided not to use it. Why not? Because when developing it is a pain to deal with an app that isn’t easily killed. If I manually terminated the application it would almost immediately restart; this was a behaviour that was by design. When I really wanted the application to terminate and stay that way things were more challenging. This had to be done from the task manager and the task manager wasn’t easily accessible since the KIOSK app ran as always on top. To see the task manager I would first have to kill the app. But if the app were killed it would just restart.

Not wanting to deal with the difficulty of this I made a new a Kiosk Application Monitor (hereon referred to as KAM). While I would generally prefer to make utilities in C# I used C for this; I was going to be using Win32 APIs and it is easier to have direct access to them instead of  writing P/Invoking declarations for them.

The key difference in this KAM and the other ones that we had used was that this KAM could be terminated through keystrokes. It adds a keyboard hook that receives every keystroke that a user makes no matter what application.

Termination on Detecting Safe Word

I’ve got a variable named SafeWord that contains the word that when typed will kill all of the child processes and shut down the KAM. To better insulate the app from an accidental activation I’ve mandated that the escape key be pressed before the safe word and the enter key be pressed immediately after the safe word.  The keyboard hook receives the virtual key codes for the keys pressed. The code for escape (0x1b) and enter (0x0d) are both used directly within the source code.   Any other key press will be will be ignored until the escape key has been pressed, and will be checked for a match to the safe word. At the first mismatch the procedure will stop comparing until the escape key is pressed again. When the enter key is pressed the routine checks if the end of the safe word has been reached. If it has then the user has typed the same word; the routine to terminate the child processes is called.

keyboardHook

They keyboard routine is a small part in what this does, but a real time saver for me.

Allowing Only One Instance

I didn’t want more than one instance of this program ever running on the same machine. The way I managed that is pretty usual for Win32 programs; I used a named event to ensure there is a single instance. Named events are shared across programs. After creating one (with CreateEvent ) calling the GetLastError() function afterwords indicates whether or not this is the only instance of an application that has access to the event or if another program already has an instance of an event by the same name. When another instance has already created one GetLastError returns ERROR_ALREADY_EXISTS.

SingleInstance

Process Description and Start-Up

Moving from the ancillary functionality to the core functionality, I decided to use JSON for specifying information on the processes that should be started and watched. The C++ libraries do no intrinsically support JSON data handling. I used a third party library for this. The data in the JSON is used to populate a structure that gives very basic information on the process to be monitored.

Structure

Most of these values are passed directly to the Win32 function CreateFunction. Ignore is there so that I could disable a process without completely removing it from my configuration file. For each process that I’m going to start I create a new thread to monitor it.

CreateThreads

Most of the code within the CreateWatchedProcess function will run within an infinite loop. The process is created and information about it is populated into a PROCESS_INFORMATION variable (which I have named pi). The value of interest for the KAM is pi.hProcess. This is the process handle. The wait functions in the Win32 API can accept handles processes. In the case of WaitForSingleObject passing a process handle will block the calling thread until the process terminates.  There is nothing that my program has to do for detecting the termination of the process. When the next line after WaitForSingleObject executes we know the process has been terminated. The only question is if it was terminated because there was a request for the KAM to shut down or if this were an unexpected .

processLoop

How Did it Perform

In testing things worked fine. I’d intentionally put a bug in the program of interest that would cause it to crash and the KAM restarted it. The app I was using it with also remembered it’s state and could restore the UI to what it was before. From the perspective of the user the screen flashed but was otherwise normal. When I tried the same utility in the production environment I’m happy to say that its full functionality was not exercised; the program it was monitoring never crashed.

I’ve found the program to be useful and see some opportunities to increase it’s utility. I plan to make updates to it to support things such as starting processes in a specific order, monitoring the message pump of another process to detect lock conditions, and allowing the utility to accept or transmit process information over a network connection.