Favourites from CES 2023

Last week marked the end of CES 2023. CES (Consumer Electronics Show) is a yearly tradeshow in which various companies show off their consumer-focus technological developments for everything from the kitchen to the road. Some of the items shown are for planned products. Others are prototypes or show pieces. Many of them show the application of digital electronics to a product. Due to Covid, the show was virtual in 2021. In 2022 the show was in-person, though with a much smaller presentation. This year, 2023, the show was closer to what it had been in times past. Reviewing some of the technologies and products displayed at the show, I wanted to highlight some of my favourites.

Vive XR Elite

The VIVE XR Elite is an augmented reality headset coming later this year. It is available for preorder now for about 1100 USD. This is less expensive than the Meta Quest Pro. It functions both as a standalone unit and can use your PC for gaming via a wireless connection. If you are nearsighted, the headset allows for the projection to be refocused for nearsightedness down to -6. At CES these were presented as units with a 90 Hz refresh rate. Though on their web page they are still described as having a 60 Hz refresh rate. The display resolution per eye is 1920×1920 pixels. The unit only wears 650 grams, with the optics in front and the batter pack in the back making for a more balanced layout. While the unit has controllers, it is also capable of hand tracking.

EcoFlow Blade

EcoFlow’s primary products are solar panels and batteries. For a person looking to go off-grid, these may be great accessories. These are also great if you live in an area with an unreliable power system. The EcoFlow Blade is an all-electric automated lawnmower. Even off-grid, you might want to have a nice lawn๐Ÿ™‚. It looks a lot more like an RC car than a lawnmower. The company says that it can both mow the grass and pickup fallen leaves. Having used electric mowers in conventional form factor, my experience thus far has been that they sometimes don’t have enough power to do the entire lawn in one session. However, if the grass cutting is automated, I’m less concerned with how many sessions it takes.

EcoFlow also showed off batteries for the entire house and a portable fridge/ice-maker also powered by their batteries. You can find more about these products here.

Ring Cameras for Car and House

Ring announced a couple of new cameras. These cameras had actually been announced before, but plans were apparently disrupted by the pandemic. One product is a Ring Camera for one’s auto-interior and exterior . The unit has cameras facing in both directions so that it records both the road and what is happening inside the car. When connected to the Internet via WiFi or LTE the owner can get alerts of events inside the car and engage in two-way conversation. With a verbal command (“Alexa, Record”). The unit is powered through the car’s OBD port. Amazon recommends for safety reasons, only use the unit in a vehicle with the OBD port on the left side of the steering wheel. This unit will be available for purchase in February.

Another is the Always Home Ring Camera. This is a drone that flies a path throughout your home on a pathway you’ve selected before flying back to its charging base. This camera solves a problem in security cameras in that they can only see from a limited angle. Withe the camera being mobile, there are more angles that it can potentially capture. Presently, Amazon is taking orders by invitation only.

Wireless 4K TV

While the 97-inch screen of the the LG M3 is eye-catching, for me the more significant attribute is that it can receive 4K signals wirelessly. Given the amount of effort I put into hiding or at least making neat the wires for the various video connections that I have, I see this as a product solving a modern day solution. The TV has a peripheral device to which video and audio sources connect. This box transmits to the TV. This solution is called “Zero Connect” and is expected to be part of their 2023 TV lineup.

Android Satellite Connectivity

Snapdragon is rolling out its chips that provide connectivity with Iridium satellites to Android devices this year. The connectivity could be used to have two-way text based communication. While the functionality it provides is simple, the ability to communicate in emergency situations is vital. Satellite connectivity may greatly reduce the situations in which one can find themselves without the ability to communicate with others.


Posts may contain products with affiliate links. When you make purchases using these links, we receive a small commission at no extra cost to you. Thank you for your support.

Mastodon:ย @j2inet@masto.ai
Instagram:ย @j2inet
Facebook:ย @j2inet
YouTube:ย @j2inet
Telegram:ย j2inet
Twitter:ย @j2inet

Experiment in “WarDriving” for Offline WiFi Locating

This is a quick explanation of a recent YouTube Short.

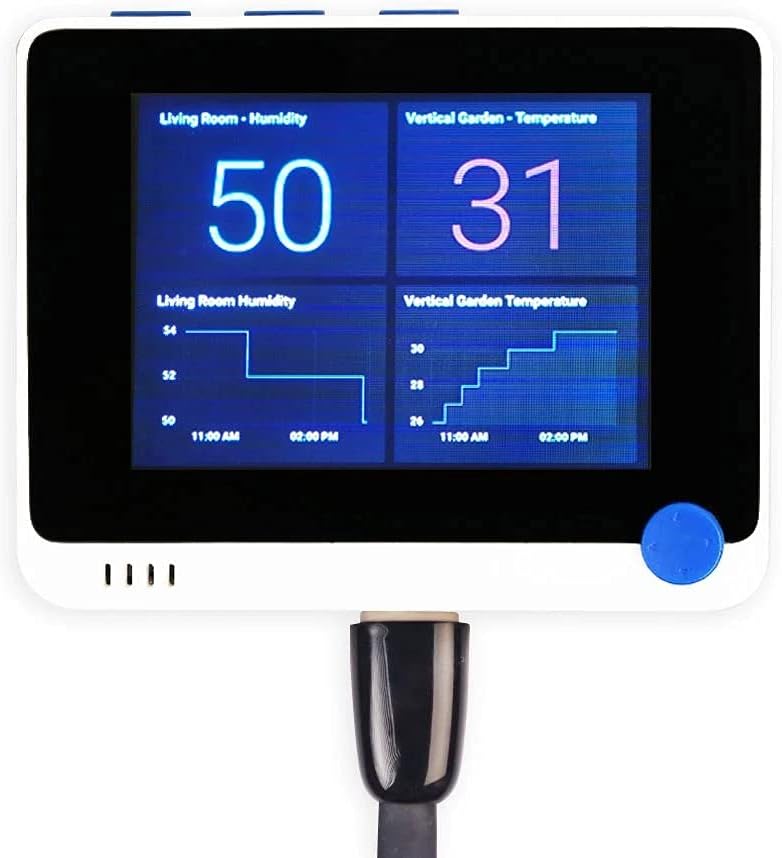
I was working with a Wio Terminal from Seeed Studio, and I needed for one to perform rough detection of its location. The most obvious way to do this is to add GPS hardware to the device. This works, but since I was concerned with batter life, adding additional hardware also felt like a disadvantage. Detection of known WiFi access points has long been a solution for location detection. I went on a search to see where I could download a listing of known WiFi hardware IDs (BSSIDs) and their location. I couldn’t find any. While there are some open source solutions for WiFi based location to which users can submit data, none of them allow the complete dataset to be downloaded. That’s no problem, I will just make my own.

This was the day before Christmas. I was going to be performing a lot of driving. To make the most of it, I quickly put together a WiFi scanning solution on Android to save WiFi data and the location at which it was found. I ended up with a dataset of about 10,000 access points. This is plenty to experiment with. After some processing and filtering, I reduced this information to a data set of 12 bytes per record to put on an SD card. The ID that a router broadcast (BSSID) is 6 bytes, but I store the has of the BSSID instead of the BSSID, which is only 4 bytes. A completed record is the 4 byte has, 4 byte latitude, and 4 byte longitude.

While I had a strategy in mind for quickly searching through a large dataset, 10,000 access points is not huge. The WioTerminal could find the matching record even if it performed a linear search. When the Wio powers up, I set it to scan the environment for the BSSIDS , calculate their hashes, and search for a matching hash. Since this was only a proof of concept, I only searched for a first match. There are some other strategies that may give more accurate results in exchange for increased computation.

The solution has touched on C++, C#, and JavaScript. There is a lot to be said about it. I’ll discuss it across several posts with the first describing the collection of data in January 2023. More to come!


Mastodon: @j2inet@masto.ai
Instagram: @j2inet
Facebook: @j2inet
YouTube: @j2inet
Telegram: j2inet
Twitter: @j2inet

Posts may contain products with affiliate links. When you make purchases using these links, we receive a small commission at no extra cost to you. Thank you for your support.

Using a Batch File as a Process Watcher

Using a utility that monitors a process and restarts it if it is terminated for any reason is a common need on programs that are driving publicly viewable displays. Were a crash to happen, or if the process were intentionally terminated, we may still need the process to restart. I’ve got several solutions for this, each with their own strengths. I recently needed a solution for this and didn’t have access to my normal solutions. I was able to make what I needed using Windows in-built command line utilities and a batch file. While I have a preference to PowerShell over batch file scripts, I used batch files this time because of constraints from organizational policies. I’m placing a copy of the script here since I thought it might be useful to others.

This script checks to see if the process of interest is running every 10 seconds. If the process is not running, it will start the program in another 5 seconds. Such large delays are not strictly necessary. But I thought it safer to have them should someone make a mistake while modifying this script. In an earlier version of the script I made a type and found myself in a situation where the computer was stuck in a cycle of spawning new processes. Stopping it was difficult because each new spawned process would take focus from the mouse and the keyboard. With the delays, were that to happen again there is sufficient delay to navigate to the command window instance running the batch file and terminate it.

ECHO OFF
SET ProcessName=notepad.exe
SET StartCommand=notepad.exe
SET WorkingDrive=c:
SET WorkingDirectory=c:\WorkingDirectory
ECHO "Watching for process %ProcessName%"
:Again
timeout /t 10 /nobreak > NUL
echo .
tasklist /fi "ImageName eq %ProcessName%" /fo csv 2> NUL | find /I "%ProcessName%" > NUL
if "%ERRORLEVEL%"=="0" (
    echo Program is running
) else (
    echo Program is not running
    timeout /t 5 /nobreak > NUL
    %WorkingDrive%
    cd %WorkingDirectory%
    start %StartCommand%
)
goto Again

Posts may contain products with affiliate links. When you make purchases using these links, we receive a small commission at no extra cost to you. Thank you for your support.

Mastodon: @j2inet@masto.ai
Instagram: @j2inet
Facebook: @j2inet
YouTube: @j2inet
Telegram: j2inet
Twitter: @j2inet
Transition Drivers to New Windows Installation

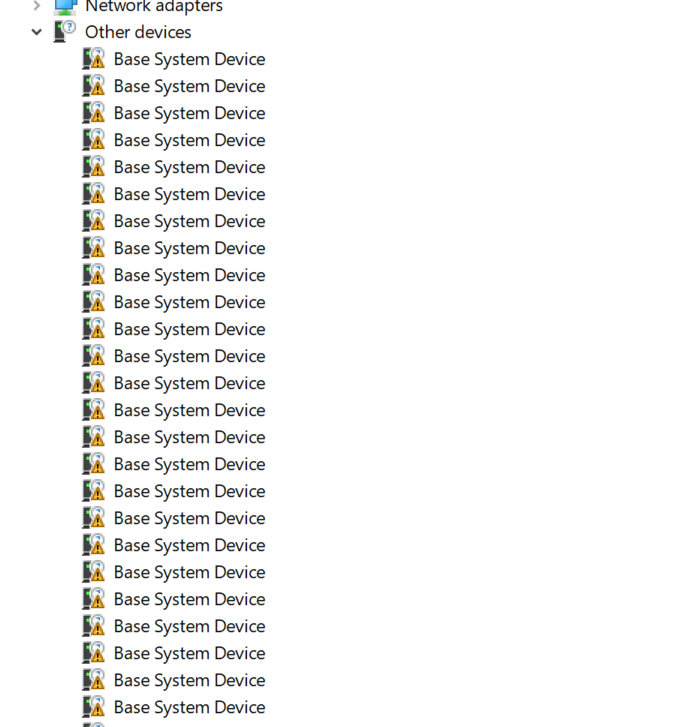
Over the Thanks Giving holiday, I took advantage of the extended time off from work and projects to reinstall Windows on newer, larger drives. When reinstalling Windows finding all of the drivers has traditionally been a pain point for me. This time around someone gave me a bit of information that made handling the drives much easier. After performing the installation, I didn’t have sound. I checked the device manager and found there were a lot of devices that were not recognized.

I initially started with trying to figure out what these devices were. Opening the properties of a device and viewing the hardware ID gives a hint. There are two hexadecimal numbers for a vendor ID and a device ID. Most of the vendor IDs I saw were 8086, which is the vendor ID for Intel (a reference to the 80×86 family of processors).

A lot of these warnings were for features related to the Xeon processor in the computer, some sound drivers, and a few other things. While I was able to find drivers for these online, I could not get them to install.

I was able to find drivers on the manufacturers’ sites for many items, but I ran into problems getting the drivers to install. While speaking of this challenge, someone asked me if I still had access to three specific folders from before I had installed Windows. All of these folders are child folders of c:\Windows\System32. The folder names are drivers, DriverState, and DriverStore. I did have access to these files; this was a hard drive swap. I went back to the device manager, selected an unrecognized device, and selected the option to update the driver. When prompted for a driver location, I pointed to these folders and let the process search. SUCCESS! The driver was found! I continued this process for the other devices.

This was a lot of devices, but it moved me in the direction of success. Some time later, all of the devices except one had their drivers installed. the remaining device, an Inten device with the ID 0x2F9C, remains unidentified. My carry away from this is that if I reinstall Windows on another computer, these folders should be included in the data that is backed up before performing the Installation.


Posts may contain products with affiliate links. When you make purchases using these links, we receive a small commission at no extra cost to you. Thank you for your support.

Mastodon: @j2inet@masto.ai
Instagram: @j2inet
Facebook: j2inet
YouTube: j2inet
Telegram: j2inet
Twitter: @j2inet

Auto-Syncing Node on Brightsign for Development

I’m working on a Node project that runs on the BrightSign hardware. To run a node project, one only needs to copy the project files to the root of a memory card and insert it into the device. When the device is rebooted (from power cycling) the updated project will run. For me, this deployment process, though simple, has a problem when I’m in the development phase. There’s no way for me to remotely debug what the application is doing, this results in a lot more trial-and-error to get something working correctly since there’s no access to the information of some errors. Usually when testing the effect of some code change I’m developing directly on a compatible system and can just press a run project see it execute. Copying the project to a memory card, walking over to the BrightSign, inserting the card, removing the power connector, and then reinserting the power connector takes longer. Consider that there are many cycles of this that must be done and you can see there is a productivity penalty.

In seeking a better way, I found an interface in the BrightSign diagnostic console that allows someone to update individual files. Navigating to the BrightSign’s IP address displays this console.

It doesn’t allow the creation of folders, though. After using the Chrome diagnostic console to figure out what endpoints were being hit I had enough information to update files through my own code instead of using the HTML diagnostic interface. Using this information, I was able to make a program that would copy files from my computer to the BrightSign over the network. This functionality would save me some back-and-forth in moving the memory card. I still needed to perform the initial copy manually so that the necessary subfolders were in place. There’s a limit of 10 MB per file when transferring files this way. This means that media would have to be transferred manually. But after that, I could copy the files without getting up. This reduces the effort to running new code to power cycling the device. I created a quick .Net 7 core program. I used .Net core so that I could run this on my PC or my Mac.

The first thing that my program needs to do is collect a list of the files to be transferred. The program accepts a folder path that represents the contents of the root of the memory card and builds a list of the files within it.

public FileInfo[] BuildFileList()
{
    Stack<DirectoryInfo> directoryList = new Stack<DirectoryInfo>();
    List<FileInfo> fileList = new List<FileInfo>();
    directoryList.Push(new DirectoryInfo(SourceFolder));

    while(directoryList.Count > 0)
    {
        var currentDirectory = new DirectoryInfo(directoryList.Pop().FullName);
        var directoryFileList = currentDirectory.GetFiles();
        foreach(var d in directoryFileList)
        {
            if(!d.Name.StartsWith("."))
            {
                fileList.Add(d);
            }
        }                
        var subdirectoryList = currentDirectory.GetDirectories();
        foreach(var d in subdirectoryList)
        {
            if(!d.Name.StartsWith("."))
            {
                directoryList.Push(d);
            }
        }
    }
    return fileList.ToArray() ;
}

To copy the files to the machine, I iterate through this array and upload each file, one at a time. The upload requests must include the file’s data and the path to the folder in which to put it. The root of the SD card is in the file path sd, thus all paths will be prepended with sd/. To build the remote folder path, I take the absolute path to the source file, strip off of front part of that path and replace it with sd/. Since I only need the folder path, I also strip the file name from the end.

public void UploadFile(FileInfo fileInfo)
{
    var remotePath = fileInfo.FullName.Substring(this.SourceFolder.Length);
    var separatorIndex = remotePath.LastIndexOf(Path.DirectorySeparatorChar);
    var folderPath= "sd/"+remotePath.Substring(0, separatorIndex);
    var filePath = remotePath.Substring(separatorIndex + 1);
    UploadFile(fileInfo, folderPath);
}

With the file parts separated, I can perform the actual file upload. It is possible the wrong path separator is being used since this can run on a Windows or *nix machine. I replace instances of the backslash with the forward slash. The exact remote endpoint to be used has changed with the BrightSign firmware version. I am using a November 2022. For these devices, the endpoint to write to is /api/v1/files/ followed by the remote path. On some older firmware versions, the path is /uploads.html?rp= followed by the remote folder path.

public void UploadFile(FileInfo fileInfo, string remoteFolder)
{
    if (!fileInfo.Exists)
    {
        return;
    }
    remoteFolder = remoteFolder.Replace("\\", "/");
    if (remoteFolder.EndsWith("/"))
    {
        remoteFolder = remoteFolder.Substring(0, remoteFolder.Length - 1);
    }
    if (remoteFolder.StartsWith("/"))
    {
        remoteFolder = remoteFolder.Substring(1);
    }

    String targetUrl = $"http://{BrightsignAddress}/api/v1/files/{remoteFolder}";
    var client = new RestClient(targetUrl);
    var request = new RestRequest();
    request.AddFile("datafile[]", fileInfo.FullName);
    try
    {
        var response = client.ExecutePut(request);
        Console.WriteLine($"Uploaded File:{fileInfo.FullName}");
        //Console.WriteLine(response.Content);
    }
    catch (Exception ect)
    {
        Console.WriteLine(ect.Message);
    }
}

I found if I tried to upload a file that already existed, the upload would fail. To resolve this problem I made a request to delete a file before uploading it. If the file doesn’t exists when the delete request is made, no harm is done.

        public void DeleteFile(string filePath)
        {
            filePath = filePath.Replace("\\", "/");
            if(filePath.StartsWith("/"))
            {
                filePath = filePath.Substring(1);
            }            
            string targetPath = $"http://{this.BrightsignAddress}/delete?filename={filePath}&delete=Delete";
            var client = new RestClient(targetPath);
            var request = new RestRequest();            
            try
            {
                var response = client.ExecuteGet(request);
                Console.WriteLine($"Deleted File:{filePath}");                
            }
            catch (Exception ect)
            {
                Console.WriteLine(ect.Message);
            }
        }

When I had the code this far, I was saved some time. To save even more I used the FileSystemWatcher to trigger my code when there was a change to any of the files.

          FileSystemWatcher fsw = new FileSystemWatcher(@"d:\\MyFilePath");
            fsw.NotifyFilter = NotifyFilters.CreationTime | NotifyFilters.FileName | NotifyFilters.Size | NotifyFilters.LastWrite;
            fsw.Changed += OnChanged;
            fsw.Created+= OnChanged;
            fsw.IncludeSubdirectories= true;
            fsw.EnableRaisingEvents= true;

My change handler uploads the specific file changed. It was still necessary to power-cycle the machine. But the diagnostic interface also had a button for rebooting the machine. With a little bit of probing, I found the endpoint for requesting a reboot. Instead of rebooting every time a file was updated, I decided to reboot several seconds after a file was updated. If another file is updated before this several seconds has passed, then I delay for more time. This way if there are several files being updated there is a chance for the update operation to complete before a reboot occurs.

static System.Timers.Timer rebootTimer = new System.Timers.Timer(5000);

public void Reboot()
{
    string targetPath = $"http://{this.BrightsignAddress}/api/v1/control/reboot";
    var client = new RestClient(targetPath);
    var request = new RestRequest();
    var response = client.ExecutePut(request);
}

static void OnChanged(object sender, FileSystemEventArgs e)
{
    var f = new FileInfo(e.FullPath);
    s.DeleteFile(f);
    s.UploadFile(f);
    rebootTimer.Stop();
    rebootTimer.Start();
}

Now, as I edit my code the BrightSign is being updated. When I’m ready to see something run, I only need to wait for a reboot. The specific device I’m using takes 90 seconds to reboot. But during that time I’m able to remain being productive.

There is still room for improvement, such as through doing a more complete sync and removing files found on the remote BrightSign that are not present in the local folder. But this was something that I quickly put together to save some time. It made more sense to have an incomplete but adequate solution to save time. Creating this solution was only done to save time on my primary tasks. Were I to spend too much time with it then it is no longer a time saver, but a productivity distraction.


Posts may contain products with affiliate links. When you make purchases using these links, we receive a small commission at no extra cost to you. Thank you for your support.

Mastodon: @j2inet@masto.ai
Instagram:ย @j2inet
Facebook:ย @j2inet
YouTube:ย @j2inet
Telegram:ย j2inet
Twitter:ย @j2inet

SD Pro Plus Micro SD XC memory card

Avoiding Unnecessary File Downloads While Syncing

I had the opportunity to revisit an old project that was created for a client. The initial release of this project had a program that was syncing content from a CMS. It was made to only download content that had been downloaded since the last time it synced. For some reason, it was now always downloading all of the files instead of only the ones that change. Looking into the problem I found that changes in the CMS resulted in files no longer having ETAG headers, which are used to tell if a file has changed since the last time it was requested. The files still had a header indicating a last updated date. It is easy enough to use that header instead. But the client had enough requests for changes to justify writing a new syncing component; they had a new CMS with different APIs. File syncing isn’t complex, I could rewrite the component easily in an evening. I decided to write the new version of the component using .Net 6.0.

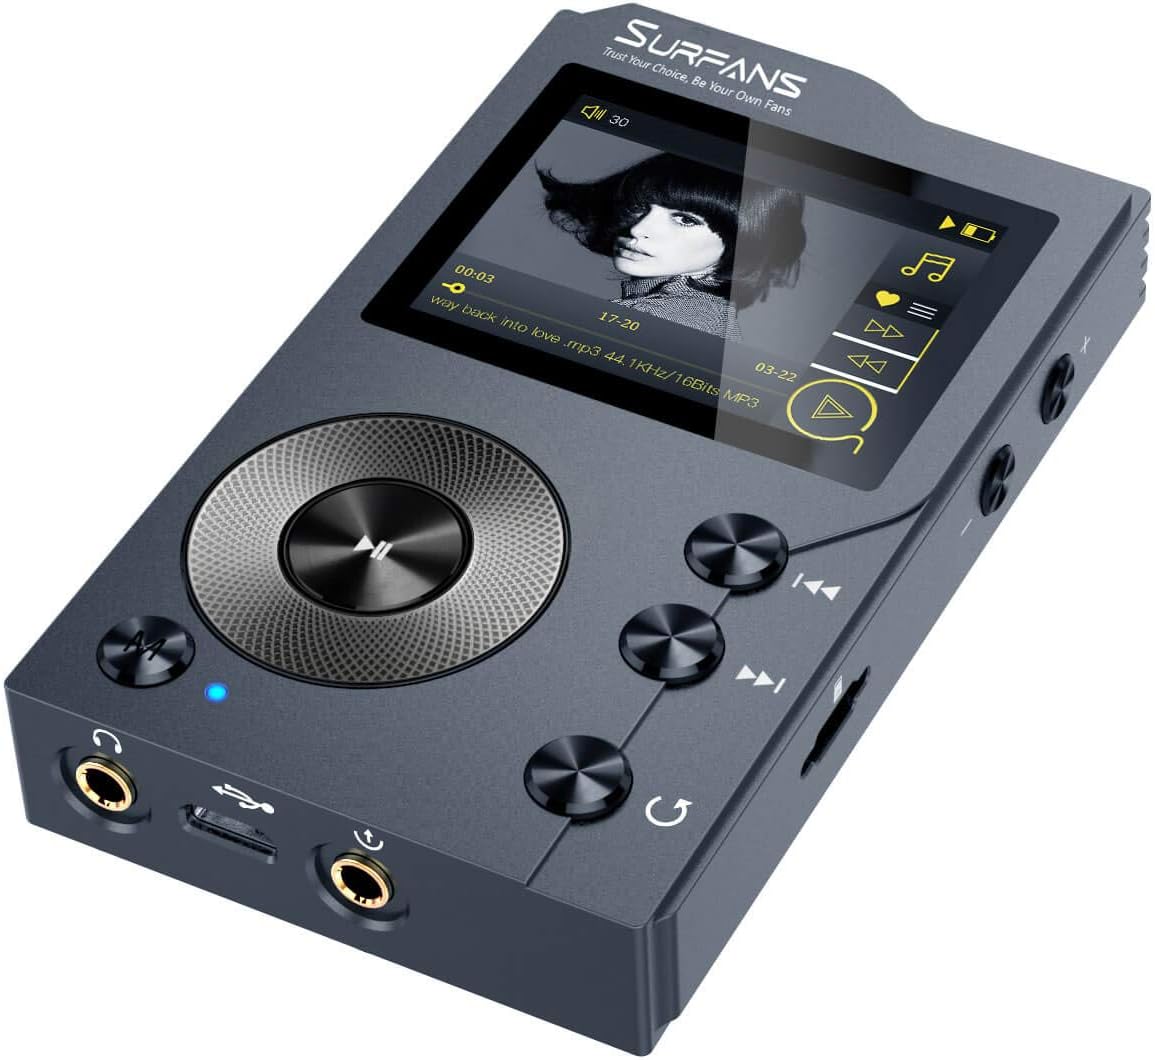
Before downloading a file, I need to check the attributes of the file on the server end without starting the transfer of the file itself. The HTTP verb for obtaining this information is HEAD. The HEAD verb will return the headers for the resource identified by the URI, but it doesn’t return the resources data stream itself. As a quick test, I grabbed the URL for an MP3 player I keep seeing in an Amazon advertisement. https://m.media-amazon.com/images/I/61TUVbqPhLL.AC_SL1500.jpg.

I used Postman to request the image at the URL and examined the headers. Postman will perform a GET request by default. Changing the request from GET to HEAD results in a response with no body, but has headers. This is exactly what we want!

There are a couple of things that we will need to do with this information. We will need to save it somewhere for future use. When we make future requests, we need to use this information to filter what data we transfer. The filtering can be done on the client side within the logic of the program making the request, or it can be performed on the server side by adding an additional header to the request named If-Modified-Since. Providing a date in this header will cause the server to either send the new resource (if it is more recent than the date in this parameter) or it will return header information only (if the server version is not more recent than the date specified). The date must be in a specific format. But if you are saving the original date response, then you can use it as it was received.

Let’s jump into actual code. I’ve made a data class that stores information about the files I will be downloaded.

namespace FileSyncExample.ViewModels
{
    public class FileData: ViewModelBase
    {
        private DateTimeOffset? _serverLastModifiedDate;
        [JsonProperty("last-modified")]
        public DateTimeOffset? ServerLastModifiedDate
        {
            get => _serverLastModifiedDate;
            set => SetValueIfChanged(() => ServerLastModifiedDate, () => _serverLastModifiedDate, value);
        }

        public string _fileName;
        [JsonProperty("file-name")]
        public string FileName
        {
            get => _fileName;
            set => SetValueIfChanged(() => FileName, () => _fileName, value);
        }

        private string _clientName;
        [JsonProperty("client-name")]
        public string ClientName
        {
            get => _clientName;
            set => SetValueIfChanged(()=>ClientName, () => _clientName, value);
        }

        private bool _didUpdate;
        [JsonIgnore]
        public bool DidUpdate
        {
            get => _didUpdate;
            set => SetValueIfChanged(()=>DidUpdate, ()=>_didUpdate, value);
        }
    }
}

I’m using this for two purposes in this example program. I’m both building a download list with it and am using it to save metadata. In the real program, this list is made using a query to the CMS. I create a list of these objects with the identifiers.

        public MainViewModel()
        {
            Files.Add(new FileData() { FileName= "61lLJ85GYXL._AC_SL1000_.jpg" });
            Files.Add(new FileData() { FileName= "61qfFAQ3xKL._AC_SL1500_.jpg" });
            Files.Add(new FileData() { FileName= "71PKvcmV6DL._AC_SX679_.jpg" });
            Files.Add(new FileData() { FileName= "71fOsWX9qlL._AC_UY327_FMwebp_QL65_.jpg" });
        }

All of these images are coming from Amazon. The full URL to the data stream is built by prepending the file name. I do this through a string format.

var requestUrl = $"https://m.media-amazon.com/images/I/{file. Filename}";

For the download, I am using the HttpClient. It accepts a request and returns the response.

HttpClient client = new HttpClient();
client.DefaultRequestHeaders.Clear();
client.DefaultRequestHeaders.Accept.Add(new MediaTypeWithQualityHeaderValue("application/json"));
client.DefaultRequestHeaders.ConnectionClose = true;

For now, let’s code for a single scenario; there are no files already downloaded. We wish to do our priming download and save the file’s data and the metadata about the file. To keep the file system clean instead of placing the metadata in a separate file I’m saving it in an alternative data stream. This only works on NTFS file systems. If you would like to learn more about that read here. The significant parts of the code to perform the download follows.

var requestUrl = $"https://m.media-amazon.com/images/I/{file.FileName}";
var request = new HttpRequestMessage(HttpMethod.Get, requestUrl);
var response = await client.SendAsync(request);
var lastModified = response.Content.Headers.LastModified;
if(lastModified.HasValue)
{
    file.ServerLastModifiedDate = lastModified;
}
try
{
    response.EnsureSuccessStatusCode();
    using (FileStream outputStream = new FileStream(Path.Combine(Settings.Default.CachePath, file.FileName), FileMode.Create, FileAccess.Write))
    {
        var data = await response.Content.ReadAsByteArrayAsync();
        outputStream.Write(data, 0, data.Length);
    }
    //Putting the metadata in an alternative stream named meta.json
    var fileMetadata = JsonConvert.SerializeObject(file);
    Debug.WriteLine(fileMetadata);
    var metaFilePath = Path.Combine(Settings.Default.CachePath, $"{file.FileName}:meta.json");
    var fileHandle = NativeMethods.CreateFileW(metaFilePath, NativeConstants.GENERIC_WRITE,
                        0,//NativeConstants.FILE_SHARE_WRITE,
                        IntPtr.Zero,
                        NativeConstants.OPEN_ALWAYS,
                        0,
                        IntPtr.Zero);
    if(fileHandle != IntPtr.MinValue)
    {
        using(StreamWriter sw = new StreamWriter(new FileStream(fileHandle, FileAccess.Write)))
        {
            sw.Write(fileMetadata);
        }
    }

}
catch(Exception exc)
{

}

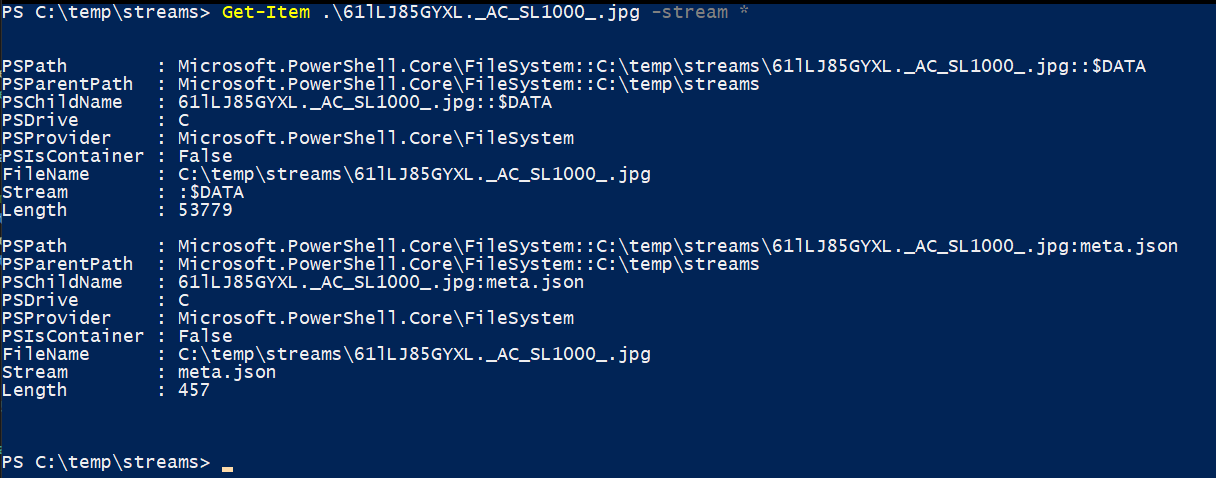
After running the program, the images show in my download folder. When I open PowerShell and check the streams, I see my alternative data stream present.

Printing out the data in one of the alternative data streams, I see the data in the format that I expect.

PS C:\temp\streams> Get-Item .\61lLJ85GYXL._AC_SL1000_.jpg | Get-Content -Stream meta.json

{"_fileName":"61lLJ85GYXL._AC_SL1000_.jpg","last-modified":"2019-10-30T16:28:38+00:00","file-name":"61lLJ85GYXL._AC_SL1000_.jpg","client-name":"j2i.net"}

PS C:\temp\streams>

Next, we want to modify the program to load this metadata if it exists and grab the LastModified property. This is all we need. We are going to use this information to detect if the file has been modified.

void RefreshMetadata()
{
    DirectoryInfo cacheDataDirectory = new DirectoryInfo(Settings.Default.CachePath);
    if (!cacheDataDirectory.Exists)
        return;
    foreach(var file in Files)
    {
        var fileInfo = new FileInfo(Path.Combine(cacheDataDirectory.FullName, file.FileName));
        if (!fileInfo.Exists)
            continue;
        //Great! The file exists! Let's load the metadata for it!
        var metaFilePath = $"{fileInfo.FullName}:meta.json";
        var fileHandle = NativeMethods.CreateFileW(metaFilePath, NativeConstants.GENERIC_READ,
                            0,//NativeConstants.FILE_SHARE_WRITE,
                            IntPtr.Zero,
                            NativeConstants.OPEN_ALWAYS,
                            0,
                            IntPtr.Zero);
        using (StreamReader sr = new StreamReader(new FileStream(fileHandle, FileAccess.Read)))
        {
            var metaString = sr.ReadToEnd();
            var readFileData = JsonConvert.DeserializeObject<FileData>(metaString);
            file.ServerLastModifiedDate = readFileData.ServerLastModifiedDate;
        }

    }
}

The previous code that we wrote needs a few changes. If the file being downloaded has a last modified date, add that to the request in a header field named If-Modified-Since. Thankfully, .Net can convert the DateTimeOffset object to the string format that we need for the request.

 if(file.ServerLastModifiedDate.HasValue)
 {
     request.Headers.Add("If-Modified-Since", file.ServerLastModifiedDate.Value.ToString("R"));
 }

When the response comes back, we must examine the response code. If the file has been updated the response code will have a response code of 200 (OK). This is the normal response code that we get when we first access a file. If the file has not been updated since the value we pass in If-Modified-Since the response code will be 304 (not modified). The response will have no content. We can move on from this file.

var response = await client.SendAsync(request);
if(response.StatusCode == System.Net.HttpStatusCode.NotModified)
{
    continue;
}

I can’t modify the images on Amazon for testing the behaviour of the app when the image is updated. If you want to test that, you will have to modify the sample program to point to a set of images that you can control to test that out. The NodeJS based http-server utility is useful here if you want to use a random set of images on your local computer for this purpose.

As always, the code for this post is available on GitHub. You can find it in the following repository.


Posts may contain products with affiliate links. When you make purchases using these links, we receive a small commission at no extra cost to you. Thank you for your support.

Twitter: @j2inet
Instagram: @j2inet
Facebook: j2inet
YouTube: j2inet
Telegram: j2inet

Kerbal Space Program 2 Available February 23, 2023

I don’t write much about games (though I am taking that into consideration), but I thought this game demands a mention. Kerbal Space Program is a game series that is about running your own space program. The game has an especially flexible system for designing and launching vehicles for travel on land, sea, air, and space. Unlike many other games, Kerbal Space Program uses a physics system that follows a lot of concepts in astrodynamics. If you ever wanted to learn about orbital mechanics, KSP is a great testing ground for learning. KSP places the player in a scaled-down solar system to explore.

KSP 2 builds upon KSP with additional customization, UI updates, and adds interstellar travel and better support for building space bases and colonies on other planets. In later releases of the game, the game’s maker plans to add support for multiplayer. The game is going to be released as a preview. This is similar to the path that the original KSP took, with frequent updates based on the feedback from the players.

Humble Bundle Developer Book Offer

Humble Bundle is known for offering games where you can decide on the price that you pay, and the money goes to a charity. One of the offers that they have available now is for a collection of 27 books from Packt Publishing on software development and related topics. For donating 18 USD the entire collection of 27 books is available. If you donate less than this, then a subset of the books are available to you. For 10 USD, a ten item bundle is available. For 1 USD, a 3 item bundle is available. (Note, the books available for the diminished selections are preselected and cannot be changed). Many of the available books are in the topic domains of C++ and Java and range from beginning to advanced. There are a few books on Python, Go, and discrete mathematics. At the time of this posting, the “Programming Mega Bundle” is available for another 14 days. The books are available in PDF, ePUB, and MOBI formats.


Posts may contain products with affiliate links. When you make purchases using these links, we receive a small commission at no extra cost to you. Thank you for your support.

Twitter: @j2inet
Instagram: @j2inet
Facebook: j2inet
YouTube: j2inet
Telegram: j2inet

DART Mission Successful

In the interest of ensuring humanity doesn’t follow the pathway of the dinosaurs, NASA engaged in a mission known as DART recently. The purpose of the DART mission was to determine if it was possible to change the trajectory of an asteroid to prevent it from impacting earth. The asteroid chosen wasn’t endangering earth and was selected only for testing. The pair of asteroids observed are named Didymos and Dimorphus. Didymous completed orbit around Dimorphus every 11 hours and 23 minutes. If NASA successfully affected the trajectory of Didymous, they expected it to alter the orbit by about 10 minutes. The effect that the impact had was that it altered the orbital period by 32 minutes. This makes for the first time that humans have altered the orbit of a celestial body.

The orbit was altered by impacting a space vehicle into the asteroid at a speed of 22,530 kilometers per hour. Of course this destroyed the spacecraft itself. Though the mission was successful, the observations are ongoing. In another 4 years, the ESA (European Space Agency) has a fly-by planned to collect more information.

In the event of a threatening asteroid, the expectation on how it will be altered is that if it is discovered early enough, that an impactor flying into it could alter its trajectory enough so that it is not a threat to life here on earth.

References:

CNN
NPR
Fox News


Posts may contain products with affiliate links. When you make purchases using these links, we receive a small commission at no extra cost to you. Thank you for your support.

Twitter:ย @j2inet
Instagram:ย @j2inet
Facebook:ย j2inet
YouTube:ย j2inet
Telegram:ย j2inet

Samsung Developer Conference 2022

Wednesday, Samsung held its 2022 developer conference. A standout attribute of this conference is they invited people to attend in person; something I’ve not really seen in developer conferences since 2019 (for obvious reasons๐Ÿฆ ). Ofcourse, for those that cannot attend, many aspects of the conference were also streamed from https://samsungdeveloperconference.com and from their YouTube channel (https://www.youtube.com/c/SamsungDevelopers ).

Concerning the content, the conference felt a bit heavier on items of consumer interest. The keynote highlighted Know Matrix, Samsung’s block-chain based solution for security among their devices (not just phones), Samsung TV Plus, Gaming, Tizen, and more.

The sessions for the conference were available either as prerecorded presentations, or live sessions. The prerecorded sessions were made available all at once .

Android

In addition to making updates to their interface (One UI, coming to the S2022 series at the end of the month) Samsung is adding a Task Bar to the Tab S8 and their foldable phones. Samsung also covered support for multitasking; Samsung’s phones support running 2 or 3 applications simultaneously. Many of the multitasking features use standard Android APIs. Samsung has also made available a task bar on their larger screen devices (tablets, foldable phones) to enable switching applications without going to the home screen or task switcher. There ar multiple levels of support that an application could have for multi-window capable devices. One is simply supporting the window being resized. FLAG_ACTIVITY_LAUNCH_ADJACENT indicates that an application was designed for a multi-window environment. New interactions enabled by multi-window applications includes drag-and-drop from one instance to another, multiple instances of an application, and supporting “flex mode” (where either side of a foldable device is used for different purposes).

Some well-known applications already support features for these environments, including Gmail, Facebook, Microsoft Outlook, and Tik-Tok.

Presentations

Multitasking Experiences
LE Wireless Audio

Tizen

It’s been 10 years since Tizen was released in 2012. In previous years, has presented Tizen as its operating system for a wide range of devices. The OS could be found running on some cameras, phones, TVs, and wearables. The Tizen OS got a great footing in TVs; you’ll find it on all of the Samsung TVs available now above a certain size, some computer monitors, and a few TVs from other manufacturers. Its presence on other devices has also diminished, with Samsung’s wearables now using Android Wear and the Tizen phones being out of production. I encountered some of the “Tizen Everywhere” marketing, but it now appears to refer to the wide range of displays that use Tizen.

One of Samsung’s presentations concerning Tizen had its own timeline of Tizen’s evolution. I might make my own, since I’ve been interested since it was in its proto-version (Bada). Samsung announced Tizen 7.0. The features highlighted in the release were in the areas of

  • OpenXR runtime
  • Real-time Kernel
  • 3D Rendering enhancements
  • Android HAL support
  • Cross-platform improcement
  • Natural User Interface Enhancements

I personally found the natural user interface enhancements to be interesting. It included a lot of AI driven features. Support for running Tizen applications on Android was also mentioned. I’m curious as to what this means though. If typical Samsung Android devices can run Tizen, then it gives the OS new relevance and increases the strength of the “Tizen Everywhere” label. Tizen has been updated to use more recent Chromium release for its Web engine. Tizen also has support for Flutter. Support was actually released last year. But compatibility and performance are increased with Tizen 7.0.

Samsung has also exposed more Native SDKs in Tizen 7.0 to C# and C from other SDKs. For .Net developers, Tizen 7.0 has increased MAUI support.

Presentations

What’s new in Tizen
Tizen Everywhere

Samsung TV Plus

This is Samsung’s IPTV service. It is integrated into the TV in such a way that it is indistinguishable from OTA channels. Entities interested in the services that this has to offer are most likely Advertisers. Samsung provided information on both making available one’s video content on Samsung TV and how to monetize it. While I don’t see myself as one that would be implementing features related to this, I did find the presentation interesting. Before a show airs (about 5 minutes before) the ad slots are available to advertisers to fill. The ad inventory is auctioned off.

Presentations

Samsung TV Plus
Home Connectivity Alliance

Gaming

The TVs support being paired with a Bluetooth controller and streaming games through the Samsung Gaming Hub. HTML-based games are served to the phone via what Samsung calls Instant Play. Samsung also showed off the features it’s made available for emersive audio within gaming environments.

Presentations

Dolby Atmos with Games
Immersive Experiences on Big Screens

Health

Samsung says they worked with Google to come up with a single set of APIs that developers can use for health apps. Often times, Samsung begins developing for some set of hardware features and later Samsung and Google normalize the way of interacting with those features. I thought these sessions would be all about Samsung Health (the application that lets you log your health stats on the phones). But the development also included their large screen (TV) interfaces with enhancements for tele-health visits. Collection of health related data has been enhanced on the Galaxy Watch 5.One of the enhancements is a microcontroller dedicated to collecting health data while the CPU sleeps. This allows the watch to collect information with less demands on the battery. The new watch is also able to measure body composition through electrical signals.

Presentations

TeleHealth in Samsung Devices
Expand Health Experiences with Galaxy Watch

IoT

Samsung’s SmartThings network now also includes the ability to find other devices and even communicate data to those devices. Like other finding networks, their solution is based on devices being able to communicate with each other. Devices can send two bytes of data through the network. How this two bytes is used it up to the device. 2 bytes isn’t a lot. But it still could be of utility, such as a device sending a desired temperature to a thermostat, or another device simply signaling “I’m home.”

Presentations

SmartThings FindMy
Home Connectivity Alliance

Other Sessions

There were plenty of other topic areas covered. I’ve only highlighted a few areas. If you would like to see the presentations for yourself visit the YouTube Channel or see the Samsung Developer’s Conference page.


Twitter:ย @j2inet
Instagram:ย @j2inet
Facebook:ย j2inet
YouTube:ย j2inet
Telegram:ย j2inet

Image Maps Made for Creatives

Many of the people with which I work are classified as being technical or creative (though there is a spectrum between these classifications). On many projects, the creative workers design UIs while the technical people transform those designs into something that is working. I’m a proponent of empowering those that are creating a design with the ability to implement it. This is especially preferred on projects where a design will go through several iterations.

I was recently working on a project for which there would be a menu with a map of a building. Clicking on a room in the map would take the user to web page that had information on the room. I had expected the rooms on the map to generally be rectangular. When I received the map, I found that many of the rooms had irregular shapes. HTML does provide a solution for defining shapes within the image that are clickable through Image Maps. I’ve never been a fan of those, and for this specific project I would not be able to ask the creatives to update the image map. I decided on a different solution. I can’t show the picture of the map that was the image being displayed. As an example, I’ll use a picture of some lenses that are sitting in the corner of my room.

Collection of Lenses

Let’s say I wanted someone to be able to click on a lens and get information about them. In this picture, these lenses overlap. Defining rectangular regions isn’t sufficient. I opened the picture in a paint program and applied color in a layer over the objects of interest. Each color is associated with a different object classification. Image editing isn’t my skill though. The result looks rough, but sufficient. This second image will be used in an HTML page to figure out which object that someone has clicked on. I’ll have a mapping of these color codes to objects.

When a user clicks on the real image, the pixel color data is extracted from the associated image map and converted to a hex string. To extract the pixel data, the image map is rendered to a canvas off-screen. The canvas’s context exposes methods for accessing the pixel data. The following code renders the image map to a canvas and sets a variable containing the canvas 2D context.

function prepareMap(width, height) {
    var imageMap = document.getElementById('target-map');
    var canvas = document.createElement('canvas');
    canvas.width = width;
    canvas.height = height;
    var canvasContext = canvas.getContext('2d');
    canvasContext.drawImage(imageMap, 0, 0, imageMap.width, imageMap.height);
    areaMapContext = canvasContext;
}

I need to know the position of the image relative to the browser’s client area. To retrieve that information, I have a method that recurses through the positioning containers for the image and accumulates the positioning settings to a usable set of coordinates.

function FindPosition(oElementArg) {
    if (oElementArg == undefined)
        return [0, 0];
    var oElement = oElementArg;
    if (typeof (oElement.offsetParent) != "undefined") {
        for (var posX = 0, posY = 0; oElement; oElement = (oElement.offsetParent)) {
            posX += oElement.offsetLeft;
            posY += oElement.offsetTop;
        }
        return [posX, posY];
    }
    return [0.0];
}

The overall flow of what happens during a click is defined within mapClick in the example code. To convert the coordinates on which someone clicked (relative to the body of the document) to coordinates relative to the image, I only need to subtract the offsets that are returned by the FindPosition function. The retrieved colorcode for the area on which the user clicked can be used as an indexer on the color code to product identifier mapping. The product identifier is used as a indexer on the product identifier to product data mapping.

function mapClick(e) {
    var PosX = e.pageX;
    var PosY = e.pageY;
    var position = FindPosition(targetImage);
    var readX = PosX - position[0];
    var readY = PosY - position[1];

    if (!areaMapContext) {
        prepareMap(targetImage.width, targetImage.height);
    }
    var pixelData = areaMapContext.getImageData(readX, readY, 1, 1).data;
    var newState = getStateForColor(pixelData[0], pixelData[1], pixelData[2]);
    var selectedProduct = productData[newState];
    showProduct(selectedProduct);
}

Once could simplify the mappings by having the color data map directly to product information. I chose to keep the two separated though. If the color scheme were ever changed (which I think is very possible for a number of reasons) I thought it better that these two items of data be decoupled from each other.

You can find the full source code for this post on GitHub at this url. Because of security restrictions in the browser, you must run this code within a local HTTP server. Attempting to run it from the file system will fail due to limitations in how an application can use the data it loads when loaded from a local file. I also have brief videos on my social media account to walk through the code.


Posts may contain products with affiliate links. When you make purchases using these links, we receive a small commission at no extra cost to you. Thank you for your support.

Twitter: @j2inet
Instagram: @j2inet
Facebook: j2inet
YouTube: j2inet
Telegram: j2inet

Stadia Cancelled

Recently, Google announced that it will be bringing Stadia to an end. Stadia was Google’s game streaming service. With the purchase of a controller and a Chromecast, users could take advantage of GPUs in the cloud to play their games. To use the service, there was both a monthly fee for access and games had to be individually purchased. The cancellation comes at a time closely following reports that Sundar Pichai told employees of plans for cost cuts to make Google more profitable[src]. Google also released a blog post [src] stating that the service didn’t get the traction they had hoped.

A few years ago, we also launched a consumer gaming service, Stadia. And while Stadia’s approach to streaming games for consumers was built on a strong technology foundation, it hasn’t gained the traction with users that we expected so weโ€™ve made the difficult decision to begin winding down our Stadia streaming service.

I’m in possession of a number of Stadia units myself. Speaking only for myself, it didn’t have faith in the product. I carry skepticism of online-only games, having lost games to smaller incidents before. One of the first XBox 360 games I had purchased online became inaccessible to my other Xbox’s when the publisher left the store. I’ve had other games that installed locally that have become less functional or completely non-functional because a server was taken offline. When I do purchase an app or a game, I do so knowing that the app could become unusable and unavailable. I don’t mind paying small amounts for what I see as temporary access to a game or app. But paying $60 for a game that could essentially evaporate out of my account was not comfortable for me. Nor was the ongoing 10 USD/month I’d pay for access to the game.

I don’t know why other people might not have jumped on board. Especially with the component shortage making the acquisition of Xbox and PlayStation challenging. Those units have been out for two years and we still are not in a place where someone can walk into a retail store and have high confidence that there will be a unit on the shelf to pickup and purchase.

What does this all mean for those that may have purchased games? The outcome financially is most favourable. They are getting a refund from Google.

Weโ€™re grateful to the dedicated Stadia players that have been with us from the start. We will be refunding all Stadia hardware purchases made through the Google Store, and all game and add-on content purchases made through the Stadia store. Players will continue to have access to their games library and play through January 18, 2023 so they can complete final play sessions. We expect to have the majority of refunds completed by mid-January, 2023. We have more details for players on this process on our Help Center.

The Chromecasts of course are still very usable and functional. The controllers themselves are, as far as I can tell, e-waste now. Out of curiosity, I looked up the Stadia in the Google Store. It is still listed on the store with no ability to make a purchase.

I very much wish that Google would release the source code or some other information so that the community could make the controllers useful. But since they are giving full refunds, I don’t think that they will be doing much more. The only things that people might have lost is their saved games (for games that do not support progress cross play, as Destiny did). According to a post on Reddit, Google did acknowledge the desire for the controllers to remain useful after the shutdown. But no promises were made [src].


Posts may contain products with affiliate links. When you make purchases using these links, we receive a small commission at no extra cost to you. Thank you for your support.

Twitter: @j2inet
Instagram: @j2inet
Facebook: j2inet
YouTube: j2inet
Telegram: j2inet

Uploading Large Files in Express

I’m back from taking a break. I’ve been working on a number of projects that culminated a crunch-time scenario where there was lots to get done before I went on a vacation for which I would have no computer and an Internet connection that would range from flaky-to-none. When going on trips I often bring some movies with me to watch when I’m taking a break and retreating to my lodging. For this trip, I did something a bit different than usual. Instead of copying my media directly to my mobile device, I decided I would copy it to a Raspberry Pi and set it up as a movie streaming server. (More on elements of my particular scenario at the end of this post) Early last year I had posted something on using Express and NodeJS for streaming. For this trip, I copied that to a Pi that had a lot of storage and did some other things to prepare it for my environment. These included:

  • Setting up the Pi as a Wireless Access Point
  • Setting my Application to Run on Boot
  • Adding the Ability to Upload files

While I didn’t perform these changes during my trip, I realized there was some other functionality I wanted this solution to have, including

  • Converting videos of other formats to MP4
  • Ensuring the MP4’s metadata was arranged for streaming
  • Adding some service to convert uploaded files as needed

Many of these changes could be topics of their own. Let’s talk about uploading files.

Uploading a File with express-fileupload

My first solution for uploading a file was to make a simple web form allowing a file to be selected and add a router to my web application to handle file uploads. I’ll start off telling you that this didn’t work. Skip ahead to the next section if you don’t want to read about this initial failed attempt. The webform itself is simple. A minimalist version of it follows.

<form action='/upload' enctype='multipart/form-data'  method='post'>
	<input type='file' id='videoUploadElement' name='video' />
	<input type='submit' />
</form>

On the server-side, I added the a router to accept my file uploads and write them to a target folder. Upon receiving the bits of the file, I’m writing it to a designated folder preserving the original file name.

//Do not use. For demonstration purposes only. While this
//appears to work. But the entire file is loaded to memory
//before being written to disk. I've found with large files
//this can easily slow down or halt the Pi. Use the router

const express = require('express');
const router = express.Router();

router.post('/', async(req,res) => {
	try {
		if(!req.files) {
			console.log(req.body);
			res.send({
				status: false,
				message: 'No File'
			});
		} else {
			let video = req.files.video;
			video.mv('./uploads/' + video.name);
			res.send({
				status: true,
				message: ' File Uploaded',
				data: {
					name: video.name,
					mimetype: video.mimetype,
					size: video.size
				}
			});
		}
	} catch(err) {
		res.status(500).send(err);
	}
});
module.exports = router;

Testing it out on a small file, it works just fine. Testing it out on a large file locks up the Pi. The issue here is that **all** of the file must be loaded to memory before it is written to storage. The files I was uploaded were feature-length high-definition videos. I tried uploading a 4.3 gig video and saw the Pi progress from less responsive to all responsive. This wasn’t going to work for my needs.

Uploading and Streaming to Storage with Busboy

Instead of using express-fileupload I used connect-busboy. Using Busboy I’m able to stream the bits of the file to storage as they are being uploaded. The complete file does **not** need to be loaded to memory. When the upload form sends a file, the busboy middleware makes the file’s data and meta-data available through the request object. To save the file, create a file stream to which the data will be written and pipe the upload (busboy) to the file storage stream.

//Uses Busboy. See: https://github.com/mscdex/busboy

const express = require('express');
const router = express.Router();
const path = require('node:path');
const Busboy = require('connect-busboy');
const fs = require("fs");

const UPLOAD_FOLDER = 'uploads';

if(!fs.existsSync(UPLOAD_FOLDER)) {
    fs.mkdirSync(UPLOAD_FOLDER, { recursive: true });
}

router.post('/', async(req,res, next) => {
	try {        
        
        console.log('starting upload');        
        console.log(req.busboy);
        req.busboy.on('field', (name, val, info)=> {
            console.log(name);
        });
        
        req.busboy.on('file', (fieldname, uploadingFile, fileInfo) => {
            console.log(`Saving ${fileInfo.filename}`);
            var targetPath = path.join(UPLOAD_FOLDER, fileInfo.filename);
            const fileStream = fs.createWriteStream(targetPath);
            uploadingFile.pipe(fileStream);
            fileStream.on('close', ()=> {
                console.log(`Completed upload ${fileInfo.filename}`);
                res.redirect('back');
            });
        });
        req.pipe(req.busboy);
    } catch (err) {
        res.status(500).send(err);
    }
});

module.exports = router;

A fairly complete version of my app.js follows, including the reference to the router that has the streaming upload method.

const express = require('express');
const createError = require('http-errors');
const path = require('path');
const { v4: uuidv4 } = require('uuid');
const Busboy = require('connect-busboy');
require('dotenv').config();

app = express();
app.use(Busboy({
   immediate: true,
   limits: 10* 1073741824,
   highWaterMark: 4 * 1048576, // Set 4 megabyte buffer
}));

app.use(express.static('public'));


const libraryRouter = require('./routers/libraryRouter');
const videoRouter = require('./routers/videoRouter');
const uploadRouter = require('./routers/uploadRouter');
const streamRouter = require('./routers/streamRouter');

app.use('/library', libraryRouter);
app.use('/video', videoRouter);
app.use('/upload', uploadRouter);
app.use('/streamUpload', streamRouter);


app.use(function (req, res, next) {
   console.log(req.originalUrl);
   next(createError(404));
});
app.set('views', path.join(__dirname, 'views'));
app.engine('html', require('ejs').renderFile);
app.set('view engine', 'html');

With this in place, I have a working upload feature. I don’t want to stop there though. FFMPEG runs on the Pi and I may take advantage of this to do additional transformations on media to prepare it for streaming. I’m going to add code for handling this processing next.

GEeting the Code

If you want to try the code out, it is on GitHub. You can find it here: https://github.com/j2inet/VideoStreamNode.

About my Scenario

I only brought the Pi for movies, but I ended up using it for a lot more. I had an iPhone and an Android phone with me on the trip. I managed to fill up the memory on my iPhone and needed a place to move some video. The Android phone had plenty of space, but there was no direct method to transfer data between the two devices. At one point I also wanted to edit video using Adobe Rush, only to find that Adobe doesn’t allow Rush to be installed on Samsung’s latest generation of phones at this time. My iPhone had Rush, thus I had to get information transferred from my Android Phone to my iPhone to do this.

Had these use cases come to mine I probably would have acquired a USB adapter for my Phone (the Android phone will connect to my USB-C drives with no special adapters needed). I’m sure there are apps that could be used to bridge this gap, but my iPhone has no coverage when I’m out of the country. I didn’t have access to try out such apps. Some part of me feels that it is a bit silly that data can’t move between these two systems without some intermediary, such as another computer, or dongle and drives. But given that we are still not at a point where media in text messages is reliably transferred without quality loss it isn’t surprising.

Given more time, I might make an app specifically for transferring data between devices in the absence of a common network. (This is not something I am promising to do though).


Posts may contain products with affiliate links. When you make purchases using these links, we receive a small commission at no extra cost to you. Thank you for your support.

Twitter: @j2inet

Instagram: @j2inet

Facebook: j2inet
YouTube: j2inet
Telegram: j2inet

Plant Timelapse

Photography is among my interests. I decided to experiment with time lapse photography using plants. To create a time lapse video, someone needs a camera on which they can take photos at timed intervals and a software to assemble those photographs together as a video. There are many solutions for doing this. Over time I will try out several different software programs, cameras, setups, and subjects. For this first attempt, I used a GoPro. I have a GoPro 5. It is an older model. Currently, the most recent GoPro version available is a GoPro 10. All of these models have time lapse photography settings built into the device. You choose your camera settings; select the time interval between photographs; aim the camera at your subject; and let it get started. With these cameras you can also specify that you are doing a video and it will assemble the photos into a video for you.
When doing a time lapse shot, you want to leave the setup undisturbed. But you will also want to know how things look so that you can make corrections. To this end, I let the GoPro run for a few hours and stopped it to look at the results. When I did this, I found that my original settings of taking a photo once a second was too frequent. It would fill up the memory card that I was using too fast. I also found that i didn’t like my original angle. I made adjustments, let another test run for another hour, and was content. I set things up and let them run. The results were okay overall, but there was still plenty of room for improvement. The first item of improvement was in the lighting. While aesthetically I liked the look, the light wasn’t sufficient for the plant. In my timelapse you will see that the plants grow up long and skinny. This is something that plants would do while underground with little light exposure. They would do this until they get sufficient light and then transition from growing up to growing out. Because of the insufficient lighting, these plants used a lot of their resources trying to grow up to get more light.

Towards the end of my timelapse, I pulled out one of my DSLRs. (I feel that DSLRs are ancient given the major camera manufacturers have transitioned to mirrorless. But it still works, and I keep using it). I have an intervalometer for my camera. This is a timing device that can be used to trigger camera. I set it up for 10 second interviews, just like the GoPro and let it run during the last day of the 10 days that it took for me to get my time lapse shots. The results were much better. Comparing the two, the DSLR will by my go-to device for time lapse shots. That’s not to say the GoPro is out. The GoPro is much more tolerant to various conditions, especially outdoor conditions. I’ll be using it for some outdoor time lapse shots fairly soon. Though the results will be far off in the future.

One of the issues here is that the lighting conditions that give the photo the look that I want might not be the conditions under which the plant can thrive. I started to imagine solution, and I thought a solution that may work is having a light that turns off of changes brightness in sequence with the photos. Full lighting conditions would be applied most of the time. But the moment just before to just after the shot being taken, the dimmer lighting conditions could be used. I’ve got a DMX controller and thought about using it. But that could be over kill. I thought about using a relay controlling a power source. But after a lot more thinking, I realized I already have a solution. My hue lighting. The Phillips hue lights are controllable via rest calls. I could have a pi dedicated to controlling the lights of interest.

The light switching must be coordinated with the camera. My intervalometer would not work for this. While I could probably get a working time sequence up front, over the course of days the intervalometer and the light sequencing could drift out of sync with each other. I need to have the Pi control the camera too. I’ve written before on controlling Hue lighting from the Pi. I think that could be used here. Now as soon as I get free time from work and other obligations, I’ll be looking into controlling the digital camera from a Pi. Some of the libraries that I’ve looked at appear to be capable of controlling both the traditional DSLRs and the more modern mirrorless cameras.

I’ve gotten some seeds for corn, okra, and peppers planted now. Once they sprout, I’ll start my next time lapse with a more advanced setup.